Biostar M6TSU M6TSU user's manual
Biostar M6TSU Manual
 |
View all Biostar M6TSU manuals
Add to My Manuals
Save this manual to your list of manuals |
Biostar M6TSU manual content summary:
- Biostar M6TSU | M6TSU user's manual - Page 1
M6TSU Federal Communications Commission (F.C.C) Statement This device complies with Part with FCC Rules. It is the responsibility of the user to provide and use these accessories properly. This equipment installed and used in accordance with the instructions, may cause harmful interference to radio - Biostar M6TSU | M6TSU user's manual - Page 2
obligation to notify any party beforehand. Duplication of this publication, in part or in whole, is not allowed without first obtaining the vendor's approval the Vendor under a license agreement. All trademarks used in this manual are the property of their respective owners. Copyright © 2001 All - Biostar M6TSU | M6TSU user's manual - Page 3
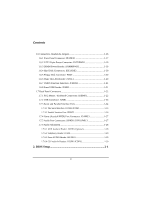
Contents Introduction 1-1 1 Motherboard Description 1-2 1.1 Features 1-2 1.1.1 Hardware 1-2 1.1.2 BIOS 1-6 1.1.3 Software 1-6 1.1.4 Accessories 1-6 1.2 Motherboard Installation 1-7 1.2.1 System Block Diagram 1-7 1.2.2 Layout of Motherboard 1-8 1.2.3 Quick Reference 1-9 1.3 CPU - Biostar M6TSU | M6TSU user's manual - Page 4
Subsystem 1-28 1.7.6.1 AUX Audio in Header: JAUX1 (Optional 1-28 1.7.6.2 Telephony Header: JTAD1 1-29 1.7.6.3 Front AUDIO Header: JAUDIO1 1-29 1.7.6.4 CD Audio-In Headers: JCDIN1/JCDIN2 1-29 2. BIOS Setup 2-1 ii - Biostar M6TSU | M6TSU user's manual - Page 5
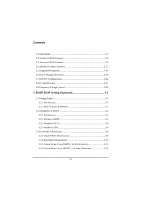
Menu 2-3 2.2 Standard CMOS Features 2-6 2.3 Advanced BIOS Features 2-9 2.4 Advanced Chipset Features 2-12 2.5 Integrated Peripherals 2-14 2.6 RAID BIOS Setting (Optional 3-1 3.1 Getting Started 3-1 3.1.1 Introduction 3-1 3.1.2 Main Features & Benefits 3-1 3.2 Installation of Driver 3-2 - Biostar M6TSU | M6TSU user's manual - Page 6
Mode 3-29 3.3.11 Device Status 3-30 3.3.12 Hot-swapping Hard Disks of Mirror Array 3-31 3.3.13 Event Log 3-32 3.4 BIOS Configuration 3-33 3.4.1 Enter into BIOS Configuration Utility 3-33 3.4.2 Create RAID 3-34 3.4.3 Delete RAID 3-35 3.4.4 Rebuild Mirror Array 3-35 3.4.5 Add Spare Disk 3-36 - Biostar M6TSU | M6TSU user's manual - Page 7
of its predecessors, this motherboard continues a commitment to reliability compatibility with industry software and hardware standards. M6TSU Highlights: 8 Contains on board I/O facilities 8 Complies with PC ATX form factor specifications. 8 Supports popular operating systems such as Windows 95/ - Biostar M6TSU | M6TSU user's manual - Page 8
Chapter1 Motherboard Description 1 Motherboard Description 1.1 Features 1.1.1 Hardware CPU − The Pentium®!!! DIMM supported. − No ECC SDRAM supported. Shadow RAM − Supports shadowing of system BIOS into RAM for faster performance. Green PC Power Management Functionality − BIOS supported - Biostar M6TSU | M6TSU user's manual - Page 9
disk drives. − Supprots Ultra DMA 33/ 66/ 100 Bus Master Mode. − Supports IDE interface with CD-ROM. − Supports high capacity hard disk drives. − Supports LBA mode. − Driver detected by BIOS. Accelerated Graphics Port (AGP) − Supports AGP 2.0 including 4X AGP data transfers. − High priority access - Biostar M6TSU | M6TSU user's manual - Page 10
Chapter1 Motherboard Description − MPU-401 MDI Support. − Intelligent Auto Power Management. − 2.88MB Super I/O Floppy Disk Controller. − Floppy Disk Available on Parallel Port Pins. Supports 360KB, 720KB, 1.2MB, 1.44MB, and 2.88MB floppy disk drives. − Enhanced Digital Data Separator. − Serial - Biostar M6TSU | M6TSU user's manual - Page 11
Chapter1 Motherboard Description − Total ATA bus tri-state by external control and Supports Hotswap (Low signal Current). − Front side bus frequency may selected by the BIOS. Universal Serial Bus − Supports two Universal Serial Bus (USB) Ports. − Supports 48MHz USB. − The two ports USB may located - Biostar M6TSU | M6TSU user's manual - Page 12
Chapter1 Motherboard Description 1.1.2 BIOS − AWARD BIOS. − ACPI Supported. − Supports APM1.2. − Setting the CPU Host and Memory clock frequency/Ratio. Cable. − Rear I/O Panel for ATX Case (Optional). − CD for sound, VGA, IDE drivers and modem driver utilities. − Front USB cable (Optional). 1-6 - Biostar M6TSU | M6TSU user's manual - Page 13
Chapter1 Motherboard Description 1.2 Motherboard Installation 1.2.1 System Block Diagram VRM 370-Pin POINT HTP370 IDE Primary IDE Secondary M6TSU ATX(FSB: 133/100MHz) SUPPORTS 3 DIMMS SUPPORTS 1 AGP SLOT SUPPORTS 6 PCI SLOTS SUPPORTS 1 CNR SLOT SUPPORTS TELEPHONY FirmWare Hub Keyboard Mouse - Biostar M6TSU | M6TSU user's manual - Page 14
Description 1.2.2 Layout of Motherboard Model No.M6TSU JKBMS1 K/B & Mouse JUSB1 USB JCOM1 JCFAN1 1 JPRNT1 U41 SOCKET 370 COM1 Parallel Port Winbond I/O CPU1 U43 COM2 JCOM2 JSPKR1 SP-OUT JLIN1 LINE-IN JMIC1 MIC-IN GAME Port FWH BIOS ROM1 JGAME1 AGP1 INTEL 82815EP AGP SLOT DIMM3 - Biostar M6TSU | M6TSU user's manual - Page 15
Chapter1 1.2.3 Quick Reference U A Motherboard Description T S R Q B P C D E O F G N H I J A. Back Panel Connertors B. AGP Slot (AGP1) C. PCI Slots (PCI1-6) D. CD-ROM Audio Header (JCDIN2) E. Front Audio Header (JAUDIO1) F. CD-ROM Audio Header (JCDIN1) G. Telephony - Biostar M6TSU | M6TSU user's manual - Page 16
Chapter1 Motherboard Description 1.3 CPU Installation 1.3.1 CPU Installation Procedure: Socket 370 Socket 370 1. Pull the lever sideways away from the socket then raise the lever up to a 90- - Biostar M6TSU | M6TSU user's manual - Page 17
Chapter1 1 JCFAN1 Motherboard Description 1 JSFAN1 1.3.2 CPU Fan Header: JCFAN1 Pin No. Assignment 1 Ground 2 +12v 3 FAN R.P.M. Signal input 1.3.3 System Fan Header: JSFAN2 Pin No. 1 2 3 Assignment Ground +12v FAN R.P.M. Signal input 1-11 - Biostar M6TSU | M6TSU user's manual - Page 18
Chapter1 Motherboard Description 1.4 RAM Module Installation 1.4.1 DIMM DRAM Access Time: 3.3V Unbuffered SDRAM PC100/133 Type required. DRAM Type: 64MB/ 128MB/ 256MB/ 512MB DIMM Module (168pin) Total - Biostar M6TSU | M6TSU user's manual - Page 19
Chapter1 Motherboard Description 1.4.2 How to install a DIMM Module 1. The DIMM socket has a " Plastic Safety Tab" and the DIMM memory module has an asymmetrical notch", so the DIMM - Biostar M6TSU | M6TSU user's manual - Page 20
system bus. Expansion slots are a means of adding or enhancing the motherboard's features and capabilities. With these efficient facilities, you can increase the motherboard's capabilities by adding hardware that performs tasks that are not part of the basic system. AGP Slot PCI Slots CNR Slot 1-14 - Biostar M6TSU | M6TSU user's manual - Page 21
Riser) Slot (Slave only) The CNR specification is an open Industry Standard Architecture and that defines a hardware scalable riser card interface, which supports audio, network and modem only. 1.5.3 PCI (Peripheral Component Interconnect) Slots This motherboard is equipped with 6 standard PCI slots - Biostar M6TSU | M6TSU user's manual - Page 22
Chapter1 Motherboard Description 1.6 Connectors, Headers & Jumpers The connectors, headers and jumpers introduced below provide you lots of capabilities such as power supply, front panel signal revelation, IDE - Biostar M6TSU | M6TSU user's manual - Page 23
LED Power-on Button IrDA Connector Speaker Connector An offboard speaker can be installed on the motherboard as a manufacturing option. An offboard speaker can be connected to the motherboard at the front panel connector. The speaker (onboard or offboard) provides error beep code information during - Biostar M6TSU | M6TSU user's manual - Page 24
SPST switch. This switch is usually open and when closed will cause the motherboard to reset and run the POST (Power On Self Test). Power LED again. APM (Advanced Power Management) must be enabled in the system BIOS and the APM driver must be loaded. Power Button This connector can be attached to a - Biostar M6TSU | M6TSU user's manual - Page 25
power button on-board. Using the ATX power supply, functions such as Modem Ring Wake-Up and Soft Power Off are supported on this motherboard. This power connector supports instant power-on functionality, which means that the system will boot up instantly when the power connector is inserted on the - Biostar M6TSU | M6TSU user's manual - Page 26
120MB Floppy (reserved for future BIOS) and other devices to IDE1 and IDE2. These connectors support the IDE hard disk cable provided. driver on this controller must be set to slave mode. 1.6.5 Floppy Disk Connector: FDD1 The motherboard provides a standard floppy disk connector (FDC) that supports - Biostar M6TSU | M6TSU user's manual - Page 27
Chapter1 Motherboard Description 1.6.7 CMOS Function Selection: JCMOS1 JCOMS1 Assignment 1 3 1-2 Closed Normal Operation (default) 1 3 2-3 Closed Plug out the power cable before clear CMOS Data 1.6.8 Front USB Header: JUSB2 - Biostar M6TSU | M6TSU user's manual - Page 28
JSPKR1 JLIN1 JMIC1 Rear Speaker out This driver will also work for two channel systems. You can play DVD movies using InterVideo's Win DVD software, if using four channel systems. 1.7.1 PS/2 Mouse / Keyboard Connectors: JKBMS1 The motherboard provides a standard PS/2 mouse / Keyboard mini DIN - Biostar M6TSU | M6TSU user's manual - Page 29
PS/2 Mouse / Keyboard Connectors Pin Assignment 1 Data 2 No connect 3 Ground 4 +5 V (fused) 5 Clock 6 No connect 1.7.2 USB Connector: JUSB1 The motherboard provides an UHCI (Universal Host Controller Interface) Universal Serial Bus roots for attaching USB devices such as: keyboard - Biostar M6TSU | M6TSU user's manual - Page 30
Chapter1 Motherboard Description 1.7.3 Serial and Parallel Interface Ports This system comes equipped with two serial ports and one parallel port. Both types of interface ports will be - Biostar M6TSU | M6TSU user's manual - Page 31
Chapter1 Motherboard Description Connectivity The serial port can be used many ways, and it may be necessary to become familiar with the pin-out diagram. The following - Biostar M6TSU | M6TSU user's manual - Page 32
Chapter1 Motherboard Description 1.7.3.2 Parallel Interface Port: JPRNT1 Unlike the serial port, parallel interface ports have been standardized and should not present any difficulty interfacing peripherals to your - Biostar M6TSU | M6TSU user's manual - Page 33
Chapter1 Motherboard Description 1.7.4 Game (Joystick/MIDI) Port Connector: JGAME1 This connector allows you to connect a joystick or game pad for playing computer games. Also, you may play - Biostar M6TSU | M6TSU user's manual - Page 34
Chapter1 1.7.6 Audio Subsystem 1 JAUDIO1 Motherboard Description 1 JTAD1 1 JCDIN2 1 JCDIN1 1 JAUX1 1.7.6.1 AUX Audio in Header: JAUX1 (Optional) Pin No. 1 2 3 4 Assignment Left Channel Aux-in Ground Ground Right Channel Aux in 1-28 - Biostar M6TSU | M6TSU user's manual - Page 35
Chapter1 Motherboard Description 1.7.6.2 Telephony Header: JTAD1 Pin No. 1 2 3 4 Assignment Phone Ground Ground MONO_out 1.7.6.3 Front AUDIO Header: JAUDIO1 Pin No. Assignment Pin No. Assignment 1 MIC_in 2 Ground 3 +5V 4 +5V 5 - Biostar M6TSU | M6TSU user's manual - Page 36
fine-tuning of the chipset controlling the entire system. The rest of this manual is intended to guide you through the process of configuring your system using Setup. Plug and Play Support These AWARD BIOS supports the Plug and Play Version 1.0A specification. ESCD (Extended System Configuration - Biostar M6TSU | M6TSU user's manual - Page 37
Version 2.1 of the Intel PCI (Peripheral Component Interconnect) local bus specification. DRAM Support SDRAM (Synchronous DRAM) are supported. Supported CPUs This AWARD BIOS supports the Intel Pentium® !!! CPU. Using Setup In general, you use the arrow keys to highlight items, press to - Biostar M6TSU | M6TSU user's manual - Page 38
and press to accept and enter the sub-menu. !! WARNING !! The information about BIOS defaults on manual (Figure 1,2,3,4,5,6,7,8,9) is just for reference, please refer to the BIOS installed on board, for update information. Figure 1. Main Menu Standard CMOS Features This submenu contains - Biostar M6TSU | M6TSU user's manual - Page 39
Chapter 2 BIOS Setup Advanced Chipset Features This submenu allows you to configure special chipset features. Integrated Peripherals This Optimized Defaults This selection allows you to reload the BIOS when the system is having problems particularly with the boot sequence. These configurations are - Biostar M6TSU | M6TSU user's manual - Page 40
2 BIOS Setup Set Supervisor Password Setting the supervisor password will prohibit everyone except the supervisor from making changes using the CMOS Setup Utility. You will be prompted with to enter a password. Set User Password If the Supervisor Password is not set, then the User Password - Biostar M6TSU | M6TSU user's manual - Page 41
Chapter 2 BIOS Setup 2.2 Standard CMOS Features The items in Standard CMOS Setup Menu are divided into 10 categories. Each category includes no, one or more than one - Biostar M6TSU | M6TSU user's manual - Page 42
Chapter 2 BIOS Setup Main Menu Selections This table shows the selections that you can make on the Main Menu. Item Options Description Date MM DD YYYY Set - Biostar M6TSU | M6TSU user's manual - Page 43
All Errors No Errors All, but Keyboard All, but Diskette All, but Disk/ Key N/A N/A N/A Description Select the situation in which you want the BIOS to stop the POST process and notify you. Displays the amount of conventional memory detected during boot up. Displays the amount of extended memory - Biostar M6TSU | M6TSU user's manual - Page 44
Setup Boot Seq & Floppy Setup First /Second/Third/ Boot Other Device These BIOS attempts to load the operating system from the devices in the sequence selected in these items. The Choices: Floppy, LS120, HDD-0, SCSI, CDROM, HDD-1, HDD-2, - Biostar M6TSU | M6TSU user's manual - Page 45
to protect the IDE Hard Disk boot sector. If this function is enabled and an attempt is made to write to the boot sector, BIOS will display a warning message on the screen and sound an alarm beep. Disabled (default) Enabled Virus protection is disabled. Virus protection is activated. Processor - Biostar M6TSU | M6TSU user's manual - Page 46
to the operating system. The Choices: Enabeld (default), Disabled MPS Version Control For OS The BIOS supports versions 1.1 and 1.4 of the Intel multiprocessor specification. Select the version supported by the operation system running on this computer. The Choices: 1.1 (default), 1.4. OS Select For - Biostar M6TSU | M6TSU user's manual - Page 47
Chapter 2 BIOS Setup 2.4 Advanced Chipset Features This submenu allows you to configure the specific features of the chipset installed on your system. This chipset manages bus speeds and access to system memory resources, such as DRAM and external cache. It also coordinates communications with the - Biostar M6TSU | M6TSU user's manual - Page 48
Cacheable Select Enabled allows caching of the video BIOS, resulting in better system performance. However, if any program writes to this memory area, a system error may result. The Choices: Disabled (default), Enabled. AGP Graphics - Biostar M6TSU | M6TSU user's manual - Page 49
Chapter 2 2.5 Integrated Peripherals Figure 5. Integrated Peripherals BIOS Setup On-Chip IDE Control The chipset contains a PCI IDE interface with support for two IDE channels. Select "Enabled" to activate the first and / or second IDE interface. Select "Disabled" to deactivate an interface, if - Biostar M6TSU | M6TSU user's manual - Page 50
2 BIOS Setup performance. In Auto mode, the system automatically determines the best mode for each device. The Choices: Auto (default), Mode0, Mode1, Mode2, Mode3, Mode4. IDE Primary / Secondary Master / Slave UDMA Ultra DMA / 33 implementation is possible only if your IDE hard drive supports - Biostar M6TSU | M6TSU user's manual - Page 51
Chapter 2 BIOS Setup This item allows you to decide to enable/ disable to support AC97 Audio/Modem. The Choices: Auto (default), Disabled. Onboard FDC Controller Select Enabled if your system has a floppy disk controller (FDC) installed on the system - Biostar M6TSU | M6TSU user's manual - Page 52
Chapter 2 BIOS Setup The Choices: Half (default), Full. Use IR Pins Consult ECP Using Parallel Port as Extended Capabilities Port. ECP+EPP Using Parallel Port as ECP & EPP mode. Normal Supports EPP or ECP mode. EPP Mode Select Select EPP port type 1.7 or 1.9. The Choices: EPP1.7 (default - Biostar M6TSU | M6TSU user's manual - Page 53
. The Choices: 330 (default), 300, 290, Disabled. Midi Port IRQ This determines the IRQ in which the Midi Port can use. The Choices: 10 (default), 5. BIOS Setup 2-18 - Biostar M6TSU | M6TSU user's manual - Page 54
Chapter 2 BIOS Setup 2.6 Power Management Setup The Power Management Setup Menu allows you to configure your system to utilize energy conservation and power up/power down features. - Biostar M6TSU | M6TSU user's manual - Page 55
Chapter 2 BIOS Setup Power Management This category allows you to select the type ( CPU's. Doze Mode = 1 min Standby Mode = 1 min. Suspend Mode = 1 min. HDD Power Down = 1 min. User Defined (default) Allows you to set each mode individually. When not disabled, each of the ranges are from 1 min. to - Biostar M6TSU | M6TSU user's manual - Page 56
Chapter 2 BIOS Setup Video Off Method This option determines the manner in which the video buffer. Blank Screen (default) This option only writes blanks to the video buffer. DPMS Support Initial display power management signaling. Video Off In Suspend This determines the manner in which the monitor - Biostar M6TSU | M6TSU user's manual - Page 57
Chapter 2 BIOS Setup When enabled and after the set time of system inactivity had lost power previously without any subsequent manual intervention. There are 3 sources that provide current to the CMOS area that retains these Power-On instructions; the motherboard battery (3V), the Power Supply ( - Biostar M6TSU | M6TSU user's manual - Page 58
Chapter 2 BIOS Setup For example: If set to "Former-Sts" and AC power is lost when system is live, then after AC power is restored, the system - Biostar M6TSU | M6TSU user's manual - Page 59
covers some very technical items and it is strongly recommended that only experienced users should make any changes to the default settings. Figure 7. PnP/PCI Configurations Reset Configuration Data The system BIOS supports the PnP feature which requires the system to record which resources are - Biostar M6TSU | M6TSU user's manual - Page 60
(default), Enabled. Resources Controlled By By Choosing "Auto(ESCD)" (default), the system BIOS will detect the system resources and automatically assign the relative IRQ and DMA channel for each peripheral.By Choosing "Manual", the user will need to assign IRQ & DMA for add-on cards. Be sure that - Biostar M6TSU | M6TSU user's manual - Page 61
Chapter 2 BIOS Setup PCI / VGA Palette Snoop Choose Disabled or Enabled. Some graphic controllers which are not VGA compatible take the output from a VGA controller and map - Biostar M6TSU | M6TSU user's manual - Page 62
Chapter 2 2.8 PC Health Status Figure 8. PC Health Status BIOS Setup Show H/W Monitor in POST If you computer contain a monitoring system, it will show PC health status during POST stage. The item offers several delay - Biostar M6TSU | M6TSU user's manual - Page 63
Chapter 2 BIOS Setup This field displays the current speed SYSTEM fan. Current CPUFAN Speed This field displays the current CPUFAN speed. CPU Voltage/1.5V/3.3V/+5V/+12V - Biostar M6TSU | M6TSU user's manual - Page 64
Chapter 2 BIOS Setup 2.9 Frequency/Voltage Control Figure 9. FrequencyControl Auto Detect DIMM/PCI Clk This item allows you to enable/ disable auto Detect DIMM/ PCI Clock. The Choices: - Biostar M6TSU | M6TSU user's manual - Page 65
Chapter 2 BIOS Setup CPU Clock Ratio This item allows you to select the CPU Ratio. If unfortunately, the system's frequency that you are selected is not functioning, - Biostar M6TSU | M6TSU user's manual - Page 66
Chapter 3 Trouble Shooting 3. RAID BIOS Setting (Optional) 3.1 Getting Started 3.1.1 Introduction RAID Administrator is a Windows-based RAID management utility for HPT370 Series UDMA/ATA100 RAID Controller. By using this RAID management utility, users can easily configure and manage the hard disks - Biostar M6TSU | M6TSU user's manual - Page 67
will find the newly installed RAID adapter and ask you to install its driver. Please follow the prompt to finish the driver installation. Manual Installation If Windows can not find new hardware, the driver can be installed through the following steps : 1. Shut down all programs. 2. Click Start - Biostar M6TSU | M6TSU user's manual - Page 68
Chapter 3 Trouble Shooting Verify Installation When the driver has been successfully installed and the popup window. If there are two device items under SCSI Controllers, it indicates that the driver has been installed properly. If you cannot find these two above-mentioned device items, or - Biostar M6TSU | M6TSU user's manual - Page 69
Trouble Shooting 3.2.3 Windows NT4.0 Install driver under Windows NT4.0 1. Click Start-->Setup-->Control Panel, then double-click SCSI Adapter icon. 2. In the follow-on window, select Driver 4. The installation program will prompt users to insert the floppy disk of driver. Please insert it and then - Biostar M6TSU | M6TSU user's manual - Page 70
Trouble Shooting Verify Installation When the driver has been successfully installed and the computer restarted: 1. Click Start-->Setup-->Control Panel, and then double-click SCSI Adapter item. 2. If there is HPT370 UDMA/ATA100 RAID Controller item in the popup window, it indicates that the driver - Biostar M6TSU | M6TSU user's manual - Page 71
of Windows 2000, the system will automatically detect new hardware and prompt users to install the driver. Please insert the floppy disk of driver and follow the system prompt to finish the driver installation and restart the computer. Manual Installation If Windows can not find new hardware, the - Biostar M6TSU | M6TSU user's manual - Page 72
Chapter 3 Trouble Shooting restarted, press F6 key when the message Setup is inspecting your select to install driver under Windows 2000. 6. The follow-on interface will list the devices to be installed, in which HPT370 UDMA/ATA100 RAID Controller item should be included.( If users want to install - Biostar M6TSU | M6TSU user's manual - Page 73
Chapter 3 Trouble Shooting Verify Installation When the driver has been successfully installed and the computer restarted: 1. Right-click My Computer icon, select Property item in the popup menu. 2. In the popup window, select - Biostar M6TSU | M6TSU user's manual - Page 74
3 Trouble Shooting 3.3 Use RAID Administrator 3.3.1 Install RAID Administrator Please take the following steps to install RAID Administrator: 1. Insert the installation CD into the CD-ROM drive. 2. Enter Windows Explorer, find and double-click the setup program file: Setup Program: Driver\Chipset - Biostar M6TSU | M6TSU user's manual - Page 75
Chapter 3 Trouble Shooting 3.3.2 Run RAID Administrator The following steps should be taken to run RAID Administrator.": 1.Click Start-->Program-->RAID Administrator-->RAID Administrator. 2.Then the main interface - Biostar M6TSU | M6TSU user's manual - Page 76
Chapter 3 Trouble Shooting 3.3.3 Create Stripe Array (RAID 0, for Performance) The following steps shall be taken to create the stripe array. 1. Click Stripe icon on the tool bar. 2. - Biostar M6TSU | M6TSU user's manual - Page 77
Chapter 3 Trouble Shooting 4. Add it into Stripe Array Member Disks column by clicking the corresponding arrow button. 5. Continue to select the other hard disk from Available Disks column. 3-12 - Biostar M6TSU | M6TSU user's manual - Page 78
Chapter 3 Trouble Shooting 6. Add it into Stripe Array Member Disks column by clicking the corresponding arrow button. Then click Next button. 7. In the follow-on dialog box, - Biostar M6TSU | M6TSU user's manual - Page 79
Chapter 3 Trouble Shooting 8. After the completion of creating stripe array , shut down all other programs. Then click Yes to restart the computer, or select No to restart - Biostar M6TSU | M6TSU user's manual - Page 80
Chapter 3 Trouble Shooting Note: 1. At least two hard disks are needed to create number of total hard disks and the smallest HD capacity. Suggestion: 1. When selecting the strip size , if the user does not know which one is suitable, please select the default size 64K. 2. In order to avoid the - Biostar M6TSU | M6TSU user's manual - Page 81
Chapter 3 Trouble Shooting 3.3.4 Create Mirror Array (RAID 1, for Data Protection) The following steps shall be taken to create the mirror array: 1. Click Mirror icon on the tool - Biostar M6TSU | M6TSU user's manual - Page 82
Chapter 3 Trouble Shooting respectively by clicking the corresponding arrow button. 4. Continue to select the other hard disk from Available Disks column. 5. Add it into Source Disk column or Mirror Disk column respectively by 3-17 - Biostar M6TSU | M6TSU user's manual - Page 83
Chapter 3 Trouble Shooting clicking the corresponding arrow button. Then click Create to begin the creation or Cancel to exit. If you select the cancel operation, the system will remain unchanged. ※ If the user wants to use a spare disk, please select Use Spare Disk item. Then select hard disks - Biostar M6TSU | M6TSU user's manual - Page 84
Chapter 3 Trouble Shooting 6. After the creation is complete, the program will prompt you to synchronize mirror, select Yes to begin or No to cancel. 7. If you select Yes, the synchronization process will proceed as shown below. 3-19 - Biostar M6TSU | M6TSU user's manual - Page 85
Chapter 3 Trouble Shooting 8. After your selection of either , the program will prompt you to restart your computer. Then you can click Yes to restart the computer, or - Biostar M6TSU | M6TSU user's manual - Page 86
Chapter 3 Trouble Shooting Note: 1. At least the source disk and the mirror disk are tool bar. 3. In the popup dialog box , select Add or Remove operation, then click Next button. 4. If the user is to add the spare disk, select the hard disk to be used in the follow-on dialog box , and then click - Biostar M6TSU | M6TSU user's manual - Page 87
Chapter 3 Trouble Shooting 3.3.6 Synchronize/Validate/Verify Mirror Array Synchronize Mirror After the completion of creating mirror array, the data on the source disk has not been copied to the mirror disk. The data on the source disk and the mirror disk do not keep identical yet. The user should - Biostar M6TSU | M6TSU user's manual - Page 88
Chapter 3 Trouble Shooting Validate Mirror The user can validate the locked mirror array through the following no longer ask the user to synchronize mirror. If the user wants to copy the data from the source disk to the mirror disk, he has to synchronize mirror manually. Verify Mirror The operation - Biostar M6TSU | M6TSU user's manual - Page 89
Chapter 3 Trouble Shooting 3.3.7 Create Span Array Please follow the steps below to create the is complete, please shut down all other programs. And then click Yes to restart the computer. The user may also select No to restart the computer later. Note: At least two hard disks are needed in - Biostar M6TSU | M6TSU user's manual - Page 90
Chapter 3 Trouble Shooting 3.3.8 Create 0+1 Array (For Performance & Data Protection) The following steps shall be taken to create the 0+1 array: 1. Click 0+1 icon on the tool bar. 2. Select the stripe size. 3. In the popup dialog box, select the hard disks to be used, and add them 3-25 - Biostar M6TSU | M6TSU user's manual - Page 91
Chapter 3 Trouble Shooting into Source Disks column or Mirror Disks column. Then click Create button to create or Cancel button to cancel the creation. If the user selects Cancel, the system will remain unchanged. 4. When the creation is complete, the program will ask the user to restart the - Biostar M6TSU | M6TSU user's manual - Page 92
Chapter 3 completely finished RAID 0+1 array. Trouble Shooting Note: 1. Four hard disks are needed in the Administrator does not support disk hot-swapping of RAID 0+1 array. User must replace the failed disk after the computer is turned off, and then rebuild the 0+1 array in BIOS. Suggestion: In - Biostar M6TSU | M6TSU user's manual - Page 93
Chapter 3 Trouble Shooting 3.3.9 Remove Disk Array The following steps shall be taken to remove disk array. 1. Select the disk array to be deleted in the disk tree. 2. - Biostar M6TSU | M6TSU user's manual - Page 94
Chapter 3 Trouble Shooting 3.3.10 Set Transfer Mode The following steps shall be take effect only after the restart of computer. Suggestion: 1. BIOS and driver of RAID Adapter can automatically detect the optimum transfer mode supported by the corresponding hard disk. Usually no need to change - Biostar M6TSU | M6TSU user's manual - Page 95
Chapter 3 Trouble Shooting 3.3.11 Device Status Raid Administrator detects the status of each device and shows their status information with different icons to prompt users (see below). Note: When reading data from the mirror array, the source disk is always to be read first, and the mirror disk - Biostar M6TSU | M6TSU user's manual - Page 96
Trouble Shooting 3.3.12 Hot-swapping Hard Disks of Mirror Array During the working process of the mirror array, if there is failure of either the source disk or the mirror disk and the spare disk has not been set, the user the system and the device by the manual hot-swap of power and cable. Please operate - Biostar M6TSU | M6TSU user's manual - Page 97
lists all the historical operation information including event, time & description, thereby providing reference for solving the problems in the operation of RAID Administrator. Event log menu provides users with functions as follows: Set Log File: Set the log file for recording the events . Clear - Biostar M6TSU | M6TSU user's manual - Page 98
Chapter 3 Trouble Shooting 3.4 BIOS Configuration 3.4.1 Enter into BIOS Configuration Utility When the following information is displayed on screen during the system starting, press ctrl + H key to enter into BIOS configuration utility. The main interface of BIOS configuration utility is as below - Biostar M6TSU | M6TSU user's manual - Page 99
Chapter 3 Trouble Shooting 3.4.2 Create RAID The following steps shall be taken to create RAID in BIOS. 1. Use the arrow key to select 1. Create RAID. 2. Press Enter to confirm and go to next. 3. Select 1. Array Mode in the popup sub-interface and - Biostar M6TSU | M6TSU user's manual - Page 100
Chapter 3 Trouble Shooting 3.4.3 Delete RAID The following steps shall be taken to delete RAID. 1. In the menu zone, select 2. Delete RAID , press Enter to confirm this operation - Biostar M6TSU | M6TSU user's manual - Page 101
Chapter 3 Trouble Shooting 3.4.5 Add Spare Disk The following steps shall be taken to add the spare disk. 1. In the menu zone, select 4. Add Spare Disk and press - Biostar M6TSU | M6TSU user's manual - Page 102
Chapter 3 Trouble Shooting 3.4.8 Set Boot Disk. The following steps shall be taken to set the boot disk: 1. In the menu zone, Note: 1. The Set Boot Disk item appears on condition that no hard disk is connected to IDE on motherboard. 2. After the boot disk is set, its status will become Boot. 3-37 - Biostar M6TSU | M6TSU user's manual - Page 103
Trouble Shooting 4. Trouble Shooting PROBLEM socket are OK, but system is still dead. Contact technical support. Faulty wall outlet; circuit Plug in device known to Use Memory DIMM is partially dislodged from the slot on the motherboard. Turn off computer. Using even pressure on Take cover - Biostar M6TSU | M6TSU user's manual - Page 104
Trouble Shooting PROBLEM message, INVALID controller board. Make DRIVE sure both ends are SPECIFICATION. securely plugged in; check the drive type in the Format hard disk; if Contact technical unable to do so the hard support. disk may be defective. Hard disk directory or FAT is scrambled. - Biostar M6TSU | M6TSU user's manual - Page 105
Trouble Shooting PROBLEM Error the configuration program. Replace any incorrect information. Review system's equipment . Make sure correct information PROBLEM DIAGNOSIS SOLUTION Check the power connectors to monitor and to system. Make sure monitor is connected to display card. See instructions - Biostar M6TSU | M6TSU user's manual - Page 106
Chapter 4 Trouble Shooting PROBABLE CAUSE Memory problem. Computer virus. PROBLEM DIAGNOSIS SOLUTION Reboot computer. Reinstall memory, make sure that all memory modules are installed in correct sockets. Use anti-virus programs to detect and clean viruses. PROBLEM Screen goes blank - Biostar M6TSU | M6TSU user's manual - Page 107
Trouble Shooting No display on screen. PROBABLE CAUSE Faulty Monitor. CMOS incorrectly set up. C: drive failure. PROBABLE CAUSE Hard drive cable not connected properly. PROBLEM DIAGNOSIS SOLUTION If possible, connect monitor to another system. If no color replace monitor. Call technical support - Biostar M6TSU | M6TSU user's manual - Page 108
Chapter 4 Trouble Shooting PROBLEM Missing operating system on hard drive. PROBABLE CAUSE CMOS setup has been changed. DIAGNOSIS SOLUTION Run setup and select correct drive type. PROBLEM Certain keys do not function. PROBABLE CAUSE Keys jammed or defective. DIAGNOSIS SOLUTION Replace - Biostar M6TSU | M6TSU user's manual - Page 109
10/18/2001 MADE IN TAIWAN R.O.C.
-
 1
1 -
 2
2 -
 3
3 -
 4
4 -
 5
5 -
 6
6 -
 7
7 -
8
-
9
-
10
-
11
-
12
-
13
-
14
-
15
-
16
-
17
-
18
-
19
-
20
-
21
-
22
-
23
-
24
-
25
-
26
-
27
-
28
-
29
-
30
-
31
-
32
-
33
-
34
-
35
-
36
-
37
-
38
-
39
-
40
-
41
-
42
-
43
-
44
-
45
-
46
-
47
-
48
-
49
-
50
-
51
-
52
-
53
-
54
-
55
-
56
-
57
-
58
-
59
-
60
-
61
-
62
-
63
-
64
-
65
-
66
-
67
-
68
-
69
-
70
-
71
-
72
-
73
-
74
-
75
-
76
-
77
-
78
-
79
-
80
-
81
-
82
-
83
-
84
-
85
-
86
-
87
-
88
-
89
-
90
-
91
-
92
-
93
-
94
-
95
-
96
-
97
-
98
-
99
-
100
-
101
-
102
-
103
-
104
-
105
-
106
-
107
-
108
-
109
 |
 |

M6TSU
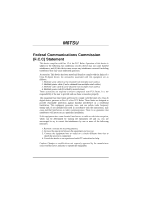
Federal Communications Commission
(F.C.C) Statement
This device complies with Part 15 of the FCC Rules. Operation of this device is
subject to the following two conditions: (1) this device may not cause harmful
interference, and (2) this device must accept any interference received, including
interference that may cause undesired operation.
Accessories: This device has been tested and found to comply with the limits of a
Class B digital device, the accessories associated with this equipment are as
follows:
1. Shielded serial cable (Can be obtained from multiple retail outlets)
2. Shielded printer cable (Can be obtained from multiple retail outlets)
3. Shielded video cable (Can be obtained from multiple retail outlets)
4. Shielded power cord (Provided by manufacturer)
These accessories are required to ensure compliance with FCC Rules. It is the
responsibility of the user to provide and use these accessories properly.
This equipment has been tested and found to comply with the limits of a Class B
digital device, pursuant to Part 15 of the FCC Rules. These limits are designed to
provide reasonable protection against harmful interference in a residential
installation. This equipment generates, uses, and can radiate radio frequency
energy and, if not installed and used in accordance with the instructions, may
cause harmful interference to radio communications. There is no guarantee that
interference will not occur in a particular installation.
If this equipment does cause harmful interference to radio or television reception,
which can be determined by turning the equipment off and on, you are
encouraged to try to correct the interference by one or more of the following
measures:
1. Reorient / relocate the receiving antenna.
2. Increase the separation between the equipment and receiver.
3. Connect the equipment into an outlet on a circuit different from that to
which the receiver is connected.
4. Consult the dealer or an experienced radio/TV technician for help.
Caution: Changes or modifications not expressly approved by the manufacturer
could void the user’s authority to operate the equipment.