Bissell Trilogy Vacuum User Guide
Bissell Trilogy Vacuum Manual
 |
View all Bissell Trilogy Vacuum manuals
Add to My Manuals
Save this manual to your list of manuals |
Bissell Trilogy Vacuum manual content summary:
- Bissell Trilogy Vacuum | User Guide - Page 1
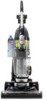
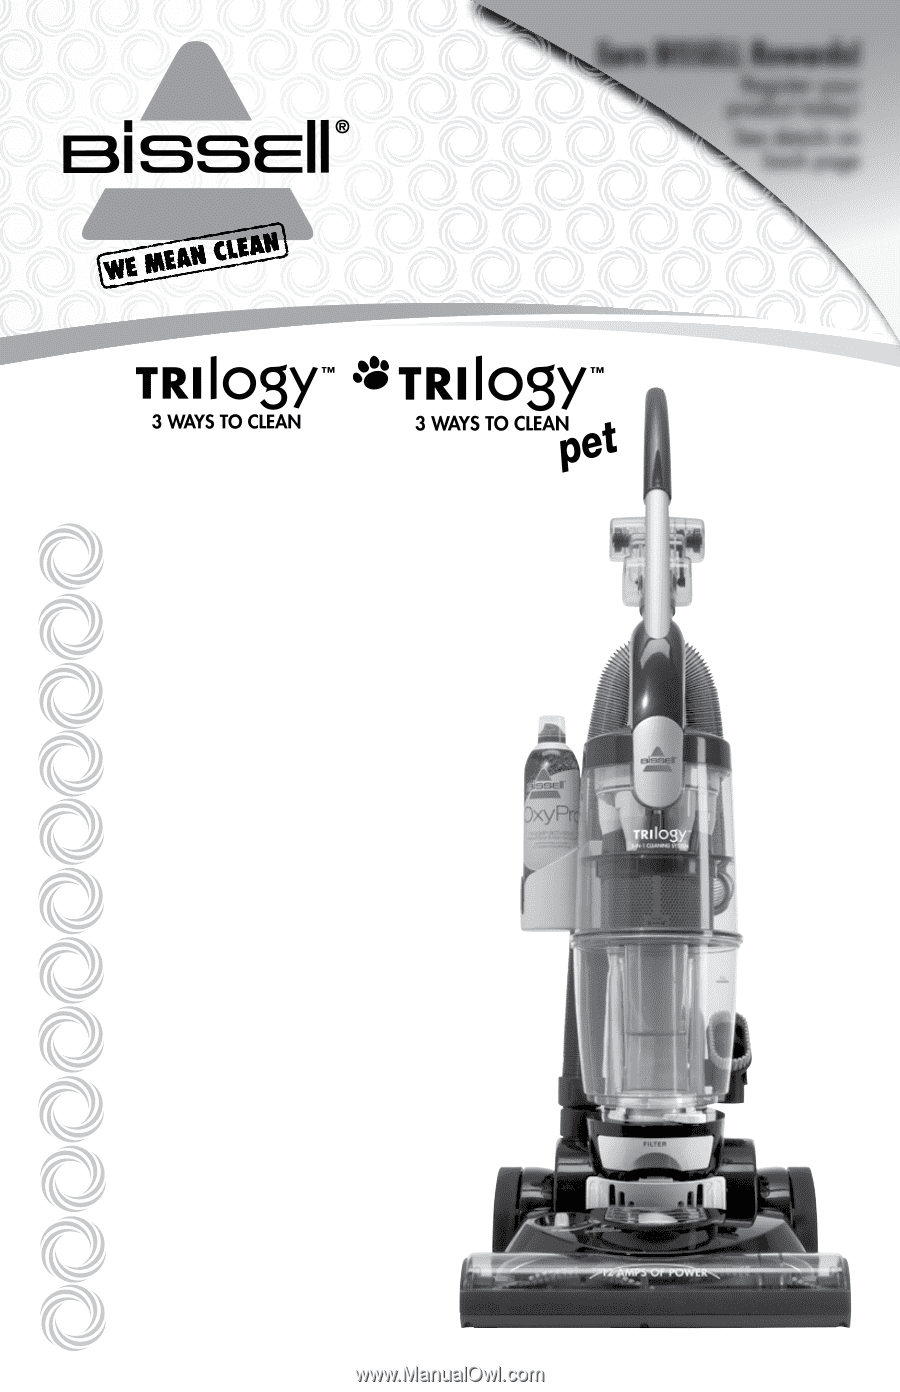
Earn BISSELL Rewards! Register your product today! See details on back page USER'S GUIDE 81M9 SERIES 2 Thank You 3 Safety instructions 4 Product view 5-6 Assembly 7-9 Operations 10-15 Maintenance and care 16-17 Troubleshooting 18 Replacement parts 18 Accessories 19 Warranty 20 Product registration - Bissell Trilogy Vacuum | User Guide - Page 2
complete, high-tech home cleaning system. Your BISSELL Trilogy vacuum is well made, and we back it with a limited three year warranty. We also stand behind it with a knowledgeable, dedicated Consumer Services department, so, should you ever have a problem, you'll receive fast, considerate assistance - Bissell Trilogy Vacuum | User Guide - Page 3
the following: Read all instructions before using your Upright VACUUM. Always connect to a vacuum cleaner while it is running. ■ Brush may unexpectedly restart. Unplug from outlet when cleaning or servicing ■ Allow carpet cleaning solution to dry completely before vacuuming. SAVE THESE INSTRUCTIONS - Bissell Trilogy Vacuum | User Guide - Page 4
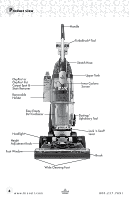
Tool Stretch Hose OxyPro® or OxyPro® Pet Carpet Spot & Stain Remover Removable Holster Upper Tank Inner Cyclone Screen Easy Empty Dirt Container Dusting/ Upholstery Tool Headlight Height Adjustment Knob Foot Window Lock 'n Seal® Lever Brush Wide Cleaning Foot 4 www.bissell.com 800.237.7691 - Bissell Trilogy Vacuum | User Guide - Page 5
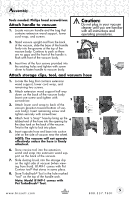
screwdriver. Attach handle to vacuum 1. Locate vacuum handle and the bag that contains extension wand support, lower cord wrap, and screws. Caution: Do not plug in your vacuum cleaner until you are familiar with all instructions and operating procedures. 2. Stand vacuum upright and from the back - Bissell Trilogy Vacuum | User Guide - Page 6
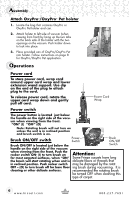
on the back side of the holster with the two openings on the vacuum. Push holster down to lock into place. 3. Place provided can of OxyPro/OxyPro Pet into holster. Follow instructions on page 8 for OxyPro/OxyPro Pet application. Operations Power cord To store power cord, wrap cord around upper - Bissell Trilogy Vacuum | User Guide - Page 7
positions 1. In upright position, tilt cleaner back on its rear wheels to transport from room to room. The vacuum can also be moved by using the carrying handle on front of the vacuum. 2. Using your foot, press handle release pedal on the lower left side of the vacuum to recline vacuum in cleaning - Bissell Trilogy Vacuum | User Guide - Page 8
removes tough stains and odors from carpet. Your Trilogy model vacuum comes with either OxyPro® or OxyPro® Pet. These items are available for purchase by visiting BISSELL website www.bissell.com. Read instructions on either OxyPro® or OxyPro® Pet can before using, including testing for colorfastness - Bissell Trilogy Vacuum | User Guide - Page 9
areas. 1. Remove Hose: With vacuum in upright position, remove hose end from the suction inlet near the bottom of the vacuum by the wheel. Do not . NOTE: Model 81M9-1 comes with the Pet TurboBrush® Tool and follows same operation instructions. 2e. Pet Contour Tool® (Included with 81M9-1 only): - Bissell Trilogy Vacuum | User Guide - Page 10
handle and pull straight out to remove from vacuum and empty. 4. Place dirt container back in the vacuum 3 and slide lever right to lock position. cord from electrical outlet. 2. Remove and Empty Dirt Container as instructed in previous section. 3. With dirt container removed, grasp inner - Bissell Trilogy Vacuum | User Guide - Page 11
It is located under the pre-motor filter tray. The vacuum must be in reclined position to remove the filter. 3. Using your foot, press the handle release 3 be 4 replaced. 5. Replace the filter door before returning vacuum back to upright position. w w w. b i s s e l l . c o m 11 800.237.7691 - Bissell Trilogy Vacuum | User Guide - Page 12
If any damage is pres- ent, discard old drive and replace as instructed in following section. Replace drive belt 1. Turn power OFF. Unplug power cord 4. Place ends of rotating brush back down 3 into slots on sides of vacuum. 5. Turn floor brush by hand several times in the direction of motor - Bissell Trilogy Vacuum | User Guide - Page 13
will not turn on or the thermal protector continues to activate, your cleaner may need servicing. Call BISSELL Consumer Services or visit the website to locate an authorized Service Center. Note: The thermal protector controls the main vacuum motor only, not the brush motor. If the thermal protector - Bissell Trilogy Vacuum | User Guide - Page 14
hose base with screw before operating vacuum. 6. Remove the Twist 'n Snap hose end 6 from the vacuum by turning to the left. Straighten the hose and unclog with a long, narrow object such as a broom handle. 7. If clog persists, follow instructions for checking the rotating brush and - Bissell Trilogy Vacuum | User Guide - Page 15
with 2. the Pet TurboBrush® Tool and follows same maintenance instructions. 1. Turn power OFF. Unplug vacuum cord from electrical outlet . Tip: Changing the light bulb 1. Turn power switch off. 2. Unplug cleaner from electrical outlet. TurboBrush may not be turning due to loss of suction. - Bissell Trilogy Vacuum | User Guide - Page 16
1. Brush switch turned to "Off" 1. Make sure brush switch is in "On" position 2. Vacuum is in upright position 2. Recline vacuum to operate brush 3. Brush is jammed 3. Remove obstruction or debris see pg. 14, unplug cleaner to reset brush see pg. 13 4. Brush needs to be reset 4. Unplug - Bissell Trilogy Vacuum | User Guide - Page 17
Troubleshooting Visible dirt escaping from cleaner Possible causes Remedies 1. Dirt container full 2. Filters correctly Other maintenance or service not included in the manual should be performed by an authorized service representative. Thank you for selecting a BISSELL product. Please do - Bissell Trilogy Vacuum | User Guide - Page 18
Holster OxyPro® Carpet Spot & Stain Remover OxyPro® Pet Carpet Spot & Stain Remover 2 3 4 5 6 7 8 Additional accessories These items are available for purchase as accessories for your BISSELL vacuum: To purchase call 1-800-237-7691 or visit www.bissell.com. Item 1 Part No. 203-1056 Part - Bissell Trilogy Vacuum | User Guide - Page 19
- BISSELL Trilogy™ Vacuum This warranty gives you specific legal rights, and you may also have other rights which may vary from state to state. If you need additional instruction regarding this warranty or have questions regarding what it may cover, please contact BISSELL Consumer Services by - Bissell Trilogy Vacuum | User Guide - Page 20
Service Supplying your information now saves you time should you need to contact us with questions regarding your product. Product Support ET ATTN: Consumer Services Or visit the BISSELL website - www.bissell.com When contacting BISSELL, have model number of cleaner available. Please record your
-
 1
1 -
 2
2 -
 3
3 -
 4
4 -
 5
5 -
 6
6 -
 7
7 -
8
-
9
-
10
-
11
-
12
-
13
-
14
-
15
-
16
-
17
-
18
-
19
-
20
 |
 |
Earn BISSELL Rewards!
R
egister your
product today!
See details on
back page
2
Thank You
USER'S GUIDE
81M9 SERIES
Safety instructions
Product view
Assembly
Operations
Maintenance and care
Troubleshooting
Consumer services
Replacement parts
3
4
5-6
7-9
10-15
16-17
20
18
Accessories
Warranty
Product registration
18
19
20
Earn BISSELL Rewards!
R
egister your
product today!
See details on
back page