Bosch DB24C4200R2 Installation Guide - Page 6
Internet Protocol TCP/IP, Local Area Connection
 |
View all Bosch DB24C4200R2 manuals
Add to My Manuals
Save this manual to your list of manuals |
Page 6 highlights
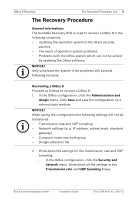
6 en | The Recovery Procedure DiBos 8 Recovery 3. Write down the network settings. - In the DiBos configuration, click the Security and network menu, and then click Control panel. The Network Connections window appears. - Double-click the Local Area Connection icon, click the General tab, and then click Properties. - Double-click Internet Protocol (TCP/IP). - Click the General tab and write down all the settings (e. g. IP address, subnet mask, standard gateway). - Click Cancel, click Cancel again, and then click Close. 4. Write down the computer name and the workgroup. - In the Network Connections window, click Control Panel. - Double-click the System icon, and then click the Computer Name tab. - Write down the full computer name and the workgroup. - Click Cancel, and then close the Control Panel window. 5. Exit the DiBos. 6. Exit Windows. To perform this, click Start, and then click Log Off. The windows logoff dialog box appears. 7. Hold down the left SHIFT key, and then click Log Off. Hold the left SHIFT key down until the Windows logon dialog box appears. 8. Insert the Recovery DVD into the drive. 9. In the Windows logon dialog box, click Shut Down. The Windows shut down dialog box appears. 10. Click the arrow, select Restart, and then click OK. This action shuts down your computer and restarts the computer with the Recovery DVD. The recovery window appears. 11. Click Continue. The recovery procedure starts. A warning message appears, stating that the recovery procedure will delete all data on the hard disk (partition C:). F.01U.076.409 | V1 | 2007.11 Installation Guide Bosch Sicherheitssysteme GmbH
-
 1
1 -
 2
2 -
 3
3 -
 4
4 -
 5
5 -
 6
6 -
 7
7 -
 8
8 -
 9
9 -
 10
10 -
 11
11 -
 12
12 -
13
-
14
-
15
-
16
-
17
-
18
-
19
-
20
-
21
-
22
-
23
-
24
-
25
-
26
-
27
-
28
 |
 |
