Brother International BA-10 Network Users Manual - English - Page 16
Feeder, origin, sensor, Button, clamp, height
 |
View all Brother International BA-10 manuals
Add to My Manuals
Save this manual to your list of manuals |
Page 16 highlights
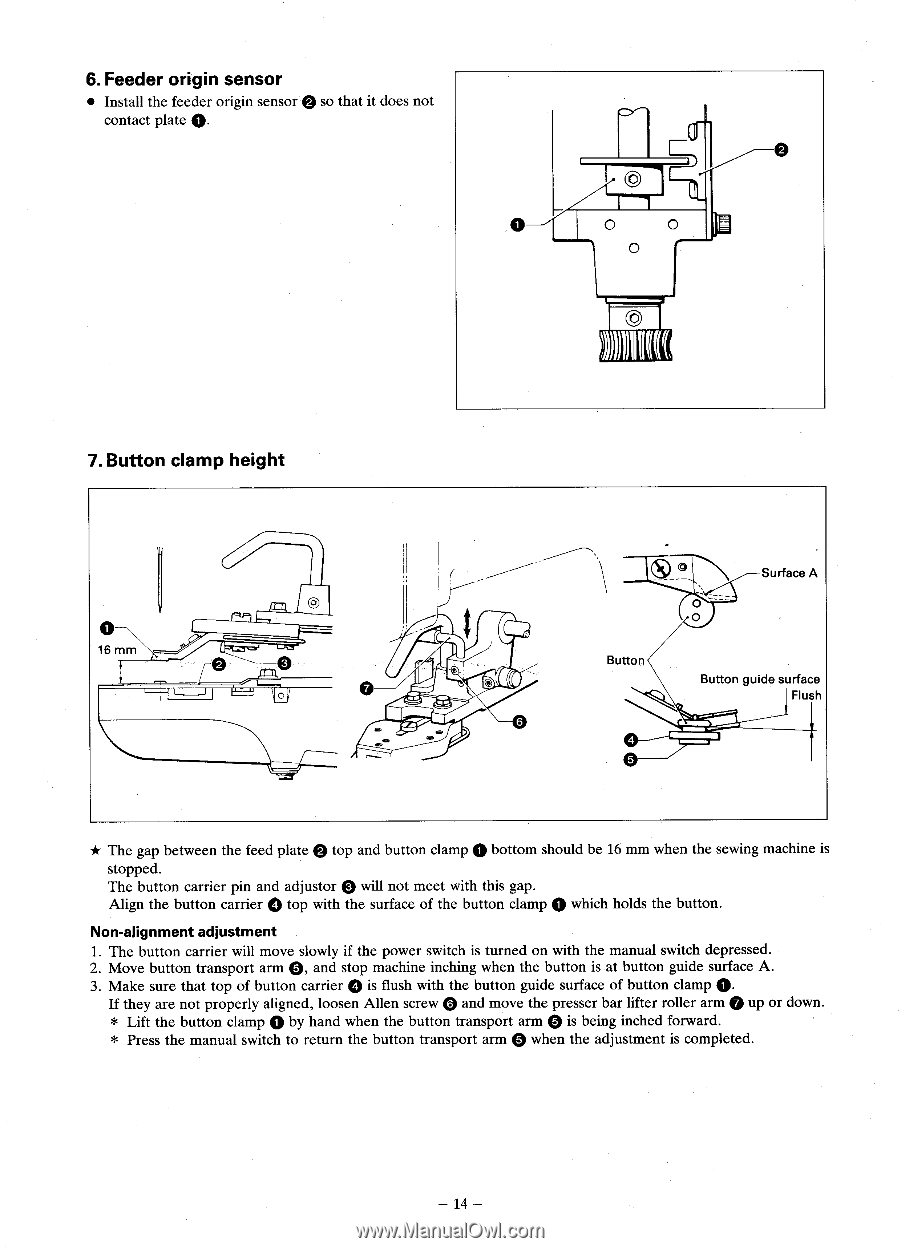
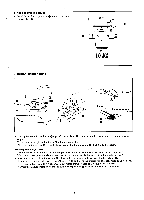
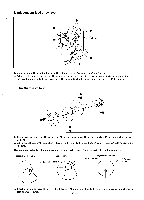
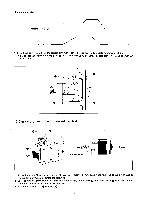
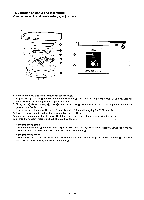
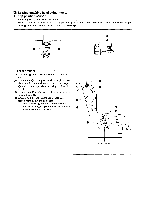
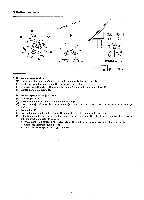
6. Feeder origin sensor • Install the feeder origin sensor contact plate Q. so that it does not O 7. Button clamp height 16 mm O rr---n, --I ® O Surface A Button O Button guide surface Flush * The gap between the feed plate 0 top and button clamp 0 bottom should be 16 mm when the sewing machine is stopped. The button carrier pin and adjustor 0 will not meet with this gap. Align the button carrier Q top with the surface of the button clamp 0 which holds the button. Non-alignment adjustment 1. The button carrier will move slowly if the power switch is turned on with the manual switch depressed. 2. Move button transport arm 0, and stop machine inching when the button is at button guide surface A. 3. Make sure that top of button carrier Q is flush with the button guide surface of button clamp Q. If they are not properly aligned, loosen Allen screw 0 and move the presser bar lifter roller arm up or down. * Lift the button clamp 0 by hand when the button transport arm 0 is being inched forward. * Press the manual switch to return the button transport arm 0 when the adjustment is completed. 0
-
 1
1 -
2
-
3
-
4
-
5
-
6
-
7
-
8
-
9
-
10
-
 11
11 -
 12
12 -
 13
13 -
 14
14 -
 15
15 -
 16
16 -
 17
17 -
 18
18 -
 19
19 -
 20
20 -
 21
21 -
22
-
23
-
24
-
25
-
26
-
27
-
28
-
29
-
30
-
31
-
32
-
33
-
34
-
35
 |
 |