Brother International HL-3040CN Network Users Manual - English - Page 99
How to con your wireless machine, using SES/WPS or AOSS from the control panel menu
 |
UPC - 012502622338
View all Brother International HL-3040CN manuals
Add to My Manuals
Save this manual to your list of manuals |
Page 99 highlights
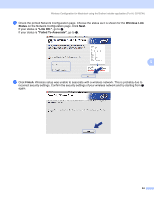
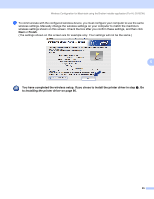
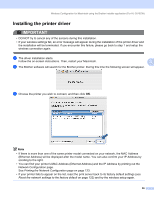
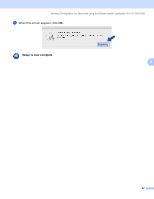
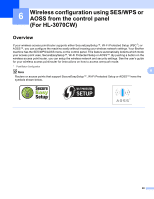
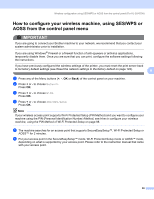
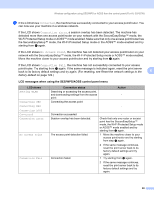
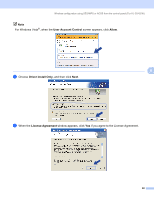
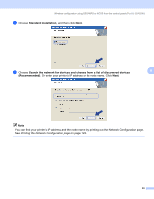
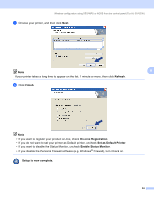
Wireless configuration using SES/WPS or AOSS from the control panel (For HL-3070CW) How to configure your wireless machine, using SES/WPS or AOSS from the control panel menu 6 IMPORTANT If you are going to connect your Brother machine to your network, we recommend that you contact your system administrator prior to installation. If you are using Windows® Firewall or a firewall function of anti-spyware or antivirus applications, temporarily disable them. Once you are sure that you can print, configure the software settings following the instructions. If you have previously configured the wireless settings of the printer, you must reset the print server back to its factory default settings (see Reset the network settings to the factory default on page 122). 6 a Press any of the Menu buttons (+, -, OK or Back) of the control panel on your machine. b Press + or - to choose Network. Press OK. c Press + or - to choose WLAN. Press OK. d Press + or - to choose SES/WPS/AOSS. Press OK. Note If your wireless access point supports Wi-Fi Protected Setup (PIN Method) and you want to configure your machine using the PIN (Personal Identification Number) Method, see How to configure your wireless machine, using the PIN Method of Wi-Fi Protected Setup on page 98. e The machine searches for an access point that supports SecureEasySetup™, Wi-Fi Protected Setup or AOSS™ for 2 minutes. f Put your access point in the SecureEasySetup™ mode, Wi-Fi Protected Setup mode or AOSS™ mode, depending on what is supported by your access point. Please refer to the instruction manual that came with your access point. 89
-
 1
1 -
2
-
3
-
4
-
5
-
6
-
7
-
8
-
9
-
10
-
11
-
12
-
13
-
14
-
15
-
16
-
17
-
18
-
19
-
20
-
21
-
22
-
23
-
24
-
25
-
26
-
27
-
28
-
29
-
30
-
31
-
32
-
33
-
34
-
35
-
36
-
37
-
38
-
39
-
40
-
41
-
42
-
43
-
44
-
45
-
46
-
47
-
48
-
49
-
50
-
51
-
52
-
53
-
54
-
55
-
56
-
57
-
58
-
59
-
60
-
61
-
62
-
63
-
64
-
65
-
66
-
67
-
68
-
69
-
70
-
71
-
72
-
73
-
74
-
75
-
76
-
77
-
78
-
79
-
80
-
81
-
82
-
83
-
84
-
85
-
86
-
87
-
88
-
89
-
90
-
91
-
92
-
93
-
 94
94 -
 95
95 -
 96
96 -
 97
97 -
 98
98 -
 99
99 -
 100
100 -
 101
101 -
 102
102 -
 103
103 -
 104
104 -
105
-
106
-
107
-
108
-
109
-
110
-
111
-
112
-
113
-
114
-
115
-
116
-
117
-
118
-
119
-
120
-
121
-
122
-
123
-
124
-
125
-
126
-
127
-
128
-
129
-
130
-
131
-
132
-
133
-
134
-
135
-
136
-
137
-
138
-
139
-
140
-
141
-
142
-
143
-
144
-
145
-
146
-
147
-
148
-
149
-
150
-
151
-
152
-
153
-
154
-
155
-
156
-
157
-
158
-
159
-
160
-
161
-
162
-
163
-
164
-
165
-
166
-
167
-
168
-
169
-
170
-
171
-
172
-
173
-
174
-
175
-
176
-
177
-
178
-
179
-
180
-
181
-
182
-
183
-
184
-
185
-
186
-
187
-
188
-
189
-
190
-
191
-
192
-
193
-
194
-
195
-
196
-
197
-
198
-
199
-
200
-
201
-
202
-
203
-
204
-
205
-
206
-
207
-
208
-
209
-
210
-
211
 |
 |