Brother International IntelliFax-4750e Users Manual - English - Page 101
Changing Default Copy Settings, Copy Mode (Type of Original)
 |
View all Brother International IntelliFax-4750e manuals
Add to My Manuals
Save this manual to your list of manuals |
Page 101 highlights
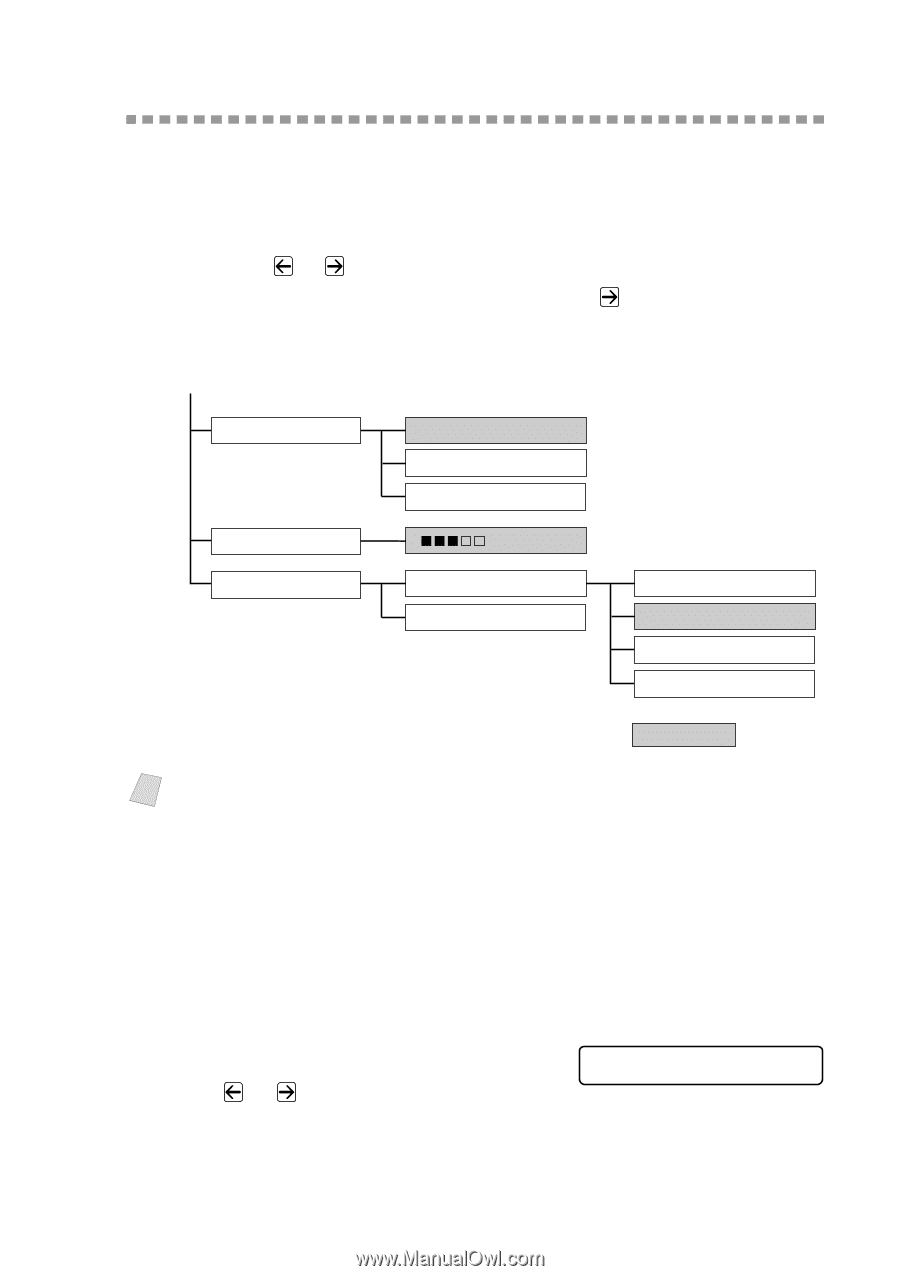
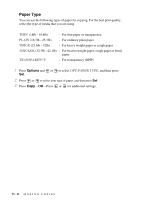
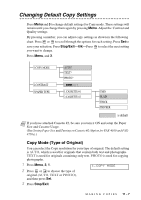
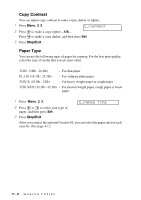
Changing Default Copy Settings Press Menu and 3 to change default settings for Copy mode. These settings will remain until you change them again by pressing Menu. Adjust the Contrast and Quality settings. By pressing a number, you can adjust copy settings as shown in the following chart. Press or to scroll through the options for each setting. Press Set to save your selection. Press Stop/Exit-OR-Press to select the next setting you want to change. Press Menu, and 3. 1.COPY MODE 2.CONTRAST 3.PAPER TYPE AUTO? TEXT? PHOTO? - + 1.CASSETTE #1 2.CASSETTE #2 THIN PLAIN THICK THICKER is default Note If you have attached Cassette #2, be sure you turn it ON and setup the Paper Size and Cassette Usage. (See Setting Paper Size and Turning on Cassette #2 (Option for FAX-4100 and FAX4750e).) Copy Mode (Type of Original) You can select the Copy resolution for your type of original. The default setting is AUTO, which is used for originals that contain both text and photographs. TEXT is used for originals containing only text. PHOTO is used for copying photographs. 1 Press Menu, 3, 1. 1.COPY MODE 2 Press or to choose the type of original (AUTO, TEXT or PHOTO), and then press Set. 3 Press Stop/Exit. M A K I N G C O P I E S 11 - 7
-
 1
1 -
2
-
3
-
4
-
5
-
6
-
7
-
8
-
9
-
10
-
11
-
12
-
13
-
14
-
15
-
16
-
17
-
18
-
19
-
20
-
21
-
22
-
23
-
24
-
25
-
26
-
27
-
28
-
29
-
30
-
31
-
32
-
33
-
34
-
35
-
36
-
37
-
38
-
39
-
40
-
41
-
42
-
43
-
44
-
45
-
46
-
47
-
48
-
49
-
50
-
51
-
52
-
53
-
54
-
55
-
56
-
57
-
58
-
59
-
60
-
61
-
62
-
63
-
64
-
65
-
66
-
67
-
68
-
69
-
70
-
71
-
72
-
73
-
74
-
75
-
76
-
77
-
78
-
79
-
80
-
81
-
82
-
83
-
84
-
85
-
86
-
87
-
88
-
89
-
90
-
91
-
92
-
93
-
94
-
95
-
 96
96 -
 97
97 -
 98
98 -
 99
99 -
 100
100 -
 101
101 -
 102
102 -
 103
103 -
 104
104 -
 105
105 -
 106
106 -
107
-
108
-
109
-
110
-
111
-
112
-
113
-
114
-
115
-
116
-
117
-
118
-
119
-
120
-
121
-
122
-
123
-
124
-
125
-
126
-
127
-
128
-
129
-
130
-
131
-
132
-
133
-
134
-
135
-
136
-
137
-
138
-
139
-
140
-
141
-
142
-
143
-
144
-
145
-
146
-
147
-
148
-
149
-
150
-
151
-
152
-
153
-
154
-
155
-
156
 |
 |