Brother International PC-210 Users Manual - English - Page 46
Do not allow thread or dust to, accumulate in the foot controller
 |
View all Brother International PC-210 manuals
Add to My Manuals
Save this manual to your list of manuals |
Page 46 highlights
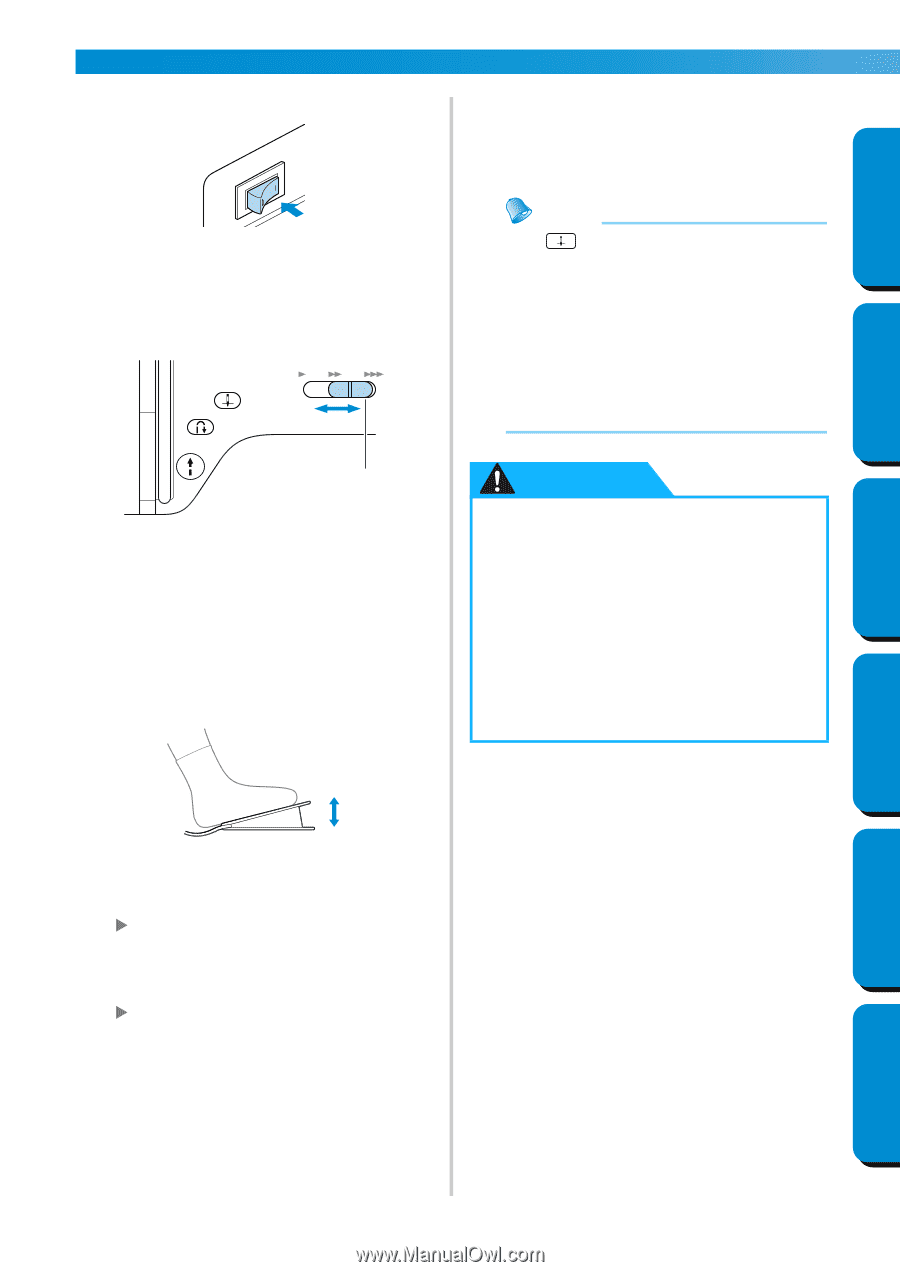
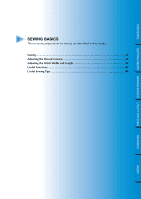
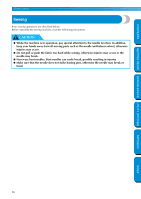
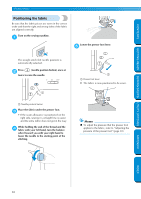
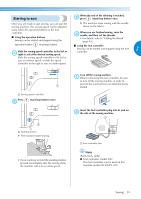
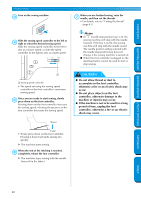
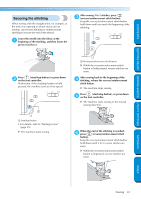
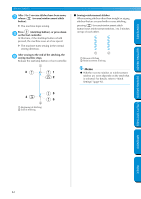
SEWING BASICS Turn on the sewing machine. 3 When you are finished sewing, raise the 7 needle, and then cut the threads. • For details, refer to "Cutting the thread" (page 43). CONTENTS Slide the sewing speed controller to the left or 4 right to select the desired sewing speed. Slide the sewing speed controller to the left to sew at a slower speed, or slide the speed controller to the right to sew at a faster speed. Memo ● If (needle stop position key) is lit, the sewing machine will stop with the needle lowered. If the key is not lit, the sewing machine will stop with the needle raised. The needle position setting selected with the needle stop position key does not change if the sewing machine is turned off. ● When the foot controller is plugged in, the start/stop button cannot be used to start or stop sewing. GETTING READY SEWING BASICS UTILITY STITCHES 1 1 Sewing speed controller • The speed set using the sewing speed controller is the foot controller's maximum sewing speed. Once you are ready to start sewing, slowly 5 press down on the foot controller. Pressing down on the foot controller increases the sewing speed; releasing the pressure on the foot controller decreases the sewing speed. Slower Faster • Slowly press down on the foot controller. Pressing it down hard starts sewing too quickly. X The machine starts sewing. When the end of the stitching is reached, 6 completely release the foot controller. X The machine stops sewing with the needle lowered (in the fabric). CAUTION ● Do not allow thread or dust to accumulate in the foot controller, otherwise a fire or an electric shock may occur. ● Do not place objects on the foot controller, otherwise damage to the machine or injuries may occur. ● If the machine is not to be used for a long period of time, unplug the foot controller, otherwise a fire or an electric shock may occur. APPENDIX INDEX 40
-
 1
1 -
2
-
3
-
4
-
5
-
6
-
7
-
8
-
9
-
10
-
11
-
12
-
13
-
14
-
15
-
16
-
17
-
18
-
19
-
20
-
21
-
22
-
23
-
24
-
25
-
26
-
27
-
28
-
29
-
30
-
31
-
32
-
33
-
34
-
35
-
36
-
37
-
38
-
39
-
40
-
 41
41 -
 42
42 -
 43
43 -
 44
44 -
 45
45 -
 46
46 -
 47
47 -
 48
48 -
 49
49 -
 50
50 -
 51
51 -
52
-
53
-
54
-
55
-
56
-
57
-
58
-
59
-
60
-
61
-
62
-
63
-
64
-
65
-
66
-
67
-
68
-
69
-
70
-
71
-
72
-
73
-
74
-
75
-
76
-
77
-
78
-
79
-
80
-
81
-
82
-
83
-
84
-
85
-
86
-
87
-
88
-
89
-
90
-
91
-
92
-
93
-
94
-
95
-
96
-
97
-
98
-
99
-
100
-
101
-
102
-
103
-
104
-
105
-
106
-
107
-
108
-
109
-
110
-
111
 |
 |