Brother International PEDESIGN 8.0 Users Manual - English - Page 79
Manually Creating Professional-Level Embroidery Patterns (Manual Punching
 |
View all Brother International PEDESIGN 8.0 manuals
Add to My Manuals
Save this manual to your list of manuals |
Page 79 highlights
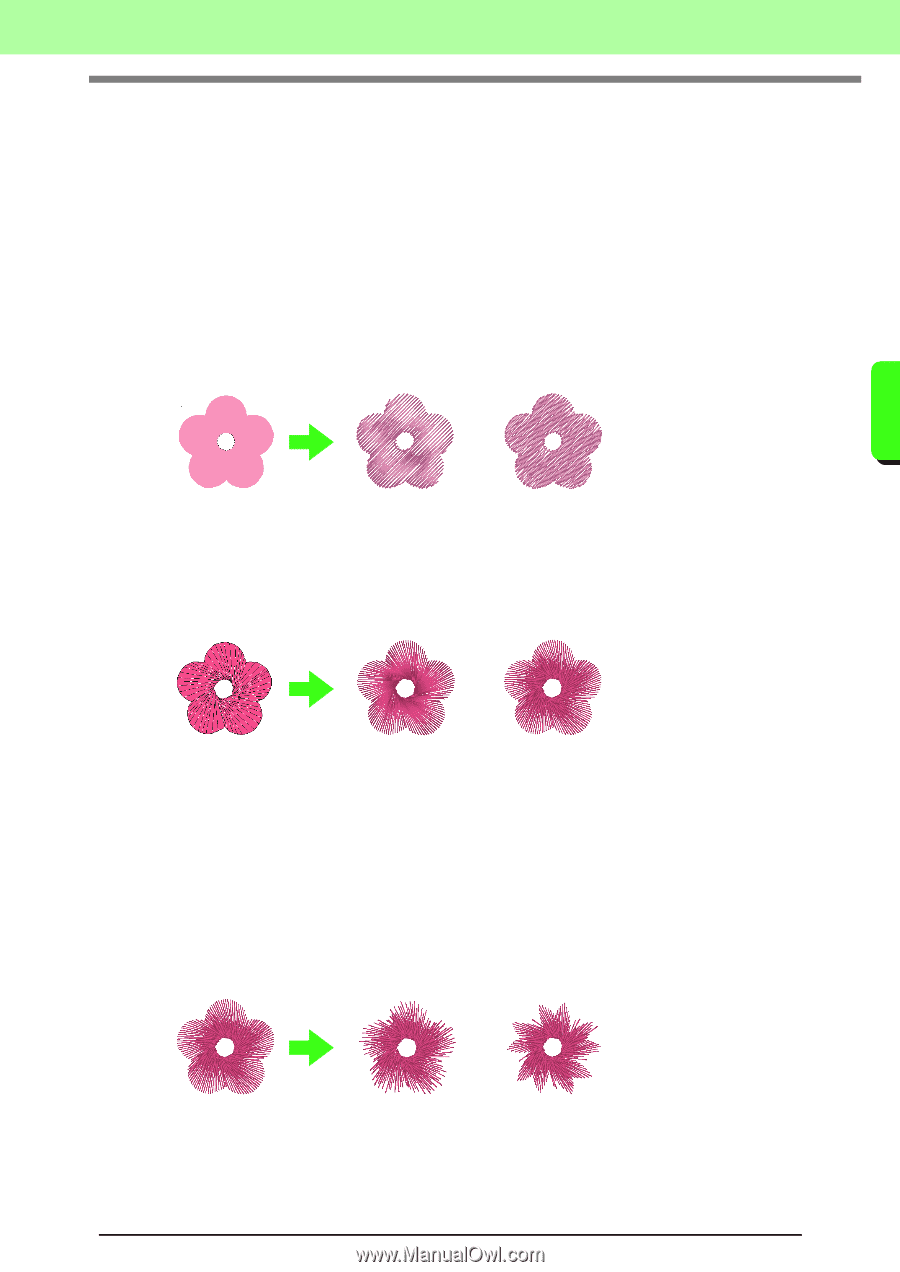
Arranging Embroidery Designs (Layout & Editing) Manually Creating Professional-Level Embroidery Patterns (Manual Punching) When fill stitches or satin stitches have been specified for region sewing, the angle of the stitching over the region is either all in the same direction or in a direction depending on the shape. However, if the Manual Punch tools are used, the sewing angle can be adjusted as desired to create patterns that appear more like manual embroidery. For example, if fill stitches or satin stitches have been specified for a region with the following shape, the stitching will appear as shown below. Satin stitch Fill stitch Arranging Embroidery Designs (Layout & Editing) If a manual punching pattern is created using the above image as a guide, the stitching will appear as shown below. Satin stitch Fill stitch The lines drawn in the pattern show the direction of the stitching. The stitching is created so that it turns around the center of the radial stitching. A three-dimensional appearance, like the flower petals, can be created for the flat design of this shape. In addition, feathered edge settings can be specified for manual punch patterns. By reducing the stitch density or specifying the length of the stitching, a feathered outline can be applied to the pattern. c Refer to "Featherd edge" in "Manual punch" on page 108. Example: Fill stitch Different variations can be applied to the flower petals. 77
-
 1
1 -
2
-
3
-
4
-
5
-
6
-
7
-
8
-
9
-
10
-
11
-
12
-
13
-
14
-
15
-
16
-
17
-
18
-
19
-
20
-
21
-
22
-
23
-
24
-
25
-
26
-
27
-
28
-
29
-
30
-
31
-
32
-
33
-
34
-
35
-
36
-
37
-
38
-
39
-
40
-
41
-
42
-
43
-
44
-
45
-
46
-
47
-
48
-
49
-
50
-
51
-
52
-
53
-
54
-
55
-
56
-
57
-
58
-
59
-
60
-
61
-
62
-
63
-
64
-
65
-
66
-
67
-
68
-
69
-
70
-
71
-
72
-
73
-
 74
74 -
 75
75 -
 76
76 -
 77
77 -
 78
78 -
 79
79 -
 80
80 -
 81
81 -
 82
82 -
 83
83 -
 84
84 -
85
-
86
-
87
-
88
-
89
-
90
-
91
-
92
-
93
-
94
-
95
-
96
-
97
-
98
-
99
-
100
-
101
-
102
-
103
-
104
-
105
-
106
-
107
-
108
-
109
-
110
-
111
-
112
-
113
-
114
-
115
-
116
-
117
-
118
-
119
-
120
-
121
-
122
-
123
-
124
-
125
-
126
-
127
-
128
-
129
-
130
-
131
-
132
-
133
-
134
-
135
-
136
-
137
-
138
-
139
-
140
-
141
-
142
-
143
-
144
-
145
-
146
-
147
-
148
-
149
-
150
-
151
-
152
-
153
-
154
-
155
-
156
-
157
-
158
-
159
-
160
-
161
-
162
-
163
-
164
-
165
-
166
-
167
-
168
-
169
-
170
-
171
-
172
-
173
-
174
-
175
-
176
-
177
-
178
-
179
-
180
-
181
-
182
-
183
-
184
-
185
-
186
-
187
-
188
-
189
-
190
-
191
-
192
-
193
-
194
-
195
-
196
-
197
-
198
-
199
-
200
-
201
-
202
-
203
-
204
-
205
-
206
-
207
-
208
-
209
-
210
-
211
-
212
-
213
-
214
-
215
-
216
-
217
-
218
-
219
-
220
-
221
-
222
-
223
-
224
-
225
-
226
-
227
-
228
-
229
-
230
-
231
-
232
-
233
-
234
-
235
-
236
-
237
-
238
-
239
-
240
-
241
-
242
-
243
-
244
-
245
-
246
-
247
-
248
-
249
-
250
-
251
-
252
-
253
-
254
-
255
-
256
-
257
-
258
-
259
-
260
-
261
-
262
-
263
-
264
-
265
-
266
-
267
-
268
-
269
 |
 |