Brother International PT-1600 Users Manual - English
Brother International PT-1600 - P-Touch 1600 Two-color Thermal Transfer Printer Manual
 |
UPC - 012502608073
View all Brother International PT-1600 manuals
Add to My Manuals
Save this manual to your list of manuals |
Brother International PT-1600 manual content summary:
- Brother International PT-1600 | Users Manual - English - Page 1
1600/1650 USER'S GUIDE GUÍA DE USUARIO • Read this User's Guide before you start using your P-touch. • Keep this User's Guide in a handy place for future reference. • Antes de usar su equipo por primera vez, lea cuidadosamente esta guía de usuario. • Guarde esta guía de usuario - Brother International PT-1600 | Users Manual - English - Page 2
Corporation 100 Somerset Corporate Boulevard Bridgewater, NJ 08807-0911 USA TEL : (908) 704-1700 declares that the product Product Name Model Number : Brother Label Printer P-touch : PT-1600/1650 complies with Part 15 of the FCC Rules. Operation is subject to the following two conditions - Brother International PT-1600 | Users Manual - English - Page 3
cassette 5 Cleaning 8 Cleaning the print head, rollers and tape cutter 8 Optional AC Adapter 9 Connecting the AC adapter 9 Turning the P-touch On/Off 9 2. Label Type Modes 10 Selecting a Label Type Mode 10 Normal and Vertical Modes 10 Rotate Mode and Rotate & Repeat Mode 11 Flag Mode 12 - Brother International PT-1600 | Users Manual - English - Page 4
With a Computer (for PT-1650 only) ...41 Installing the Software & Printer Driver 42 Before installation 42 Installing the P-touch Editor 3.2 software 43 Installing the USB printer driver 44 Reading the User's Guide 46 Using P-touch Editor 3.2 47 Starting up P-touch Editor 3.2 48 Displaying - Brother International PT-1600 | Users Manual - English - Page 5
Transfer mode 50 Downloading data to the P-touch 51 Adding a user-defined character image to the text 52 Using template data 52 Using downloaded database data 54 Backing up/restoring P-touch data 57 6. Appendix 58 Troubleshooting 58 Error Message List 59 Machine Specifications 63 Hardware - Brother International PT-1600 | Users Manual - English - Page 6
sole discretion. Brother reserves the right to supply a refurbished or remanufactured replacement Machine and/or accompanying Consumable and Accessory Item(s) and use refurbished parts provided such replacement products conform to the manufacturer's specifications for new product/parts. The repaired - Brother International PT-1600 | Users Manual - English - Page 7
and if you first reported the problem after 90 days, but before 1 year from the date of original purchase, Brother will furnish, free of charge (excluding labor charges), replacement part(s) for those part(s) of the Machine determined by Brother or its Authorized Service Center to be defective. You - Brother International PT-1600 | Users Manual - English - Page 8
Brother Product, we have a variety of support options for you to choose from: USA-Customer Service: Customer Service 877-478-6824 (voice) Customer Service 901-379-1210 (fax) Automated Faxback 800-521-2846 World Wide Web www.brother.com Supplies of sale) in case your Product requires service. Model # - Brother International PT-1600 | Users Manual - English - Page 9
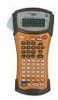
Started 1 Getting Started General Description Top view & bottom view Top view Display Tape cutter button Keyboard Back cover USB port (for PT-1650 only) AC adapter connector Battery compartment Tape cassette compartment Cassette release lever Print head Tape exit slot Bottom view 1 - Brother International PT-1600 | Users Manual - English - Page 10
Keyboard & LCD display PT-1600 1 234 56 7 E GF H Q P O N D CB A 0 8 9 I J K L M 1 Left text alignment text style (page 28) 8 Frame (page 25) 9 Low battery (page 6) 0 Block number (page 17) A Label Type setting (page 10) B Width setting (page 27) C Size setting (pages 26 & 27) D Length setting - Brother International PT-1600 | Users Manual - English - Page 11
Getting Started PT-1650 E GF H Q P O N 1 234 56 7 D CB A 0 8 9 I J K L M 1 Left text alignment (page text style (page 28) 8 Frame (page 25) 9 Low battery (page 6) 0 Block number (page 17) A Label Type setting (page 10) B Width setting (page 27) C Size setting (pages 26 & 27) D Length setting ( - Brother International PT-1600 | Users Manual - English - Page 12
a long period of time, disconnect the AC adapter, and remove the batteries to prevent them from leaking and damaging the machine. ● Use six AA alkaline or rechargeable (Ni-Cd or Ni-MH) batteries. ● Never try to disassemble the P-touch. ● It is recommended that you use the USB cable supplied with the - Brother International PT-1600 | Users Manual - English - Page 13
alkaline batteries. ☞ The rechargeable batteries cannot be recharged by leaving them in the P-touch with the AC adapter connected. Instead, recharge the batteries by using a battery charger designed specifically for the type of batteries used. For more details on the rechargeable batteries, refer - Brother International PT-1600 | Users Manual - English - Page 14
from the time that the unit is shipped from the factory, their life span may not meet specifications, depending on when the unit is put into use. Notes on tape cassettes ☞ Before installing the tape cassette, make sure that the end of the tape feeds under the tape guides. If the tape cassette to - Brother International PT-1600 | Users Manual - English - Page 15
the instruction sheet included with the Extra Strength Adhesive Tape cassette recommends cutting the tape with scissors, the tape cutter that this P-touch is equipped with is able to cut Extra Strength Adhesive Tape. Flexible ID Tape ☞ For applications that require more flexible labels, such - Brother International PT-1600 | Users Manual - English - Page 16
optional AC adapter. ☞ Be extremely careful not to touch the cutter blades with your fingers. Print head Dry Cotton swab Dry Cotton swab Tape cutter blades Tape cutter blades Dry cotton swab Notes on cleaning the print head & rollers ☞ If a blank horizontal streak appears through the label text - Brother International PT-1600 | Users Manual - English - Page 17
turn on or turn off the P-touch. If batteries are installed or the P-touch has remained plugged in using the AC adapter, the previous session's text is displayed when the P-touch is turned on again. This feature allows you to stop work on a label, turn off the machine, and return to it later without - Brother International PT-1600 | Users Manual - English - Page 18
to type in the desired setting). 6 Press n to apply the selected settings. 7 Type the text for each label in a separate text block. 8 Print the labels. • To print a single copy of each label, press p. • To print multiple copies or several copies while increasing certain characters, or to print using - Brother International PT-1600 | Users Manual - English - Page 19
lines that fit within the label are printed. ☞ For labels to be attached to cables and wires, we recommend using Flexible ID Tape. When wrapping Flexible ID Tape around cylindrical objects, the diameter of the object should be at least 1/8" (3 mm), otherwise the FLAG Label Type mode should be used - Brother International PT-1600 | Users Manual - English - Page 20
contain a maximum of 7 text lines. ☞ For labels to be attached to cables and wires, we recommend using Flexible ID Tape. To wrap Flexible ID Tape around cylindrical objects, use the FLAG Label Type mode when the diameter of the object is less than 1/8" (3 mm). In addition, the flag length should be - Brother International PT-1600 | Users Manual - English - Page 21
useful for identifying different components or ports that are not equally spaced. With the Panel Label Type mode, all blocks of the text are evenly spaced on a single label, making this label useful for a row of equally spaced switches, fuses or connectors on a patch panel. In addition, the text - Brother International PT-1600 | Users Manual - English - Page 22
length): * For the PORT Label Type mode: 0.80" to 8.00" (20 to 200 mm) Default: 1.20" (30 mm) * For the PANEL Label Type mode: 0.25" to 8.00" (6 to 200 mm) Default: 1.20" (30 mm) ● FRAME: * For the PORT Label Type mode: OFF, 1 , 2 , 3 , 4 Default: OFF * For the PANEL Label Type mode: OFF - Brother International PT-1600 | Users Manual - English - Page 23
3 Basic Functions Performing Basic Operations Choosing functions, parameters, settings and groups ● If "WX" appears, press l to select the previous item or r to select the next item. ● If " S T " appears, press u to select the previous item or d to select the next item. - Brother International PT-1600 | Users Manual - English - Page 24
Inputting Label Data Entering and editing text Entering characters ● To type a lowercase spaces ● To add a blank space to the text, press e. Moving the cursor Move the cursor in order to review and edit the text, or you can select the various functions and settings. ● To move the cursor left, right, - Brother International PT-1600 | Users Manual - English - Page 25
can be printed depends on the width of the tape. Tape Width 1/4" (6 mm) 3/8" (9 mm) 1/2" (12 mm) 3/4" (18 mm) 1" (24 mm) Maximum Number of Lines That Can Be Printed have the same formatting features. ☞ While trying to print a large amount of data at one time, some outputted labels may be blank. For - Brother International PT-1600 | Users Manual - English - Page 26
Deleting text ● To remove characters to the left of the cursor's current position, press b until all of the characters that you wish to delete are removed. ● To delete all of the text: 1 Press g, then b. 2 Press u or d to select either TEXT ONLY (to erase just the text) or TEXT&FORMAT (to erase all - Brother International PT-1600 | Users Manual - English - Page 27
Entering a bar code The Bar Code function allows bar codes to be printed as part of labels. ☞ Since this machine is not specifically designed for special bar code label-making, some bar code readers may not be able to read the labels. ☞ Bar code readers may not be able to read bar codes printed with - Brother International PT-1600 | Users Manual - English - Page 28
Entering bar code data 1 Press c. 2 Type in the new bar code data or edit the old data. 3 Press n to add the bar code to the text. ☞ To add special characters to the bar code data (only with protocols CODE39, CODABAR, EAN128 or CODE128), position the cursor below the character immediately to the - Brother International PT-1600 | Users Manual - English - Page 29
The following special characters can only be added to bar codes created using protocols EAN128 and CODE128. Symbol 0 1 2 3 4 5 6 7 8 9 10 11 12 13 14 15 16 17 Character (SPACE) Symbol 18 19 20 21 22 23 24 25 26 27 28 29 30 31 32 33 34 35 Character NUL SOH STX ETX EOT ENQ ACK Symbol 36 37 - Brother International PT-1600 | Users Manual - English - Page 30
6 Press n. ☞ A symbol can also be selected by typing in the corresponding code from the table below. For example, typing "A02", then pressing n adds "?" to the text. ☞ Some symbols are printed in color on the keypad. To use a symbol on a key, press g to enter Code mode, and then press the key for - Brother International PT-1600 | Users Manual - English - Page 31
Basic Functions Category Symbols H NUMBER 12 13 14 0 1 2 1 2 00 01 02 03 04 05 06 07 I PICTOGRAPH 00 01 02 03 04 05 J 00 01 02 03 04 05 06 07 08 09 ELECTRICAL / ELECTRONIC 10 11 12 13 14 15 16 17 18 19 20 21 22 23 24 25 26 27 28 29 30 31 32 33 - Brother International PT-1600 | Users Manual - English - Page 32
Press g, then A. 2 Press l or r until LENGTH is displayed. 3 Press u or d until the desired label length is displayed (or use the number keys to type in the desired setting). 4 Press n. 0.30" to 39.00" (6 to 999 mm) Specifying a margin size The size of the margins for the left and right sides of - Brother International PT-1600 | Users Manual - English - Page 33
Framing the text 1 Press g, then B. 2 Press u or d until the desired frame setting is displayed. 3 Press n. The selected setting is applied to the entire text. The following frame styles are available. Frame Setting Sample Frame Setting Sample 1 8 2 9 3 10 4 11 5 12 6 13 7 14 - Brother International PT-1600 | Users Manual - English - Page 34
shows the maximum text size that can be used with each tape width. Tape Width Maximum Text Size 1/4" (6 mm) 3/8" (9 mm) 1/2" (12 mm) 12 points (3 mm) 18 points (4 mm) 24 points (6 mm) 3/4" (18 mm) 36 points (9 mm) 1" (24 mm) 48 points (12 mm) ☞ With the AUTO setting selected and the text in - Brother International PT-1600 | Users Manual - English - Page 35
to the text line that the cursor is positioned in. The following width sizes are available for each text size as shown. Width Size 12 mm (48 points) NORMAL NARROW MINIMUM WIDE 9 mm (36 points) 6 mm (24 points) 4 mm (18 points) 3 mm (12 points) 2 mm (9 points) 1 mm (6 points) 27 - Brother International PT-1600 | Users Manual - English - Page 36
Specifying the character style Formatting the character style of all text 1 Press t. 2 Press l or r until GLB STYL is displayed. 3 Press u or d until the desired character style setting is displayed. 4 Press n. The selected setting is applied to the entire text. Formatting the character style of a - Brother International PT-1600 | Users Manual - English - Page 37
Specifying the alignment for all lines in the text 1 Press t. 2 Press l or r until ALIGN is displayed. 3 Press u or d until the desired setting is displayed. 4 Press n. The selected setting is applied to the entire text. The following alignment settings are available. LEFT CENTER RIGHT JUSTIFY - Brother International PT-1600 | Users Manual - English - Page 38
, type text into each of its fields, and then the label is ready to be printed. The following label templates are available. Key Template Name Tape Width Label Length 1 BIN BOX 3/4" × 2.75" (18 mm × 69 mm) Template Fields 1 SYMBOL? 2 TEXT1? 3 TEXT2? 4 BAR CODE? Sample 2 ASSET1 1" × 3.30 - Brother International PT-1600 | Users Manual - English - Page 39
to the text, press n or b. Feeding tape ● To feed out 1" (23 mm) of tape, press f. The message "FEED" is displayed. ☞ Press f to feed out any leftover printed tape after pressing o to quit printing. Printing a label ● To print out a label, press p. The message "WORKING", then "COPIES" followed - Brother International PT-1600 | Users Manual - English - Page 40
print specific sections of label text, or print label text as a mirror image. Printing multiple copies of a label TAPE TO CONTINUE" appears after each label is printed. Press the tape cutter button to cut off the label and continue printing. ☞ Be sure to cut the tape within 5 minutes from the time - Brother International PT-1600 | Users Manual - English - Page 41
Cut function is set to 1 or 3, the message "CUT TAPE TO CONTINUE" appears after each label is printed. Press the tape cutter button to cut off the label and continue printing. ☞ Be sure to cut the tape within 5 minutes from the time that the message appears. ☞ For the different options available for - Brother International PT-1600 | Users Manual - English - Page 42
CONTINUE is displayed in the Print Option menu, and then press n. Printing mirrored labels This function prints your label so that the text can be read from the adhesive side of the tape. If mirror-printed labels are attached to glass or some other transparent material, they can be read correctly - Brother International PT-1600 | Users Manual - English - Page 43
Option menu. 5 Press n (or p) to begin printing the specified number of labels. The number of each copy is displayed while it is being printed. ☞ When using the Mirror Printing function, the text should be printed on clear tape. ☞ To specify settings for additional Print Option functions, instead - Brother International PT-1600 | Users Manual - English - Page 44
Storing and Recalling Files Frequently used label text along with its formatting can be stored file is no longer needed or more space is necessary, the Clear function can be used to delete text files. Storing label text 1 Press m. 2 Press u or d until STORE is displayed. 3 Press n. 4 Press u or d - Brother International PT-1600 | Users Manual - English - Page 45
under the selected file number is recalled into the display. ☞ To view other parts of the selected text file, press l or r. Deleting text that has been selected text file(s), press b instead of n in step 7. ☞ To view other parts of the selected text file, press l or r. ☞ To remove a text file - Brother International PT-1600 | Users Manual - English - Page 46
of the P-touch. Selecting how tape is fed and cut The Cut function enables you to specify how the tape is fed out after it is printed. The settings of the Cut function consist of combinations of two different cut methods: cut-pause (where the machine stops printing so the label can be cut - Brother International PT-1600 | Users Manual - English - Page 47
label length can be recalibrated with the Length Adjust function by selecting a setting between -1 and +3. (The default setting is 0.) 1 Press g, then Z. 2 Press l or r until LENGTH ADJUST is displayed. 3 Press u or d until the desired setting is displayed, and then press n. 39 Machine Adjustments - Brother International PT-1600 | Users Manual - English - Page 48
units of measure The units used for displaying measurements can be set to millimeters (mm) or inches (inch). (The default setting is inch.) 1 Press g, then information This function can be used to display the version information for the P-touch software and built-in symbol set. 1 Press g, then Z. 2 - Brother International PT-1600 | Users Manual - English - Page 49
for PT-1650 only) This P-touch is equipped with a USB port, allowing you to connect it to a computer running Microsoft® Windows®. The enclosed CD-ROM contains P-touch Editor 3.2, which is installed together with the printer driver, Transfer Manager and Backup Manager. ● P-touch Editor 3.2 is a label - Brother International PT-1600 | Users Manual - English - Page 50
bar codes and images, enabling you to design just about any label that you can imagine. With this application, the printer driver must also be installed in order for the application to communicate with the P-touch. ☞ Although the P-touch can be connected to the computer through a USB connection - Brother International PT-1600 | Users Manual - English - Page 51
then remove the CD-ROM from the CD-ROM drive. ☞ To uninstall the P-touch Editor 3.2 software, double-click "Add/Remove Programs" ("Add or Remove Programs" in Windows® XP) in the Control Panel window, and then follow the instructions that appear. 43 Using P-touch With a Computer (for PT-1650 only) - Brother International PT-1600 | Users Manual - English - Page 52
Installing the USB printer driver ☞ Do not connect the P-touch to the computer until you are instructed to do so, otherwise the printer driver may not be installed correctly. With Windows® 98, 98 SE, Me or 2000: 1 When the dialog box appears, informing you that the P-touch printer driver will be - Brother International PT-1600 | Users Manual - English - Page 53
then remove the CD-ROM from the computer. ☞ To uninstall the printer driver, start up the installer on the CD-ROM, click the Driver button in the dialog box that appeared, and then select the desired option and follow the instructions that appear. 45 Using P-touch With a Computer (for PT-1650 only) - Brother International PT-1600 | Users Manual - English - Page 54
is quickly available at any time. Since the User's Guide is an HTML document, a browser is needed to read it. To view the User's Guide from the CD-ROM: 1 Start up Windows® Explorer. 2 Select the CD-ROM drive. 3 Double-click the Ptouch folder 4 Double-click the Manual folder 5 Double-click "Main.htm - Brother International PT-1600 | Users Manual - English - Page 55
with the Numbering function on the P-touch machine. ☞ Backgrounds specified with P-touch Editor are not compatible with the P-touch machine. ☞ Time and date objects using the "At Printing" setting on P-touch Editor will not be printed. ☞ The printed label may differ from the image that appears - Brother International PT-1600 | Users Manual - English - Page 56
same unless specifically mentioned. The desired Properties can be displayed by clicking the icon in the property dock. Page Properties icon Text Properties icon Font Properties icon Database Properties icon Layout Properties icon Page Properties ( ) When the P-touch is selected as the printer - Brother International PT-1600 | Users Manual - English - Page 57
details, refer to Reading the User's Guide on page 46. Notes on usage Bar codes Keep the following points in mind when using P-touch Editor 3.2 to print bar codes. • Bar code readers may not be able to read bar codes printed with certain ink colors on certain label tape colors. • Be sure to test - Brother International PT-1600 | Users Manual - English - Page 58
be used with P-touch Editor. Refer to the User's Guide supplied on the P-touch Editor 3.2 CD touch. ☞ Be sure not to turn off the P-touch while data is being set to it, otherwise the data will be lost. ☞ Regardless of whether the P-touch is being operated from batteries or the AC adapter, the machine - Brother International PT-1600 | Users Manual - English - Page 59
to the computer through a USB connection, label layouts created in P-touch Editor cannot be printed directly from the application. 1 Make sure that the P-touch is in Transfer mode. (For more details, refer to Entering Transfer mode on page 50.) 2 • For downloading a template or database to the - Brother International PT-1600 | Users Manual - English - Page 60
file can be cut from a file with the specifications described above. ☞ The downloaded image is automatically resized to the width of the tape being used. Using template data A label layout created with P-touch Editor (*.lbl file) can be downloaded to the P-touch, where it can be used as a template - Brother International PT-1600 | Users Manual - English - Page 61
touch can only contain one database at a time. However, the database can be replaced and then type in the new text. RM NO.:[Part Nam] NO 1: AC adapter 5 Press p. To select a range of database records labels using the specified range of records. Using P-touch With a Computer (for PT-1650 only) 53 - Brother International PT-1600 | Users Manual - English - Page 62
of data at one time, some outputted labels may be blank. For example, when printing 50 records, the maximum number of characters that can be printed at one time is limited to approximately 200. Using downloaded database data Either an *.mdb database, created with P-touch Editor 3.2, or a database - Brother International PT-1600 | Users Manual - English - Page 63
labels on page 34.) ☞ While trying to print a large amount of data at one time, some outputted labels may be blank. For example, when printing 50 records, the maximum number of characters that can be printed at one time is limited to approximately 200. 55 Using P-touch With a Computer (for PT-1650 - Brother International PT-1600 | Users Manual - English - Page 64
selecting a database record whose data is to be added to a label, the database can be searched for records containing specific characters or records with a specific number. To search the database for a record containing specific characters: 1 Press g and e until the search screen is displayed - Brother International PT-1600 | Users Manual - English - Page 65
touch onto the computer as a backup in case the P-touch data is lost. In addition, the data backed up onto the computer can be restored onto the P-touch. • Label templates • Database • User-defined character images • Label files stored in the P-touch Printer touch With a Computer (for PT-1650 only) - Brother International PT-1600 | Users Manual - English - Page 66
printed label. 6 Striped tape appears. 7 The P-touch has "locked up" (i.e., nothing happens when a key is pressed). 58 Solution • Check that the AC adapter (model AD-60) is connected correctly. • If you are using batteries, check that they are correctly inserted. • If the batteries are low, replace - Brother International PT-1600 | Users Manual - English - Page 67
blocks of text have been entered with the PANEL Label Type mode selected. • This message appears if 7 message appears if the tape cassette was changed while the P-touch paused for the tape to be cut. add any more. • Change the tape cassette back again. • Replace the batteries with six new AA - Brother International PT-1600 | Users Manual - English - Page 68
SETTING IN LABEL TYPE MODE! On 3/4" (18 mm) tape: CHECK THE NUMBER OF LINES! 5 MAX On 1/2" (12 mm) tape: CHECK THE NUMBER OF LINES! 3 MAX On 3/3" (9 mm) and 1/4" (6 mm) tape: CHECK THE NUMBER OF LINES! 2 MAX CHOOSE COPIES LESS THAN 1000! CUTTER ERROR! IMAGE CHARACTER SIZE ERROR! (for PT-1650 only - Brother International PT-1600 | Users Manual - English - Page 69
and end of the bar code data. • Install a 1" (24-mm)-wide tape cassette. • Install a 3/4" (18-mm)-wide tape cassette. • Install a 1/2" (12-mm)-wide tape cassette. • Install a 3/8" (9-mm)-wide tape cassette. • Install a 1/4" (6-mm)-wide tape cassette. • Delete some of the text. • Delete an unwanted - Brother International PT-1600 | Users Manual - English - Page 70
FORMAT (for PT-1650 only) NO TAPE! RECORD NOT FOUND! (for PT-1650 only) downloaded to the P-touch when you press g, then i. • This message appears if no tape cassette is installed when you try to feed the tape installed tape. • This message appears if the length of the text is longer than the label - Brother International PT-1600 | Users Manual - English - Page 71
Machine Specifications Appendix Hardware Power supply: Input device: LCD: Print tape: Print head: Tape cutter: Dimensions: Weight: Six AA alkaline batteries or Six AA rechargeable batteries or AC adapter (model AD-60) Keyboard (56 keys) 48 × 132 dots + Caps and other indicators TZ tape is - Brother International PT-1600 | Users Manual - English - Page 72
(For USA Only) The following supplies and accessories are available for your P-touch machine and can be ordered directly from Brother should your retailer not stock them. StockNo. Description Price Extra Strength Adhesive Tapes: Super Adhesive Strength: laminated tapes with twice the adhesive - Brother International PT-1600 | Users Manual - English - Page 73
Tweety Pattern TZ-WT41 Black on Tazmanian Devil Pattern 1/2" (12mm)-wide laminated tapes TZ-131 Black on Clear TZ-135 White on Clear TZ-231 Black Black on Red 1/4" (6mm)-wide laminated tapes TZ-111 Black on Clear TZ-211 Black on White TZ-315 White on Black Price $22.99 $23.99 $23.99 - Brother International PT-1600 | Users Manual - English - Page 74
*all tapes are 26.2' long unless otherwise noted StockNo. Options XXXXX Description Carrying Case Price XXXX There are 4 easy ways to order directly from Brother. 1. Call us Toll Free 't already returned your machine warranty card, take a few minutes to register at www.registermybrother.com 66 - Brother International PT-1600 | Users Manual - English - Page 75
Index A AC adapter 9 Accent function 18 15 default setting 15 cleaning print head 8 rollers 8 tape cutter 8 Clear function 18 Code indicator 2, 3 confirming pause 38 D database record range 53 databases 53, 54 Label Type mode 55 searching 56 default setting 15 deleting memory files - Brother International PT-1600 | Users Manual - English - Page 76
2, 3 Insert key 17 installing printer driver 44 P-touch Editor 42 italic text style 28 indicator 2, 3 J justified text alignment 29 indicator 2, 3 K keyboard 2 L label margins 24 Label Type key 2, 3 Label Type mode 10 68 databases 55 Label Type setting indicator......... 2, 3 language - Brother International PT-1600 | Users Manual - English - Page 77
print head 8 Print key 2, 3, 31 printer driver installing 44 printing database record range 53 text block range 34 problems 58 P-touch Editor installing 42 starting 47 template 52 User's Guide 46 R recalling 37 Repeat Printing function 32 restoring 57 return key 2, 3, 15, 17 right text - Brother International PT-1600 | Users Manual - English - Page 78
call Brother Customer Service at: Voice 1-877-4-PTouch, or Fax 1-901-379-1210 Assistance on the Internet For product information and downloading the latest drivers: http://www.brother.com For purchasing accessories and certain Brother products: http://www.brothermall.com Accessories and Supplies - Brother International PT-1600 | Users Manual - English - Page 79
visit our web site at http://www.brothermall.com. Please refer to the Accessories listing in your User's Guide for stock no. and price. Stock # Description Quantity Price To complete the Order Form: 1. Review the reverse side of this form and select the desired items. 2. Complete the form above - Brother International PT-1600 | Users Manual - English - Page 80
- Brother International PT-1600 | Users Manual - English - Page 81
visit our web site at http://www.brothermall.com. Please refer to the Accessories listing in your User's Guide for stock no. and price. Stock # Description Quantity Price To complete the Order Form: 1. Review the reverse side of this form and select the desired items. 2. Complete the form above - Brother International PT-1600 | Users Manual - English - Page 82
- Brother International PT-1600 | Users Manual - English - Page 83
GUÍA DE USUARIO - Brother International PT-1600 | Users Manual - English - Page 84
100 Somerset Corporate Boulevard Bridgewater, NJ 08807-0911 EE.UU. TEL : (908) 704-1700 declara que el producto Nombre del producto Número de modelo : Impresora de etiquetas P-touch de Brother : PT-1600/1650 cumple la Parte 15 de las Normas FCC. El funcionamiento está sujeto a las dos condiciones - Brother International PT-1600 | Users Manual - English - Page 85
del cabezal de impresión, rodillos y cortador de la cinta 8 Adaptador de CA opcional 9 Conexión del adaptador de CA 9 Conexión/desconexión de la P-touch 9 2. Modos de tipo de etiqueta 10 Selección de un modo de tipo de etiqueta 10 Modos Normal y Vertical 10 Modos Girar (ROTATE) y Girar - Brother International PT-1600 | Users Manual - English - Page 86
40 Cambio de las unidades de medida 40 Cambio del idioma 40 Visualización de información sobre la versión 40 5. Uso de la P-touch con un PC(sólo para PT-1650) ........41 Instalación de los programas y del controlador de impresión ...... 42 Antes de la instalación 42 Instalación del programa - Brother International PT-1600 | Users Manual - English - Page 87
de plantilla 52 Uso de los datos de la base de datos descargada 54 Cómo hacer una copia de seguridad de los datos de la P-touch y restaurarlos 57 6. Apéndice 58 Solución de problemas 58 Lista de mensajes de error 59 Características técnicas de la máquina 63 Hardware ...63 Software - Brother International PT-1600 | Users Manual - English - Page 88
iv - Brother International PT-1600 | Users Manual - English - Page 89
ón general Vista superior y vista inferior Vista Visualizador Botón del cortador de la cinta Teclado Cubierta posterior Puerto USB (sólo para PT-1650) Conector del adaptador de CA Compartimento de las pilas Compartimento del casete de cinta Palanca de liberación del casete Cabezal de - Brother International PT-1600 | Users Manual - English - Page 90
Teclado y visualizador de LCD PT-1600 1 234 56 7 E GF H Q P O N D CB A 0 8 9 I J K L M 1 Alineación del texto a la izquierda (página 29) 2 Alineación del texto centrada (página 29) 3 Alineación del texto a la derecha (página 29) 4 Alineación - Brother International PT-1600 | Users Manual - English - Page 91
Para empezar PT-1650 E GF H Q P O N 1 234 56 7 D CB A 0 8 9 I J K L M 1 Alineación del texto a la izquierda (página 29) 2 Alineación del texto centrada (página 29) 3 Alineación del texto a la derecha (página 29) 4 Alineación - Brother International PT-1600 | Users Manual - English - Page 92
que se entrega con la unidad P-touch. Si tiene que utilizar otro cable USB, asegúrese de que es de buena calidad (sólo para PT-1650). ● IBM® y PC-DOS® son marcas comerciales de International Business Machines, Inc(sólo para PT-1650). ● Microsoft® y Windows® son marcas registradas de Microsoft Corp - Brother International PT-1600 | Users Manual - English - Page 93
. Pueden usarse pilas recargables (Ni-Cd o Ni-MH) en lugar de 6 pilas alcalinas. ☞ Las pilas recargables no se pueden cargar dejándolas en la P-touch con el adaptador de CA conectado. Cárguelas con un cargador diseñado específicamente para el tipo de pilas utilizado. Para más detalles acerca de las - Brother International PT-1600 | Users Manual - English - Page 94
; de lo contrario, el texto visualizado en la pantalla y cualquier texto almacenado en la memoria se perderán. ☞ Si prevé que no va a utilizar la P-touch durante un período prolongado, extraiga las pilas. Cuando se desconecta la máquina, se pierden el texto que se muestra en la pantalla y el que - Brother International PT-1600 | Users Manual - English - Page 95
adhesiva extra se recomienda cortarla con tijeras, el cortador de esta P-touch es capaz de cortar este tipo de cinta. Cinta de identificación objetos cilíndricos, el diámetro del objeto debe ser, como mínimo, de 1/8" (3 mm); si es menor, pegue la etiqueta en forma de bandera y utilice el modo de tipo - Brother International PT-1600 | Users Manual - English - Page 96
que limpiar ciertas partes de la P-touch. Puede que se adhiera polvo o suciedad al cabezal de impresión y a los rodillos de la P-touch, especialmente si se cabezal de impresión y los rodillos, pulse o para desconectar la P-touch y, a continuación, extraiga las pilas y desenchufe el adaptador de CA - Brother International PT-1600 | Users Manual - English - Page 97
acerca del adaptador de CA ☞ Emplee sólo el adaptador de CA diseñado exclusivamente para esta máquina. ☞ Si prevé que no va a utilizar la P-touch durante un período prolongado, desconecte el adaptador de CA. Cuando se desconecta la máquina, se pierden el texto que se muestra en la pantalla y - Brother International PT-1600 | Users Manual - English - Page 98
2 Modos de tipo de etiqueta Selección de un modo de tipo de etiqueta Presionando a, podrá seleccionar uno de los dos modos normales de diseño e impresión de etiquetas personalizadas, o cualquiera de los seis modos especiales disponibles para imprimir etiquetas preformateadas para la identificación - Brother International PT-1600 | Users Manual - English - Page 99
de identificación flexible. Cuando enrolle cinta de identificación flexible en torno a objetos cilíndricos, el diámetro del objeto debe ser, como mínimo, de 1/8" (3 mm); si es menor, utilice el modo de tipo de etiqueta FLAG (bandera). Además, los extremos solapados de la etiqueta o la longitud de la - Brother International PT-1600 | Users Manual - English - Page 100
en ambos extremos de etiquetas diferentes. La longitud de la parte no impresa de esta etiqueta es igual a la circunferencia del " (0 a 100 mm) Valor predeterminado: 0,25" (7 mm) ● FLAG LEN (longitud de la bandera): 0,40" a 8,00" (10 a 200 mm) Valor predeterminado: 1,20" (30 mm) ● FRAME (marco - Brother International PT-1600 | Users Manual - English - Page 101
Modos de tipo de etiqueta Modos Puerto (PORT) y Panel (PANEL) Las etiquetas impresas usando estos modos de tipo de etiqueta se pueden usar para identificar diversos componentes o paneles. Con el modo de tipo de etiqueta Port, cada bloque de texto se imprime en una etiqueta diferente, por lo que - Brother International PT-1600 | Users Manual - English - Page 102
Para el modo de tipo de etiqueta PORT: 0,80" a 8,00" (20 a 200 mm) Valor predeterminado: 1,20" (30 mm) * Para el modo de tipo de etiqueta PANEL: 0,25" a 8,00" (6 a 200 mm) Valor predeterminado: 1,20" (30 mm) ● FRAME (marco): * Para el modo de tipo de etiqueta PORT: OFF, 1 , 2 , 3 , 4 Valor - Brother International PT-1600 | Users Manual - English - Page 103
3 Funciones básicas Cómo realizar las operaciones básicas Elección de funciones, parámetros, ajustes y grupos ● Si aparece "WX", pulse l para seleccionar el elemento anterior o r para seleccionar el elemento siguiente. ● Si aparece " S T ", pulse u para seleccionar el elemento anterior o - Brother International PT-1600 | Users Manual - English - Page 104
Introducción de los datos de la etiqueta Introducción y modificación de texto Introducción de caracteres ● Para escribir una letra minúscula, un número, una coma o un punto, sólo tiene que pulsar la tecla correspondiente. ● Para escribir una letra mayúscula, pulse h para entrar en el modo de mayú - Brother International PT-1600 | Users Manual - English - Page 105
depende de la anchura de la cinta. Anchura de la cinta 1/4" (6 mm) 3/8" (9 mm) 1/2" (12 mm) 3/4" (18 mm) 1" (24 mm) Número máximo de líneas que pueden imprimirse 2 2 3 5 en el que se encuentra el cursor aparece indicado en la parte inferior del visualizador. ☞ Todos los bloques de texto tienen las - Brother International PT-1600 | Users Manual - English - Page 106
Borrado de texto ● Para eliminar caracteres situados a la izquierda de la posición actual del cursor, pulse b hasta que haya borrado todos los caracteres deseados. ● Para borrar todo el texto: 1 Pulse g y luego b. 2 Pulse u o d para seleccionar TEXT ONLY (para borrar sólo el texto) o TEXT&FORMAT ( - Brother International PT-1600 | Users Manual - English - Page 107
añadir "Ä" al texto, escriba "A2" y luego pulse n. Funciones básicas Introducción de un código de barras Esta función permite imprimir códigos de barras como parte de las etiquetas. ☞ Como esta máquina no ha sido específicamente diseñada para hacer etiquetas de códigos de barras, es posible que - Brother International PT-1600 | Users Manual - English - Page 108
Introducción de los datos del código de barras 1 Pulse c. 2 Escriba los datos del nuevo código de barras o modifique los datos existentes. 3 Pulse n para añadir el código de barras al texto. ☞ Para añadir caracteres especiales a los datos del código de barras (sólo con los protocolos CODE39, CODABAR - Brother International PT-1600 | Users Manual - English - Page 109
Los siguientes caracteres especiales solamente podrán añadirse a códigos de barras creados con los protocolos EAN128 y CODE128. Símbolo 0 1 2 3 4 5 6 7 8 9 10 11 12 13 14 15 16 17 Carácter (SPACE) Símbolo 18 19 20 21 22 23 24 25 26 27 28 29 30 31 32 33 34 35 Carácter NUL SOH STX ETX EOT ENQ - Brother International PT-1600 | Users Manual - English - Page 110
6 Pulse n. ☞ También se puede seleccionar un símbolo escribiendo el código correspondiente, que puede ver en la tabla siguiente. Por ejemplo, para añadir "?" al texto, escriba "A02" y luego pulse n. ☞ Algunos símbolos aparecen impresos en color sobre el teclado. Para usar un símbolo impreso sobre - Brother International PT-1600 | Users Manual - English - Page 111
Categoría Símbolos H NUMÉRICOS 12 13 14 0 1 2 1 2 00 01 02 03 04 05 06 07 I PICTOGRÁFICOS 00 01 02 03 04 05 J 00 01 02 03 04 05 06 07 08 09 ELECTRICIDAD / 10 11 12 13 14 15 16 17 18 19 ELECTRÓNICA 20 21 22 23 24 25 26 27 28 29 Funciones bá - Brother International PT-1600 | Users Manual - English - Page 112
3 Pulse u o d hasta que se visualice la longitud de etiqueta deseada (o utilice las teclas numéricas para escribirla). 4 Pulse n. 0,30" a 39,00" (6 a 999 mm) Definición de un tamaño de margen Se puede definir el tamaño de los márgenes izquierdo y derecho del texto. 1 Pulse g y luego A. 2 Pulse - Brother International PT-1600 | Users Manual - English - Page 113
Cómo enmarcar el texto 1 Pulse g y luego B. 2 Pulse u o d hasta que se visualice el ajuste de marco deseado. 3 Pulse n. El ajuste seleccionado se aplicará a todo el texto. Están disponibles los siguientes estilos de marco: Ajuste de marco Muestra Ajuste de marco Muestra 1 8 2 9 3 10 4 - Brother International PT-1600 | Users Manual - English - Page 114
con cada anchura de cinta. Anchura de la cinta Tamaño máximo del texto 1/4" (6 mm) 12 puntos (3 mm) 3/8" (9 mm) 18 puntos (4 mm) 1/2" (12 mm) 24 puntos (6 mm) 3/4" (18 mm) 36 puntos (9 mm) 1" (24 mm) 48 puntos (12 mm) ☞ Con el ajuste AUTO seleccionado y el texto de un bloque de una sola - Brother International PT-1600 | Users Manual - English - Page 115
situado el cursor. Están disponibles las siguientes anchuras para cada tamaño de texto indicado: Anchura Tamaño 12 mm (48 puntos) NORMAL NARROW (condensado) MINIMUM (mínimo) WIDE (ancho) 9 mm (36 puntos) 6 mm (24 puntos) 4 mm (18 puntos) 3 mm (12 puntos) 2 mm (9 puntos) 1 mm (6 puntos) 27 - Brother International PT-1600 | Users Manual - English - Page 116
Definición del estilo de los caracteres Cómo formatear el estilo de los caracteres de todo el texto 1 Pulse t. 2 Presione l o r hasta que se visualice GLB STYL. 3 Pulse u o d hasta que se visualice el ajuste de estilo de caracteres deseado. 4 Pulse n. El ajuste seleccionado se aplicará a todo el - Brother International PT-1600 | Users Manual - English - Page 117
Funciones básicas Definición de la alineación de todas las líneas de texto 1 Pulse t. 2 Pulse l o r hasta que se visualice ALIGN. 3 Pulse u o d hasta que se visualice el ajuste deseado. 4 Pulse n. El ajuste seleccionado se aplicará a todo el texto. Están disponibles los siguientes ajustes de - Brother International PT-1600 | Users Manual - English - Page 118
ID LABEL 1" × 2.75" (24 mm × 69 mm) 1 TEXT1? 3 TEXT3? 2 TEXT2? 7 SIGN 1" × 4.00" 1 SYMBOL? 2 TEXT1? (24 mm × 101 mm) 3 TEXT2? 8 BADGE 3/4" × 4.00" 1 NAME? (18 mm × 101 mm) 2 COMPANY? 9 FILING 1/2" × 3.50" (12 mm × 88 mm) 1 TITLE? 2 SUBTITLE? 0 IC CHIP 3/8" × 1.00" (9 mm × 25 mm - Brother International PT-1600 | Users Manual - English - Page 119
preliminar de impresión a la derecha o a la izquierda, pulse l o r. ☞ Para volver al texto, pulse n o b. Avance de la cinta ● Para hacer avanzar 1" (23 mm) de cinta, pulse f. Aparecerá el mensaje "FEED". ☞ Pulse f para hacer avanzar el excedente de cinta impresa después de pulsar o para abandonar la - Brother International PT-1600 | Users Manual - English - Page 120
. El número de cada copia se visualizará mientras esta se esté imprimiendo. ☞ Si la función de corte está ajustada a 1 o 3, aparecerá el mensaje "CUT TAPE TO CONTINUE" (corte la cinta para continuar) después de que se imprima cada etiqueta. Pulse el botón del cortador de la cinta para cortar la - Brother International PT-1600 | Users Manual - English - Page 121
definido. El número de cada copia se visualizará mientras esta se esté imprimiendo. ☞ Si la función de corte está ajustada a 1 o 3, aparecerá el mensaje "CUT TAPE TO CONTINUE" (corte la cinta para continuar) después de que se imprima cada etiqueta. Pulse el botón del cortador de la cinta para cortar - Brother International PT-1600 | Users Manual - English - Page 122
☞ Para definir ajustes para otras funciones de opción de impresión en lugar de continuar con el paso 9, presione u o d hasta que se visualice CONTINUE en el menú de opciones de impresión y seguidamente presione n. ☞ Si en el paso 5 se selecciona un código de barras como campo de numeración, sáltese - Brother International PT-1600 | Users Manual - English - Page 123
3 Pulse u o d hasta que se visualice ON. 4 Pulse n (o p). Aparecerá START en el menú de opciones de impresión. 5 Presione n (o p) para empezar a imprimir el número de etiquetas definido. El número de cada copia se visualizará mientras esta se esté imprimiendo. ☞ Cuando emplee la función de impresión - Brother International PT-1600 | Users Manual - English - Page 124
Almacenamiento e invocación de archivos Si hay textos de etiquetas que usa con frecuencia, puede guardarlos en memoria, junto con su formato, y después invocarlos fácilmente para poder modificarlos e imprimirlos con rapidez. Cuando se almacena un archivo de texto, se le asigna un número para poder - Brother International PT-1600 | Users Manual - English - Page 125
(o "CLEAR ALL?" si se han seleccionado todos los archivos). 7 Pulse n. Se borrará el texto almacenado en los archivos seleccionados. ☞ Para ver otras partes del archivo de texto seleccionado, pulse l o r. ☞ Para quitar un archivo de texto de la lista de archivos a borrar, visualícelo y pulse e para - Brother International PT-1600 | Users Manual - English - Page 126
4 Ajustes de la máquina Existen diversas funciones que permiten cambiar y ajustar el funcionamiento de la P-touch. Selección de la forma de avance y corte de la cinta La función Cut permite definir la forma de avance de la cinta una vez impresa. - Brother International PT-1600 | Users Manual - English - Page 127
1 Pulse g y luego Z. 2 Pulse l o r hasta que se visualice CONTRAST. 3 Pulse u o d hasta que se visualice el ajuste deseado y seguidamente pulse n. Ajuste de la función de reducción automática Con la función de reducción automática, puede seleccionar si la anchura del texto (TEXT WIDTH) o el tamaño - Brother International PT-1600 | Users Manual - English - Page 128
de medida Las unidades usadas para indicar las medidas pueden ajustarse a milímetros (mm) o a pulgadas (inch). (El ajuste predeterminado es inch.) 1 Pulse g función puede usarse para ver información sobre la versión del software P-touch y del juego de símbolos incorporados. 1 Pulse g y luego Z. - Brother International PT-1600 | Users Manual - English - Page 129
con un PC (sólo para PT-1650) Esta P-touch está provista de un puerto USB que permite conectarla a un PC que opere en Microsoft® Windows®. El CD-ROM adjunto incluye P-touch Editor 3.2, que se instala junto con el controlador de impresión, Transfer Manager y Backup Manager. ● P-touch Editor 3.2 es un - Brother International PT-1600 | Users Manual - English - Page 130
poderse comunicar con la P-touch, esta aplicación requiere la instalación previa del controlador de impresión. ☞ Aunque la P-touch se puede conectar al Monitor Puerto USB Unidad de CD-ROM IBM PC/AT o compatible Microsoft® Windows® 98, 98 SE, Me, 2000 Professional, XP Professional o XP Home Edition - Brother International PT-1600 | Users Manual - English - Page 131
el cuadro de diálogo "User Information" (Información acerca del touch Editor 3.2 de forma que sea compatible con Access 2000.Para actualizar P-touch Editor 3.2 para Access 2000, haga clic en "Yes" (Sí) y siga las instrucciones de la pantalla. 43 Uso de la P-touch con un PC (sólo para PT-1650 - Brother International PT-1600 | Users Manual - English - Page 132
y, a continuación, mantenga pulsada g y pulse o para encender la P-touch en modo Transfer. Un nuevo cuadro de diálogo indica que se de su unidad. En Windows® XP: ☞ Aparece un mensaje que informa de que el controlador de impresión ha pasado las pruebas de compatibilidad de Brother y de que hay que - Brother International PT-1600 | Users Manual - English - Page 133
advierte de que el software no ha superado la prueba Windows® Logo. 4 Haga clic en "Continue Anyway" (Contin Driver Setup" (Instalación del controlador) que indica que el controlador de impresión ya se ha instalado, haga clic en "Finish" (Finalizar). Uso de la P-touch con un PC (sólo para PT-1650 - Brother International PT-1600 | Users Manual - English - Page 134
Guía del usuario La Guía del usuario de P-touch Editor puede consultarse insertando el CD-ROM cada vez que el CD-ROM: 1 Inicie el Explorador de Windows®. 2 Seleccione la unidad de CD-ROM. 3 Haga doble clic en la carpeta Ptouch. 4 Haga doble clic en la carpeta Manual. 5 Haga doble clic en "Main.htm". - Brother International PT-1600 | Users Manual - English - Page 135
ía la etiqueta y la imprime en 2 o más etiquetas). ☞ La longitud de la etiqueta ajustada con P-touch Editor y el ajuste de longitud de etiqueta de la P-touch pueden diferir ligeramente a consecuencia del margen de error de cálculo de la P-touch. 47 Uso de la P-touch con un PC (sólo para PT-1650) - Brother International PT-1600 | Users Manual - English - Page 136
para Windows® 2000 y XP son iguales, salvo indicación expresa en contrario. Puede ver las propiedades que desee haciendo clic en el icono correspondiente de la zona de propiedades. Página Texto Fuente Base de datos Maquetación Propiedades de la página ( ) Cuando se seleccione la P-touch como - Brother International PT-1600 | Users Manual - English - Page 137
a Windows® 98, 98 SE y Me, las operaciones para Windows® 2000 pulse la tecla Intro del teclado. ☞ Con P-touch Editor 3.2, el texto siempre se escribe en modo presentes los puntos siguientes cuando utilice P-touch Editor 3.2 para imprimir códigos de la P-touch. Consulte en la página 19 una lista - Brother International PT-1600 | Users Manual - English - Page 138
3.2 no se ha actualizado para Access 2000 durante la instalación, consulte el archivo Readme situado en Ptouch\Editor\Ac2k del CD-ROM y ejecute el programa. • Además de los archivos .mdb, P-touch Editor 3.2 puede importar archivos de otros tipos, como .csv. Los archivos guardados en formato .csv con - Brother International PT-1600 | Users Manual - English - Page 139
se están transfiriendo. 7 Cuando aparezca el mensaje "The transfer was completed successfully." (La transferencia ha terminado con éxito.), haga clic en "OK" (Aceptar). 8 En la P-touch, presione o para salir del modo Transfer y apagar la P-touch. 51 Uso de la P-touch con un PC (sólo para PT-1650) - Brother International PT-1600 | Users Manual - English - Page 140
. Para restaurar las plantillas iniciales, use Transfer Manager para descargar los archivos *.pd3 de la carpeta situada en \etc\Transfer, dentro de la carpeta P-touch Editor. ☞ Sólo se puede asignar una imagen de carácter o una plantilla a cada tecla PF. Si ya se ha asignado una imagen de carácter - Brother International PT-1600 | Users Manual - English - Page 141
Para modificar cualquier texto del registro, pulse u o d para RM NO.:[Part Nam] NO 1: AC adapter visualizar el texto y, a continuación, escriba el nuevo texto. 5 Pulse p. a imprimir las etiquetas usando el intervalo de registros definido. Uso de la P-touch con un PC (sólo para PT-1650) 53 - Brother International PT-1600 | Users Manual - English - Page 142
está ajustada a 1 o 3, aparecerá el mensaje "CUT TAPE TO CONTINUE" (corte la cinta para continuar) después de que se pueden usar con una plantilla o se pueden añadir directamente a una etiqueta creada en la P-touch, sin usar plantilla. Cómo añadir datos de la base de datos a una etiqueta 1 Mueva el - Brother International PT-1600 | Users Manual - English - Page 143
ejemplo, al imprimir 50 registros, el número máximo de caracteres que se pueden imprimir de una vez está limitado aproximadamente a 200. 55 Uso de la P-touch con un PC (sólo para PT-1650) - Brother International PT-1600 | Users Manual - English - Page 144
Búsqueda en la base de datos Al seleccionar un registro de base de datos para usarlo en una plantilla o para añadir sus datos a una etiqueta, es posible buscar en la base de datos un registro que contenga caracteres concretos o que tenga un número determinado. Para buscar en la base de datos un - Brother International PT-1600 | Users Manual - English - Page 145
PF, haga clic en "Change PF Key Mapping" (Cambiar la asignación de teclas PF), en la ficha PC → Printer, y seleccione la tecla PF a la que desea asignar los datos. ☞ Sólo se puede restaurar una imagen de car otra imagen de carácter o plantilla. 57 Uso de la P-touch con un PC (sólo para PT-1650) - Brother International PT-1600 | Users Manual - English - Page 146
Los caracteres impresos no se forman correctamente. 5 Aparece una línea horizontal en blanco a lo largo de la etiqueta impresa. 6 Aparecen franjas. 7 La P-touch se ha "bloqueado" (es decir, no responde cuando se presiona una tecla). 58 Solución • Compruebe que el adaptador de CA (modelo AD-60) est - Brother International PT-1600 | Users Manual - English - Page 147
si se ha cambiado el casete de cinta durante la pausa de la P-touch para cortar la cinta. • Este mensaje aparecerá si se ha instalado Escriba algún texto antes de intentar realizar cualquiera de estas operaciones. • Borre parte del texto existente antes de intentar añadir más. • Vuelva a colocar el - Brother International PT-1600 | Users Manual - English - Page 148
LABEL TYPE MODE! En cinta de 3/4" (18 mm): CHECK THE NUMBER OF LINES! 5 MAX En cinta de 1/2" (12 mm): CHECK THE NUMBER OF LINES! 3 MAX En cinta de 3/3" (9 mm) y de 1/4" (6 mm): CHECK THE NUMBER OF LINES! 2 MAX CHOOSE COPIES LESS THAN 1000! CUTTER ERROR! IMAGE CHARACTER SIZE ERROR! (sólo para PT-1650 - Brother International PT-1600 | Users Manual - English - Page 149
error INSERT 1" TAPE INSERT 24mm TAPE INSERT 3/4" TAPE INSERT 18mm TAPE INSERT 1/2" TAPE INSERT 12mm TAPE INSERT 3/8" TAPE INSERT 9mm TAPE INSERT 1/4" TAPE INSERT 6mm TAPE LENGTH LIMIT! MEMORY FULL! MIN 4 DIGITS! Causa • Este mensaje aparecerá si no hay un casete de cinta de 1" (24 mm) de anchura - Brother International PT-1600 | Users Manual - English - Page 150
FILES! NO DATABASE OR INCORRECT FORMAT (sólo para PT-1650) NO TAPE! RECORD NOT FOUND! (sólo para PT-1650) TEXT TOO HIGH! XX BLOCK TEXT TOO LONG • Este mensaje aparecerá si no se ha descargado ninguna base de datos a la P-touch al presionar g y luego i. • Este mensaje aparecerá si no hay un casete de - Brother International PT-1600 | Users Manual - English - Page 151
Cinta de impresión: La cinta TZ está disponible en estas 5 anchuras: 1/4" (6 mm) 3/8" (9 mm) 1/2" (12 mm) 3/4" (18 mm) 1" (24 mm) Cabezal de impresión: 18,1 mm (altura)/180 ppp (resolución) Cortador de la cinta: Manual Dimensiones: Con el botón del cortador de la cinta: 5 1/4" (An) × 9 7/16 - Brother International PT-1600 | Users Manual - English - Page 152
siguientes suministros y accesorios para su máquina P-touch. Puede pedirlos directamente a Brother si su tienda no dispone de ellos. de seguridad TZ-SE4 Cinta de negro sobre fondo blanco de seguridad de 3/4" (18 mm) - al quitarla deja un motivo de tablero de ajedrez Cintas de tela para - Brother International PT-1600 | Users Manual - English - Page 153
Rojo sobre fondo blanco TZ-334 Dorado sobre fondo negro TZ-335 Blanco sobre fondo negro TZ-631 Negro sobre fondo amarillo Cintas laminadas de 3/8" (9 mm) de anchura TZ-121 Negro sobre fondo transparente TZ-221 Negro sobre fondo blanco TZ-325 Blanco sobre fondo negro TZ-421 Negro sobre - Brother International PT-1600 | Users Manual - English - Page 154
cambio sin previo aviso. Los precios son en dólares estadounidenses y solamente para clientes en EE.UU. Existen 4 sencillas formas de hacer pedidos directos a Brother. 1. Llámenos al número gratuito 1-888-879-3232 y pague con una de las principales tarjetas de crédito. 2. Visite nuestra página Web - Brother International PT-1600 | Users Manual - English - Page 155
Índice alfabético A Adaptador de CA 9 ajuste de longitud 39 ajuste predeterminado 15 alineación 29 alineación del texto a la derecha ..... 29 indicador 2, 3 alineación del texto a la izquierda ... 29 indicador 2, 3 alineación del texto centrada........... 29 indicador 2, 3 alineación del - Brother International PT-1600 | Users Manual - English - Page 156
3 marco 2, 3 mayúscula individual 2, 3 mayúsculas continuas 2, 3 número de bloque 2, 3 pilas gastadas 2, 3 tamaño 2, 3 instalación controlador de impresión 44 P-touch Editor 42 invocación 37 L letras mayúsculas 16 letras minúsculas 16 limpieza cabezal de impresión 8 cortador de la cinta - Brother International PT-1600 | Users Manual - English - Page 157
números 16 P pausa para corte 38 pilas 5 plantillas formato automático 30 P-touch Editor 52 problemas 58 P-touch Editor Guía del usuario 46 inicio 47 instalación 42 plantilla 52 R restauración 57 rodillos 8 S selección 15, 16 ajuste predeterminado 15 serie de bloques 34 serie - Brother International PT-1600 | Users Manual - English - Page 158
operativa". Asistencia operativa Si necesita asistencia técnica y operativa, puede llamar al Servicio de atención al cliente de Brother en: Voz 1-877-4-PTouch, o Fax 1-901-379-1210 Asistencia por Internet Para obtener información sobre productos y descargar los controladores más recientes: http - Brother International PT-1600 | Users Manual - English - Page 159
FORMULARIO DE PEDIDO DE ACCESORIOS PARA LA P-TOUCH (sólo para EE.UU.) Estimado cliente: Adjuntamos -947-1445 d.Envíe por correo el formulario cumplimentado junto con el correspondiente abono a: BROTHER INTERNATIONAL CORP. Attn: Consumer Accessory Div. P.O.Box 341332 Bartlett, TN 38184-1332 Nombre - Brother International PT-1600 | Users Manual - English - Page 160
- Brother International PT-1600 | Users Manual - English - Page 161
FORMULARIO DE PEDIDO DE ACCESORIOS PARA LA P-TOUCH (sólo para EE.UU.) Estimado cliente: Adjuntamos -947-1445 d.Envíe por correo el formulario cumplimentado junto con el correspondiente abono a: BROTHER INTERNATIONAL CORP. Attn: Consumer Accessory Div. P.O.Box 341332 Bartlett, TN 38184-1332 Nombre - Brother International PT-1600 | Users Manual - English - Page 162
- Brother International PT-1600 | Users Manual - English - Page 163
Printed in China LN3015001
-
 1
1 -
 2
2 -
 3
3 -
 4
4 -
 5
5 -
 6
6 -
 7
7 -
8
-
9
-
10
-
11
-
12
-
13
-
14
-
15
-
16
-
17
-
18
-
19
-
20
-
21
-
22
-
23
-
24
-
25
-
26
-
27
-
28
-
29
-
30
-
31
-
32
-
33
-
34
-
35
-
36
-
37
-
38
-
39
-
40
-
41
-
42
-
43
-
44
-
45
-
46
-
47
-
48
-
49
-
50
-
51
-
52
-
53
-
54
-
55
-
56
-
57
-
58
-
59
-
60
-
61
-
62
-
63
-
64
-
65
-
66
-
67
-
68
-
69
-
70
-
71
-
72
-
73
-
74
-
75
-
76
-
77
-
78
-
79
-
80
-
81
-
82
-
83
-
84
-
85
-
86
-
87
-
88
-
89
-
90
-
91
-
92
-
93
-
94
-
95
-
96
-
97
-
98
-
99
-
100
-
101
-
102
-
103
-
104
-
105
-
106
-
107
-
108
-
109
-
110
-
111
-
112
-
113
-
114
-
115
-
116
-
117
-
118
-
119
-
120
-
121
-
122
-
123
-
124
-
125
-
126
-
127
-
128
-
129
-
130
-
131
-
132
-
133
-
134
-
135
-
136
-
137
-
138
-
139
-
140
-
141
-
142
-
143
-
144
-
145
-
146
-
147
-
148
-
149
-
150
-
151
-
152
-
153
-
154
-
155
-
156
-
157
-
158
-
159
-
160
-
161
-
162
-
163
 |
 |
USER’S GUIDE
GUÍA DE USUARIO
1600/1650
• Read this User’s Guide before you start using your P-touch.
• Keep this User’s Guide in a handy place for future reference.
• Antes de usar su equipo por primera vez, lea cuidadosamente esta guía de usuario.
• Guarde esta guía de usuario para futuras referencias.
USER’S GUIDE
GUÍA DE USUARIO