Bushnell 118326 User Manual - Page 11
Shooting Videos - manual
 |
View all Bushnell 118326 manuals
Add to My Manuals
Save this manual to your list of manuals |
Page 11 highlights
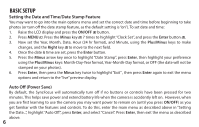
Shooting Videos (Setting/Using Video Mode) To switch from still photo to video mode, press the Right arrow key 3 times, until the red movie camera icon is displayed at the top right area of the LCD (see "LCD Preview Display Icons", #10). You are now in Video Mode. Press SNAP to start recording a new video clip, and press it again to stop recording and store the video in memory. The recording time is limited only by the amount of internal or card memory currently available. You may record a single long video until you run out of memory or multiple shorter videos by stopping and starting recording whenever you wish by pressing SNAP. The counter on the right side of the display shows the time elapsed since the recording was started. Note: the video files use the .avi format. By default, videos are recorded as a 15 second loop ("instant replay"). To change this, press MENU-the first item is "Resolution". Press Enter, then select "Video Size". Use the Plus/Minus keys to select a different video resolution and frame rate combination (which determines loop length-8, 15, 30 or 60 seconds). You also have the option to select a "Norm" video setting if you prefer to shoot standard video clips, instead of loops that re-record (refresh) automatically. For more information regarding the still and video resolution options and other menu settings, please see the "Using the Main Menu" section of this manual. Press the Enter button if you wish to check a video after you shoot it. Press the SNAP button to begin playback, press it again to pause playback (the display will indicate "AVI PAUSE"). During playback, the counter on the right displays time remaining in the video clip. Press the Left arrow key to review previous video or still photo files. When you are ready to return to the live preview display to shoot more videos (or stills), press the Enter button. 11
-
 1
1 -
2
-
3
-
4
-
5
-
 6
6 -
 7
7 -
 8
8 -
 9
9 -
 10
10 -
 11
11 -
 12
12 -
 13
13 -
 14
14 -
 15
15 -
 16
16 -
17
-
18
-
19
-
20
-
21
 |
 |
