Canon 2099B002 User Manual
Canon 2099B002 Manual
 |
View all Canon 2099B002 manuals
Add to My Manuals
Save this manual to your list of manuals |
Canon 2099B002 manual content summary:
- Canon 2099B002 | User Manual - Page 1
Document Scanner DR-2050C DR-2050SP User's Guide Please read this manual before using this unit. After you finish reading this manual, keep it in a safe place for future reference. To customers who have purchased a Canon DR-2050SP Document Scanner: If you plan to use the document scanner in the - Canon 2099B002 | User Manual - Page 2
- Canon 2099B002 | User Manual - Page 3
sur le matériel brouilleur: "Appareils Numériques", NMB-003 édictée par l'Industrie Canada. MODEL NAMES Model DR-2050C is identical to model M11055. Model DR-2050C is the sales name of model M11055. Model DR-2050SP is identical to model M11060. Model DR-2050SP is the sales name of model M11060. i - Canon 2099B002 | User Manual - Page 4
. No updates, fixes or support will be made available for the SOFTWARE. 4. LIMITED WARRANTY AND DISCLAIMER OF INDEMNITY: Canon, Canon's affiliate, their distributor or dealer will not guarantee uninterrupted service, or absence or correction of errors. Therefore, the SOFTWARE is licensed on an "AS - Canon 2099B002 | User Manual - Page 5
scanners. The standards and logos are uniform among participating nations. Trademarks • Canon and the Canon logo are registered trademarks of Canon their respective owners. Copyright Copyright 2006 by CANON ELECTRONICS INC. All rights reserved. No part of this publication may be reproduced or - Canon 2099B002 | User Manual - Page 6
iv - Canon 2099B002 | User Manual - Page 7
with the Canon DR-2050C/DR-2050SP Document Scanner. Make sure to read the manuals before attempting to use the scanner. If you plan to use the DR-2050SP in Presentation mode, you should read this manual together with the DR-2050SP User's Guide Presentation Mode Edition. 1. DR-2050C/DR-2050SP Easy - Canon 2099B002 | User Manual - Page 8
The following symbols are used in this manual to explain procedures, restrictions, handling precautions, and instructions that should be observed for safety. WARNING Indicates a warning concerning operations that may lead to death or injury to persons if not performed correctly. To - Canon 2099B002 | User Manual - Page 9
1 Manuals for the Scanner 1 Symbols Used in This Manual 2 Chapter 1 Before Using the Scanner 5 1. Important Safety Instructions 6 Installation Location 6 Power 7 Moving the Scanner 7 Remote Control (DR-2050SP only 8 Handling 8 Disposal 10 2. Features 11 3. Names and Functions of Parts 13 - Canon 2099B002 | User Manual - Page 10
Not Fed Correctly 74 Paper Is Not Ejected Correctly 75 Saved Image Files Do Not Open 75 Scanning Results Are Not as Expected 75 4. Uninstalling Software 78 Uninstalling the ISIS/TWAIN Driver/Job Registration Tool .... 80 Uninstalling CapturePerfect 3.0 82 5. Specifications 84 Specifications - Canon 2099B002 | User Manual - Page 11
Chapter 1 Before Using the Scanner 1. Important Safety Instructions 6 Installation Location 6 Power 7 Moving the Scanner 7 Remote Control (DR-2050SP only 8 Handling 8 Disposal 10 2. Features 11 3. Names and Functions of Parts .......... 13 4. Installation Requirements 15 5. About the Setup - Canon 2099B002 | User Manual - Page 12
Instructions To ensure the safe operation of this scanner, be sure to read the safety warnings and precautions described below. Installation Location The performance of this scanner is affected by the environment in which it is installed. Make sure that the location where the scanner is installed - Canon 2099B002 | User Manual - Page 13
any other electrical devices. Model: MG1-3607 • If you have any questions regarding the power supply, contact your local authorized Canon dealer or service representative for further information. Moving the Scanner • When moving the scanner, always hold it with both hands to avoid dropping it. The - Canon 2099B002 | User Manual - Page 14
a fire or electric shock. • Do not use flammable aerosol sprays products near the scanner. • When cleaning the scanner, turn the power switch OFF and disconnect the power cord from the power supply. • Clean the scanner using a slightly dampened cloth which has been well wrung out. Never use alcohol - Canon 2099B002 | User Manual - Page 15
outlet. Then, contact your local authorized Canon dealer or service representative to have the unit serviced. • Before moving the scanner, be sure to turn the power switch OFF, and disconnect the power plug from the power outlet. CAUTION • Do not install the scanner on a surface that is unstable or - Canon 2099B002 | User Manual - Page 16
in personal injury. Be extra careful of neckties and long hair. If anything becomes caught in the scanner, immediately disconnect the power cord to stop the scanner. Disposal • When disposing of this scanner, be sure to follow all local ordinances and laws or consult with the retailer who sold you - Canon 2099B002 | User Manual - Page 17
of the DR-2050C/DR-2050SP document scanner are described below. „ Compact Configuration The scanner has a Supports a Variety of Scanning Modes The scanner supports the following scanning modes, depending on the document type: • Single-sided/double-sided mode • Single sheet/dual feeding path „ Paper - Canon 2099B002 | User Manual - Page 18
the adjusted image to the application software, without needing to scan the document again. „ Auto Start The scanner is scanner without using a computer. For more details see the DR-2050SP User's Guide Presentation Mode Edition. Note Certain functions may not be available depending on the software - Canon 2099B002 | User Manual - Page 19
. Make sure to read this section and familiarize yourself with the parts of the scanner before using the scanner. For part names and their functions of the DR-2050SP, see the DR2050SP User's Guide Presentation Mode Edition. „ Front/Right Side Upper Cover Open when you need to set a document in the - Canon 2099B002 | User Manual - Page 20
Openings USB Connector Connect the included USB cable or one that supports Hi-Speed USB 2.0. Power Switch Turns the scanner ON and OFF. (OFF) (ON) Power Connector Connect the AC adapter that is provided with the scanner. Kensington Slot Used for anti-theft measures. Theft can be prevented - Canon 2099B002 | User Manual - Page 21
4. Installation Requirements To use the DR-2050C/DR-2050SP, your computer must satisfy the following system requirements. • One of the following operating systems: - Microsoft Windows 98SE - Microsoft Windows Me - Microsoft Windows 2000 Professional SP4 or later - Microsoft Windows XP Professional - Canon 2099B002 | User Manual - Page 22
the recommended specifications, the scanning speed may vary, depending on the scan settings. • The ISIS/TWAIN Drivers provided with the scanner do not necessarily operate on all ISIS- or TWAIN-compatible applications. For details, contact your application software retailer. 16 Before Using the - Canon 2099B002 | User Manual - Page 23
driver for use with the DR-2050C/DR-2050SP scanner, and the Job Registration Tool. • CapturePerfect 3.0 ISIS-compatible application developed for Canon document scanners. Note The following shows how the DR-2050 series setup disc is configured. For instructions on how to install the software - Canon 2099B002 | User Manual - Page 24
18 Before Using the Scanner - Canon 2099B002 | User Manual - Page 25
Folio (Folded Document 27 4. Scanning Documents 28 Using CapturePerfect 3.0 28 Using the Job Function 34 Setting the Event Function 37 5. Clearing a Paper Jam 42 6. Scanning Hints 44 7. Software Settings 49 ISIS Driver Settings 50 TWAIN Driver Settings 52 Job Registration Tool Settings 54 - Canon 2099B002 | User Manual - Page 26
Bypass mode (single-sheet feed) (See paper at one time can cause the scanner rollers or scanning glass, cause stripes to appear in images, or dirty other documents. • When scanning a two-sided document that is printed on thin paper, the image on the opposite side of each page may show through. Adjust - Canon 2099B002 | User Manual - Page 27
Chapter 2 2. Preparing the Trays Prepare the document feed tray in accordance with the document size and type. Setting Up the Document Feed Tray Pull the document feed tray towards you to open it. In the case of a short document, open the upper cover. Using the Scanner 21 - Canon 2099B002 | User Manual - Page 28
If document skew is not remedied by installing the document guide adapter, set deskew to on in the ISIS/TWAIN driver settings. (See p. 49.) Using the Feed Extension Plate Under the following conditions, install the document guide adapter, set the document in the scanner, and then pull out the feed - Canon 2099B002 | User Manual - Page 29
paper separation, called the Page Separation mode and Bypass mode for feeding documents. Feeding documents continuously from a stack of documents placed in the feed tray is called the Page Separation mode. Feeding documents one sheet in the scanner, immediately disconnect the power cord to stop - Canon 2099B002 | User Manual - Page 30
2. Adjust the document guide to the width of the document being scanned. IMPORTANT Do not hold the tips of the document guide adaptor when installing it. Doing so can damage the document tray. 3. Fan the stack of documents to be scanned, and then angle the stack as shown in the - Canon 2099B002 | User Manual - Page 31
or a creased document can damage the document. 6. Start scanning from the application. IMPORTANT • If the paper feed operation stops due to a system error or a paper jam while the scanner is scanning, resolve the problem, make sure that the scanned image of the last page that was fed has been stored - Canon 2099B002 | User Manual - Page 32
1. Raise the feed selection lever (Bypass mode). Bypass mode Page Separation mode 2. Adjust the document guide to the width of the document being scanned. 3. Start scanning from the application. 4. Set the document in the scanner with the back of the document facing forward and its top edge facing - Canon 2099B002 | User Manual - Page 33
or misaligned images. • The part of the document at the fold is not scanned. Take care when scanning documents that have text or photos that go across the fold. • Use manual feeding for folio scanning. Load the document one page at a time. • Align the paper side guides to the width of the document - Canon 2099B002 | User Manual - Page 34
and the Job Function. For details on how to install each application and the driver, see the Easy Start Guide. Using CapturePerfect 3.0 CapturePerfect 3.0 is an ISIS-compatible application developed for Canon document scanners. CapturePerfect 3.0 includes the following modes. Select the desired scan - Canon 2099B002 | User Manual - Page 35
the screen. DR-2050C/ DR-2050SP Scan to Presentation Mode Scan to Presentation Mode Note For instructions on how to use CapturePerfect 3.0, see the CapturePerfect 3.0 Operation Guide and CapturePerfect Help. Be sure to read the CapturePerfect 3.0 Operation Guide and CapturePerfect Help before - Canon 2099B002 | User Manual - Page 36
CapturePerfect 3.0 starts up. 2. Follow the procedure below to select the Canon DR-2050C document scanner as the scanner to be used. 1. On the [Scan] menu, click [Select Scanner]. 30 Using the Scanner - Canon 2099B002 | User Manual - Page 37
OK] button. Note If [CANON DR-2050C] is not displayed in the list of scanners, re-install the ISIS/TWAIN driver. (See "Step 3. Installing the Software" in the Easy Start Guide.) 3. Set the "Default Page Size". Note This dialog box is displayed only when you select [CANON DR-2050C] for the first time - Canon 2099B002 | User Manual - Page 38
4. Set the scan settings. For details setting the scanning settings, see "ISIS Driver Settings," on p. 50, and ISIS/TWAIN Driver Help. 5. Place your document. (See "Placing a Documents," on p. 23.) 6. On the [Scan] menu, select [Scan Batch to File]. 32 Using the Scanner - Canon 2099B002 | User Manual - Page 39
. For details on the available settings in the [Scan Batch to File Setting] dialog box, see the CapturePerfect Operation Guide and CapturePerfect Help. 8. When there are no more document sheets to scan, scanning stops and the Continue dialog box is displayed. To continue scanning, click [Continue - Canon 2099B002 | User Manual - Page 40
the [Scan] button on the scanner according to the Windows event function and job tools. software is started up and image files are attached to a new e-mail massage. (network) DR-2050C/ DR-2050SP Scan button (mail server) Launcher The specified application is started up. 34 Using the Scanner - Canon 2099B002 | User Manual - Page 41
click [Programs] ([All Programs] if you are using Windows XP) Æ [Canon DR-2050C] Æ [Job Registration Tool]. The Job Registration Tool starts up. Note • Job Registration Tool is a TWAIN compatible application that is installed with the ISIS/TWAIN driver. • You can register jobs for numbers 1 through - Canon 2099B002 | User Manual - Page 42
. 4. Click [Close] to close the [Job Registration Tool]. 5. Place the document. (See "Placing a Documents," on p. 23.) 6. Press the [Scan] button. Scan button 36 Using the Scanner - Canon 2099B002 | User Manual - Page 43
sheets, the image data is transferred according to the specified conditions. [Sending complete] is displayed on the "Monitor for DR2050C." 8. Click [Close] to close the "Monitor for DR2050C [Control Panel]. (For Windows XP, click the [Start] button Æ click [Control Panel].) Using the Scanner 37 - Canon 2099B002 | User Manual - Page 44
2. For Windows XP, switch the Control Panel to Classic View, or select [Printers and Other Hardware] in the working field. Control Panel (category view) Printers and Other Hardware Control Panel (classic view) 3. Click [Scanners and Cameras]. 38 Using the Scanner - Canon 2099B002 | User Manual - Page 45
Chapter 2 4. Select [CANON DR-2050C USB], and then click [Properties]. 5. Click the [Events] tab. Using the Scanner 39 - Canon 2099B002 | User Manual - Page 46
2. Select [Scan] button from the [Scanner events] drop-down list. 3. At [Send to this application] unmark the applications that are not to be started up, and click [Apply]. 4. Click [OK] to close [CANON DR-2050C USB Properties]. 5. Restart Windows to enable the new settings for the event function. - Canon 2099B002 | User Manual - Page 47
clicked. • Certain applications may not run normally when started as an event. • To disable use of events, mark the [Disable device events] checkbox. Using the Scanner 41 - Canon 2099B002 | User Manual - Page 48
, take care not to cut your hands on the edges of the paper. 1. Remove any documents from the document feed tray. 2. Pressing the OPEN knob from both sides (a), pull the front unit forward to open it (b). 3. Remove the jammed document from the feed side or the output side. 42 Using the Scanner - Canon 2099B002 | User Manual - Page 49
Chapter 2 IMPORTANT If you are removing the document manually, make sure to remove the document carefully, by pulling on it steadily and without applying too much force. Should the paper tear, make sure to remove any torn pieces remaining in the scanner. 4. Gently press the left and right sides of - Canon 2099B002 | User Manual - Page 50
your scanner. Refer to these hints when you set up the ISIS/TWAIN driver. For more details on items not described in this section, see "Software Settings," as a Custom Paper Size. See "ISIS Driver Settings l," on p. 50, and "TWAIN Driver Settings l," on p. 52. • I want to scan only part of a - Canon 2099B002 | User Manual - Page 51
is loaded, the scanner starts scanning when it detects the next document. If the "Feeding Option" is set to [Panel-Feeding] and the next document is loaded, the scanner starts scanning when the Scan button is pressed. See "ISIS Driver Settings h," on p. 50, and "TWAIN Driver Settings h," on p. 52 - Canon 2099B002 | User Manual - Page 52
is not performed, and blank pages are skipped. See "ISIS Driver Settings g," on p. 50, and "TWAIN Driver Settings g," on p. 52. • Blank sheets are not skipped even if [Skip blank page] is set. Set a higher [Ratio of black pixels] value (adjust the slider towards the right). If a low [Ratio of black - Canon 2099B002 | User Manual - Page 53
Select [Red Enhance] at Dropout Color. See "ISIS Driver Settings o," on p. 50, and "TWAIN Driver Settings o," on p. 52. • I want to enhance image contours Adjust the [Edge emphasis] setting. See "ISIS Driver Settings q," on p. 50, and "TWAIN Driver Settings q," on p. 52. • I want to delete black - Canon 2099B002 | User Manual - Page 54
the image before I scan it For the ISIS driver, check the [Prescan] checkbox. The Prescan window is displayed when scanning starts. See "ISIS Driver Settings k," on p. 50. For the TWAIN driver, check the [Prescan] checkbox and click [Preview]. One sheet of the document is scanned, and the Prescan - Canon 2099B002 | User Manual - Page 55
P. 50 TWAIN Driver Settings P. 52 Job Registration Tool Settings P. 54 Note A "Quick Guide" containing the same content as this section of the PDF file version of the User's Guide is available on the setup disc. Print this guide and keep it near the scanner as a reference. Using the Scanner 49 - Canon 2099B002 | User Manual - Page 56
ISIS Driver Settings Basic Setup Dialog Box a b c d is selected. Scan Area Dialog Box l m n Save User Preferences Mode Page Size * [Contrast] is set automatically q r Select s Scanner Adjustment is a function used to adjust the reference values of the scanner when abnormalities occur within - Canon 2099B002 | User Manual - Page 57
scanned and its image is displayed in the Prescan window. Scan Area Dialog Box l Page Size Selects the problem. For details on Scanner Adjustment, refer to "Scanning Results Are Not as Expected" (See p. 75.) in the user's guide. This Quick Guide describes the dialog boxes displayed by CapturePerfect - Canon 2099B002 | User Manual - Page 58
TWAIN Driver Settings Basic Setup Dialog Box a b c d e f g h i j k Scanning Option If an application program executes scanning directly from the basic setup dialog box, the [Scan] button is displayed instead of the [OK] button, and the [Area window] is displayed in the Scan Area dialog box. - Canon 2099B002 | User Manual - Page 59
click this button to display a preview image in the Prescan window after a page of the document is scanned. Advanced Settings problem. For details on Scanner Adjustment, refer to "Scanning Results Are Not as Expected" (See p. 75.) in the user's guide. This Quick Guide describes the TWAIN driver - Canon 2099B002 | User Manual - Page 60
on the selected function. Save as file f g h i j k l m File type Print * The [Setting] button is enabled when [PDF] or [TIFF] is selected. n o Attach to E-mail Function Language for OCR PDF/TIFF Settings r s t u Access setting (Windows 2000/XP) p q Launcher 54 Using the Scanner - Canon 2099B002 | User Manual - Page 61
are smaller than the paper, they are printed at actual size. p Save Image Select this check box to save images scanned using "Attach to E-mail". q Launcher Starts applications set with the Windows event function. See the user's guide for detailed information. PDF/TIFF Settings r Compression rate - Canon 2099B002 | User Manual - Page 62
56 Using the Scanner - Canon 2099B002 | User Manual - Page 63
Not Fed Correctly 74 Paper Is Not Ejected Correctly 75 Saved Image Files Do Not Open 75 Scanning Results Are Not as Expected .... 75 4. Uninstalling Software 78 Uninstalling the ISIS/TWAIN Driver/ Job Registration Tool 80 Uninstalling CapturePerfect 3.0 82 5. Specifications 84 Specifications - Canon 2099B002 | User Manual - Page 64
, and then wipe the exterior of the scanner to clean it. Cleaning Inside the Scanner Dust or paper particles inside the scanner can cause lines in scanned images. Use a blower for regular cleaning of dust and paper particles from inside the scanner. After finishing a large scanning job, you should - Canon 2099B002 | User Manual - Page 65
then the scanning glass or the rollers inside the scanner may be dirty. Clean them blower to keep the interior of the scanner free of dust and paper particles. 4. Use a clean dry errors. If there are scratches on the scanning glass, contact your local authorized Canon dealer or service representative. - Canon 2099B002 | User Manual - Page 66
it with a clean dry cloth. Feed Roller Retard Roller 6. Remove the feed roller and retard roller. (See p. 66, p. 69.) IMPORTANT After removing the feed roller and retard roller, clean them and then return them to the scanner. 7. Wipe the removed rollers with a firmly wrung cloth moistened with water - Canon 2099B002 | User Manual - Page 67
so can damage precision mechanisms, such as the light source. Moisture on the scanner or your hands also creates the risk of electric shock. • Scanner power needs to be turned on when cleaning the metal rollers. Because of this, you need to exercise extra caution when cleaning them. Appendices - Canon 2099B002 | User Manual - Page 68
when you clean or replace them. IMPORTANT Feed rollers are consumable parts. When the rollers start to wear out, paper jams and misfeeds may occur more often. When this happens, buy an exchange roller kit, and replace the feed roller and the retard roller. CAUTION Do not use excessive force when - Canon 2099B002 | User Manual - Page 69
After replacing the feed rollers, open the [Counter setup] dialog box and reset the counter. 1. Follow the procedure below to open the [Counter setup] dialog box. 1. Click the [Start] button, Æ click [Settings] on the Start menu Æ click [Control Panel]. (For Windows XP, click the [Start] button - Canon 2099B002 | User Manual - Page 70
3. Select [CANON DR-2050C USB], and then click [Properties]. 4. Click the [Counter] tab. 64 Appendices - Canon 2099B002 | User Manual - Page 71
] has been set to 0. Chapter 3 Removing and Attaching the Feed Roller Follow the procedure below to remove and attach the feed roller for cleaning or replacement. Note When attaching the feed roller during installation, operate the roller fastening lever according to the removal procedure and then - Canon 2099B002 | User Manual - Page 72
Removing the Feed Roller 1. Pressing the OPEN knob from both sides (a), pull the front unit forward to open it (b). 2. Open the roller cover on the scanner side. Insert a finger into the depression in the cover and open it. 3. Raise the roller lock lever (a), and then slide it to the left (b). 66 - Canon 2099B002 | User Manual - Page 73
the left to separate it from the shaft, and then remove it. Attaching the Feed Roller 1. Set the feed roller into the hollow inside the roller cover, and align the notch in the roller with the scanner shaft. 2. Slide the roller lock lever to the right, and then insert the shaft into the hole on the - Canon 2099B002 | User Manual - Page 74
it click into place. Removing and Attaching the Retard Roller Follow the procedure below to remove and attach the retard roller for cleaning or replacement. Note When attaching the feed roller during installation, operate the roller fastening lever according to the removal procedure and then attach - Canon 2099B002 | User Manual - Page 75
Do not use excessive force when removing or attaching the rollers. Doing so may damage them. Removing the Retard Roller 1. Pressing the OPEN knob from both sides (a), pull the front unit forward to open it (b). 2. Holding the edges of the roller cover on the inside of the front unit, open the - Canon 2099B002 | User Manual - Page 76
to the left to separate it from the shaft, and then remove it. Attaching the Retard Roller 1. Position the retard roller so the notch in the roller is facing the scanner's shaft. 2. Slide the roller lock lever to the right, and then insert the shaft into the hole on the left side of the retard - Canon 2099B002 | User Manual - Page 77
lever towards the back of the scanner to lock the retard roller in place. 4. Attach the roller cover. Be sure that the upper unit is completely closed by pushing on both edges with both hands until you hear a click. 5. Gently press the - Canon 2099B002 | User Manual - Page 78
this section, you still cannot resolve the problem, contact your local authorized Canon dealer or your service representative. The Scanner Does Not Turn ON Check the following if the scanner does not turn on: • Is the power cord connected correctly? • Is the power cord connected securely? • Is the - Canon 2099B002 | User Manual - Page 79
operate with all types of USB interfaces. Contact your local authorized Canon dealer or service representative for more information. (See p. 15.) Problem The scanner does not support the USB cable. Solution Use the USB cable provided with the scanner. Problem The USB hub is not compatible with the - Canon 2099B002 | User Manual - Page 80
Is there a problem in the PC system? IMPORTANT • If documents are not scanned normally even if the scanner setup is OK, a probable cause is that the scanner driver or application software is not running correctly. Re-install the scanner driver or application software. • When system errors result in - Canon 2099B002 | User Manual - Page 81
causes are incorrect ISIS/ TWAIN driver settings or a problem with the scanning unit inside the scanner. Scanning results can also become skewed if the ISIS/TWAIN driver has not been installed correctly, or the application in use does not support ISIS/ TWAIN driver functions. Appendices 75 - Canon 2099B002 | User Manual - Page 82
at an angle. (skew) Solution Use the document guide adapter to prevent document skew, and set [Deskew] to on. (See p. 22.) Symptoms Lines, smudges, or dirt appear on the scanned image. Problem CauseThe scanning glass or rollers inside the scanner are dirty. Solution Clean the scanning glass and - Canon 2099B002 | User Manual - Page 83
Adjustment Sheet in the scanner, click the Windows [Start] button, and then click [Programs] (All Programs in the case of Windows XP) Æ [Canon Document Scanner], and then [DR-2050C & 2080C Adjustment Tool], or use the [Scanner Adjustment] function of the ISIS/ TWAIN driver. Follow the instructions - Canon 2099B002 | User Manual - Page 84
If the ISIS/TWAIN driver, "Job Registration Tool," and "CapturePerfect 3.0" are not operating normally, follow the procedure below to uninstall them. Then, re-install the software from the DR-2050 series setup disc. (See "Step 3. Installing the Software," in the Easy Start Guide.) IMPORTANT Be sure - Canon 2099B002 | User Manual - Page 85
For Windows XP, the [Add or Remove Programs] dialog box appears. 3. From the list in the dialog box, select the application you want to delete Æ click [Change/Remove]. For more information on uninstalling each application, see the following: See "Uninstalling the ISIS/TWAIN Driver/Job Registration - Canon 2099B002 | User Manual - Page 86
Uninstalling the ISIS/TWAIN Driver/Job Registration Tool 1. From the Programs list in the dialog box, select [Canon DR-2050C/2080C Scanner Driver] (or [DR-2050C Job Tool]) Æ click the [Change/Remove] button. 2. The [Confirm File Deletion] screen appears. Click the [Yes] button. The [Remove Shared - Canon 2099B002 | User Manual - Page 87
4. Click the [Yes] button to start the uninstallation. Note All deleted shared files can be reinstalled by installing the software again. 5. After uninstall is complete, click the [OK] button to exit the uninstaller. Chapter 3 Appendices 81 - Canon 2099B002 | User Manual - Page 88
Uninstalling CapturePerfect 3.0 1. Select [CapturePerfect 3.0] from the list in the dialog box Æ click the [Remove] button. 2. The file delete confirmation screen appears. Click the [Yes] button. Uninstallation starts. 82 Appendices - Canon 2099B002 | User Manual - Page 89
3. After uninstallation is complete, click the [Finish] button to exit the uninstaller. Chapter 3 Appendices 83 - Canon 2099B002 | User Manual - Page 90
Presentation mode specifications, see the DR-2050SP User's Guide Presentation Mode Edition. Scanner Type Desktop sheetfed scanner Scanning Document Specifications Width: 2.16" Side Simplex/Duplex Scanning Modes Black and white, Text Enhanced, Advanced Text Enhancement II, Error diffusion, - Canon 2099B002 | User Manual - Page 91
Model Input Output Power Supply Weight MG1-3607 AC 100-240 V 50/60 Hz 0.65-0.34 A DC 16 V 1.8 A 0.5 W max. (separate AC adaptor) Approx. 0.7 lb (0.3 kg) (including Power Cord) Replacement Parts Roller replacement kit (product code: 7982A001) Kit to replace the feed rollers (feed roller and retard - Canon 2099B002 | User Manual - Page 92
7.7" (197 mm) 12.7" (323 mm) (Document Tray is open) External Dimensions 11.7" (298 mm) 3.9" (100 mm) 1.3" (32 mm) 86 Appendices - Canon 2099B002 | User Manual - Page 93
Retard Roller 60, 68 Attaching 70 Removing 69 S Scanning Documents 28 CapturePerfect 3.0 28 Scanning Hints 44 Setup Disc 17 Custom Installation 17 Read the manual 17 Typical Installation 17 Software 49, 78 Settings 49 Uninstalling 78 Specifications 84 T Troubleshooting 72 TWAIN Driver - Canon 2099B002 | User Manual - Page 94
U Upper Cover 13 USB Connector 14 V Ventilation Openings 14 88 Index - Canon 2099B002 | User Manual - Page 95
Memo Nederlands Italiano Espanõl Deutsch Français English - Canon 2099B002 | User Manual - Page 96
- Canon 2099B002 | User Manual - Page 97
59-61, P.O.BOX 2262, 1180 EG AMSTELVEEN, THE NETHERLANDS CANON LATIN AMERICA, INC. 703 WATERFORD WAY, SUITE 400 MIAMI, FLORIDA 33126, U.S.A. CANON AUSTRALIA PTY. LTD. 1 THOMAS HOLT DRIVE, NORTH RYDE, SYDNEY. N.S.W, 2113. AUSTRALIA CANON SINGAPORE PTE. LTD. 1 HARBOUR FRONT AVENUE #04-01, KEPPEL - Canon 2099B002 | User Manual - Page 98
ISIS Driver Quick Guide Keep this Quick Guide near the scanner for ready reference. Basic Setup Dialog Box Save User Preferences Mode Page Size Dialog Box Drop-out color Scanner Adjustment is a function used to adjust the reference values of the scanner when abnormalities occur within the - Canon 2099B002 | User Manual - Page 99
Driver Quick Guide Keep this Quick Guide near the scanner for ready reference. Basic Setup Dialog Box 1 User window. problem. For details on Scanner Adjustment, refer to "Adjusting the Scanner" (see P.75) in the user's guide. This Quick Guide describes the dialog boxes displayed by CapturePerfect - Canon 2099B002 | User Manual - Page 100
TWAIN Driver Quick Guide Keep this Quick Guide near the scanner for ready reference. Basic Setup Dialog Box Save User Area window] Scanner Adjustment is a function used to adjust the reference values of the scanner when abnormalities occur within the scanned images. Do not execute when the scanner - Canon 2099B002 | User Manual - Page 101
image in the Prescan window after a page of scanner when abnormalities occur within the scanned images, and normal maintenance does not remedy the problem. For details on Scanner Adjustment, refer to "Adjusting the Scanner" (see P.75) in the user's guide. This Quick Guide describes the TWAIN driver - Canon 2099B002 | User Manual - Page 102
Job Registration Tool Quick Guide Keep this Quick Guide near the scanner for ready reference. Job Registration Tool Dialog Box Admin Print File type * The [Setting] button is enabled when [PDF] or [TIFF] is selected. PDF/TIFF Settings Attach to E-mai Access setting (Windows 2000/XP) Launcher - Canon 2099B002 | User Manual - Page 103
are smaller than the paper, they are printed at actual size. F Save Image Select this check box to save images scanned using "Attach to E-mail". G Launcher Starts applications set with the Windows event function. See the user's guide for detailed information. PDF/TIFF Settings H Compression rate
-
 1
1 -
 2
2 -
 3
3 -
 4
4 -
 5
5 -
 6
6 -
 7
7 -
8
-
9
-
10
-
11
-
12
-
13
-
14
-
15
-
16
-
17
-
18
-
19
-
20
-
21
-
22
-
23
-
24
-
25
-
26
-
27
-
28
-
29
-
30
-
31
-
32
-
33
-
34
-
35
-
36
-
37
-
38
-
39
-
40
-
41
-
42
-
43
-
44
-
45
-
46
-
47
-
48
-
49
-
50
-
51
-
52
-
53
-
54
-
55
-
56
-
57
-
58
-
59
-
60
-
61
-
62
-
63
-
64
-
65
-
66
-
67
-
68
-
69
-
70
-
71
-
72
-
73
-
74
-
75
-
76
-
77
-
78
-
79
-
80
-
81
-
82
-
83
-
84
-
85
-
86
-
87
-
88
-
89
-
90
-
91
-
92
-
93
-
94
-
95
-
96
-
97
-
98
-
99
-
100
-
101
-
102
-
103
 |
 |
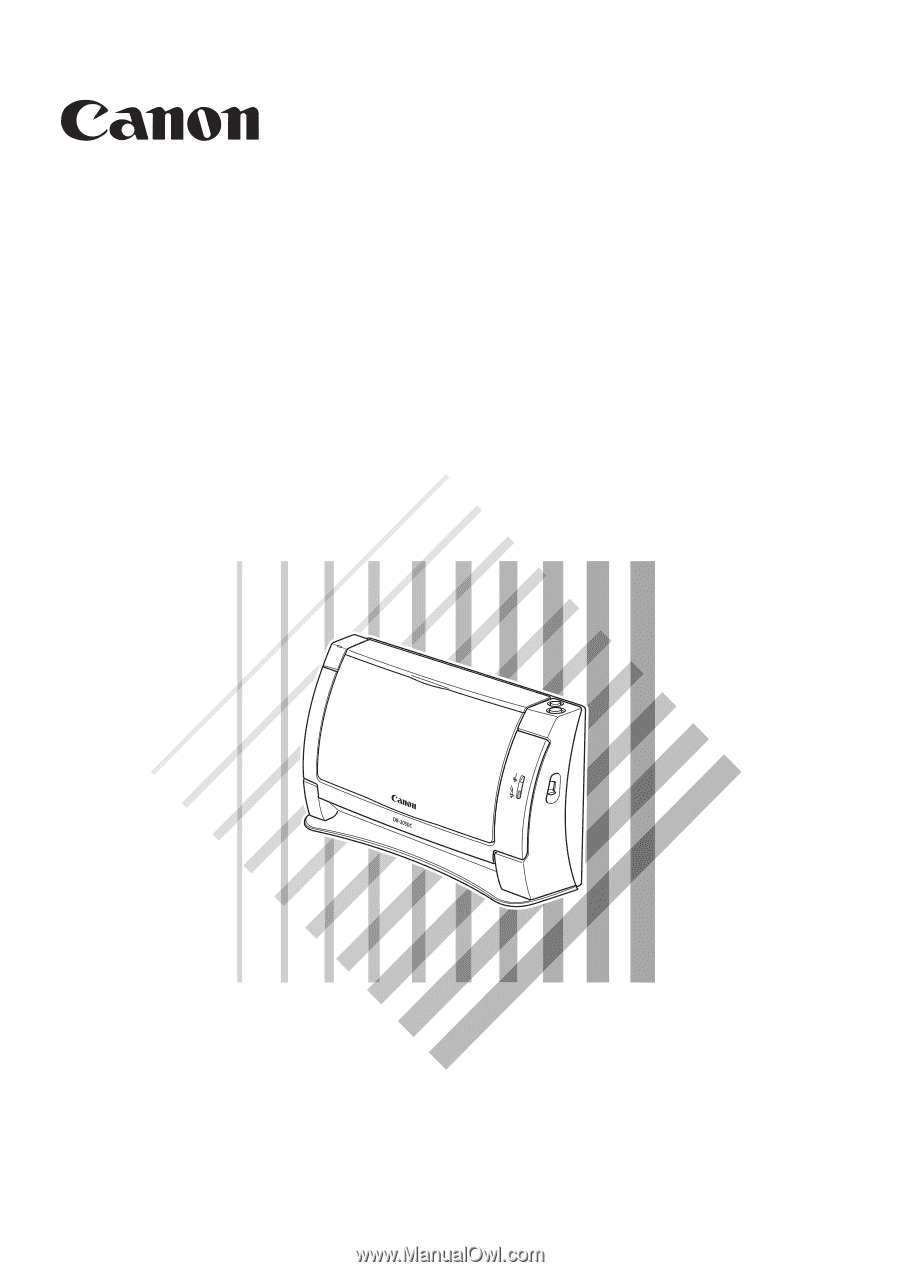
Document Scanner
User’s Guide
DR-2050C
DR-2050SP
Please read this manual before using this unit. After you finish
reading this manual, keep it in a safe place for future reference.
To customers who have purchased a Canon DR-2050SP
Document Scanner:
If you plan to use the document scanner in the Presentation mode,
you should read this manual together with the
DR-2050SP User’s
Guide Presentation Mode Edition
.