Canon BJC-85 BJC-85 Setup - Page 3
Install the Printer Driver - driver for windows 7
 |
View all Canon BJC-85 manuals
Add to My Manuals
Save this manual to your list of manuals |
Page 3 highlights
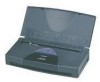
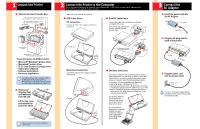
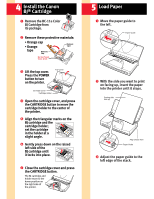
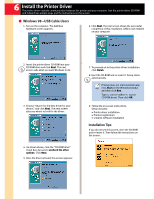
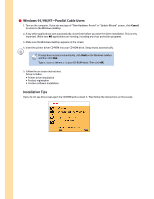
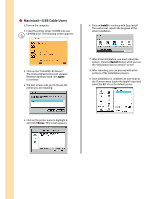
6 Install the Printer Driver The printer driver controls communication between the printer and your computer. Use the printer driver CD-ROM and follow these simple steps and the instructions on the screen. Windows 98-USB Cable Users 1. Turn on the computer. The Add New Hardware screen appears: 6. Click Next. The next screen shows the successful completion of this installation. USB is now enabled on your computer. 2. Insert the printer driver CD-ROM into your CD-ROM drive and click Next. The next screen asks what you want Windows to do: 3. Choose "Search for the best driver for your device," and click Next. The next screen asks you where to look for the driver: 4. As shown above, click the "CD-ROM drive" check box; be sure to uncheck the other options. Click Next. 5. Once the driver is found, this screen appears: 7. To proceed on to the printer driver installation, click Finish. 8. Eject the CD-ROM and re-insert it. Setup starts automatically. If Setup does not start automatically, click Start on the Windows taskbar and then click Run. Type X:\SETUP (where X:is your CD-ROM drive). Then click OK. 9. Follow the on-screen instructions. Setup includes: Printer driver installation Product registration Creative software installation Installation Tips If you do not see this screen, eject the CD-ROM and re-insert it. Then follow the instructions on the screen.
-
 1
1 -
 2
2 -
 3
3 -
 4
4 -
 5
5 -
 6
6
 |
 |