Canon FAXPHONE L170 Basic Guide
Canon FAXPHONE L170 - B/W Laser - Copier Manual
 |
UPC - 013803038477
View all Canon FAXPHONE L170 manuals
Add to My Manuals
Save this manual to your list of manuals |
Canon FAXPHONE L170 manual content summary:
- Canon FAXPHONE L170 | Basic Guide - Page 1
Guides with this symbol are PDF manuals included on the CD-ROM accompanying CD-ROM. (See footnote.) • Setting up the Machine • Installing Printer Driver Set-Up Instructions • Document and Paper Handling • Sending and Receiving Faxes • Speed Dialing • Making Copies • Maintenance • Troubleshooting - Canon FAXPHONE L170 | Basic Guide - Page 2
Find Help Canon offers a full range of customer technical support* options: • For e-mail support, the latest driver downloads and answers to frequently asked questions (www.usa.canon.com/ consumer) • Free technical support Monday-Saturday (excluding holidays) for products still under warranty (1-800 - Canon FAXPHONE L170 | Basic Guide - Page 3
laser beam cannot escape from the machine during any phase of user operation. Do not remove protective housings or external covers, except as directed by this manual. Disclaimer Canon U.S.A., Inc. has reviewed this guide thoroughly in order to make it easy to use guide for your Canon FAXPHONE L170 - Canon FAXPHONE L170 | Basic Guide - Page 4
electrical shock. • Follow all warnings and instructions marked on the machine. ■ Location WARNING Do not place the machine near alcohol, paint thinner, or other inflammable substances. If inflammable substances come into contact with electrical parts inside the machine, it may result in a fire or - Canon FAXPHONE L170 | Basic Guide - Page 5
• Place the machine on a flat, stable, vibration-free surface that is strong enough to support its weight. • Do not place objects around the power plug so that you are able at any time to readily contact with metallic objects etc., it may result in fire or electrical shock. vi Where to Find Help - Canon FAXPHONE L170 | Basic Guide - Page 6
or plug is damaged or frayed. - If liquid has spilled into the machine. - If the machine has been exposed to rain or water. - If the machine does not operate normally when you have followed the instructions in the guides included with your machine. Adjust only those controls that are covered by the - Canon FAXPHONE L170 | Basic Guide - Page 7
. Maintenance WARNING • Do not service the machine yourself except as specifically described in this guide. If further servicing is required, contact the Canon Customer Care Center. • Keep the machine clean. Dust accumulation may prevent the machine from operating properly. viii Where to Find Help - Canon FAXPHONE L170 | Basic Guide - Page 8
of these documents is set forth below. This list is intended to be a guide only. If you are uncertain about the legality of using your product to scan, (canceled or uncanceled) • Identifying badges or insignias • Selective service or draft papers • Checks or drafts issued by governmental agencies - Canon FAXPHONE L170 | Basic Guide - Page 9
dedicated extension off a PBX machine without "Call Waiting" can be used with your FAXPHONE L170. Key telephone systems are not recommended because they send non-standard signals to individual telephones for ringing and special codes, which may cause a fax error. C. Power requirements This equipment - Canon FAXPHONE L170 | Basic Guide - Page 10
described in this guide, disconnect the equipment from the telephone line and unplug the power cord. The telephone line should not be reconnected or the power cord plugged in until the problem is completely resolved. Users should contact Canon Authorized Service Facilities for servicing of equipment - Canon FAXPHONE L170 | Basic Guide - Page 11
dedicated extension off a PBX machine without "Camp On" signals is also permissible with your FAXPHONE L170. Key telephone systems are not recommended because they send non-standard signals to individual telephones for ringing and special codes, which may cause a fax error. C. Power requirements The - Canon FAXPHONE L170 | Basic Guide - Page 12
d'Industrie Canada. Before installing this equipment, users should ensure that it is permissible to be the above conditions may not prevent degradation of service in some situations. Repairs to certified equipment should produit est 1.0. CANON CANADA INC. 1-800-263-1121 24 HOURS A DAY, SEVEN DAYS - Canon FAXPHONE L170 | Basic Guide - Page 13
United States. CAUTION Use of controls, adjustments, or performance of procedures other than those specified in this User's Guide may result in hazardous radiation exposure. The label is attached to the laser scanner machine inside the machine and is not in a user access area. xiv Users in Canada - Canon FAXPHONE L170 | Basic Guide - Page 14
xi FCC Notice xi Users in Canada xii Pre-installation requirements for Canon facsimile equipment xii Notice xiii Laser Safety xiv CDRH Regulations xiv Contents xv Introducing the FAXPHONE L170 Welcome 1-1 The Main Features of the Machine 1-2 Fax Features 1-2 Printer Features 1-3 Copier - Canon FAXPHONE L170 | Basic Guide - Page 15
2-14 Setting the Energy Saver Mode Manually 2-14 Restoring from the Energy Saver Mode 2-14 The Toner Cartridge 2-15 Handling and Storing Cartridges 2-15 Installing/Replacing the Toner Cartridge 2-16 Registering Information in the Machine Guidelines for Entering Information 3-1 Entering Numbers - Canon FAXPHONE L170 | Basic Guide - Page 16
Receiving Faxes Manually: Manual Mode 7-4 Receiving Faxes Automatically: FaxOnly Mode 7-5 Using an Answering Machine: AnsMode 7-5 Using the Machine With an Answering Machine 7-5 Receiving with a DRPD (Distinctive Ring Pattern Detection) service: DRPD 7-5 Receiving Faxes in Memory When a Problem - Canon FAXPHONE L170 | Basic Guide - Page 17
Dial List 12-8 User's Data List 12-9 Document Memory List 12-10 Troubleshooting Clearing Jams 13-1 Removing Jammed Paper from Inside the Machine 13-1 Removing Jammed Paper from the ADF 13-6 LCD Messages 13-7 Paper Feeding Problems 13-9 Faxing Problems 13-12 Sending Problems 13-12 Receiving - Canon FAXPHONE L170 | Basic Guide - Page 18
15-6 5. ADD. REGISTRATION 15-13 6. PRINTER SETTINGS 15-14 7. TIMER SETTINGS 15-15 8. PRINT LISTS 15-16 Specifications General A-1 Fax A-2 Copier A-3 Telephone A-3 Printer A-4 Printable Area: Papers A-5 Printable Area: Envelopes A-6 Document Sizes A-7 Printer Driver A-8 Contents xix - Canon FAXPHONE L170 | Basic Guide - Page 19
xx Contents - Canon FAXPHONE L170 | Basic Guide - Page 20
comes with the machine, and gives important safety instructions. Welcome Thank you for purchasing the new Canon FAXPHONE L170. We are sure that your machine will meet your printing and copying needs easily and conveniently, as well as your fax and phone requirements. FAXPHONE L170 Welcome 1-1 - Canon FAXPHONE L170 | Basic Guide - Page 21
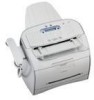
Introducing the FAXPHONE L170 The Main Features of the Machine This machine is a multifunction system for your home or small office, and combines a plain paper fax machine, a laser 1 printer, a copier, and a telephone into a single, convenient desktop machine. The machine's multitasking ability - Canon FAXPHONE L170 | Basic Guide - Page 22
Introducing the FAXPHONE L170 Printer Features ■ Excellent print quality The machine offers 1200 dpi enhanced × 600 dpi laser beam printing, providing you with high resolution text and graphics. ■ Simple maintenance The S35 Cartridge for the machine contains both the toner and drum, making - Canon FAXPHONE L170 | Basic Guide - Page 23
the printer driver with your machine, refer to the Software Guide also stored on this CD-ROM. System Requirements The printer driver for Windows 98/Me/2000/XP can be used in the following system environments. ■ Operating System Windows 98, Windows Me, Windows 2000, or Windows XP. ■ Computer - Canon FAXPHONE L170 | Basic Guide - Page 24
use the machine. • Basic Guide (this Guide) This Guide provides detailed information on how to use and troubleshoot your machine. • Software Guide This Guide (stored in the CD-ROM) describes how to use the machine to print from your PC. Introducing the FAXPHONE L170 Using Your Documentation - Canon FAXPHONE L170 | Basic Guide - Page 25
1 Introducing the FAXPHONE L170 1-6 Using Your Documentation - Canon FAXPHONE L170 | Basic Guide - Page 26
connect your machine, install the toner cartridge, and load paper-everything you need to know to get your machine ready to use. Choosing a Location for Your Machine Before unpacking your machine, follow these guidelines to choose an appropriate location for the machine. CAUTION Please review the - Canon FAXPHONE L170 | Basic Guide - Page 27
line cord • Documentation Set-Up Instructions Basic Guide Warranty Warranty for S35 Cartridge Registration Card (for USA only) • FAXPHONE L170 Software CD-ROM If any of the above items are damaged or missing, notify your local authorized Canon dealer immediately. 2-2 Unpacking Your Machine - Canon FAXPHONE L170 | Basic Guide - Page 28
Parts The only component of the machine that needs regular service or replacement is the S35 Cartridge. The S35 S-Cartridge comes with your machine but you should purchase the regular S35 Cartridge for replacement. Although Canon manufactures many types of toner cartridges, the S35 Cartridge - Canon FAXPHONE L170 | Basic Guide - Page 29
Setting Up Your Machine Assembling the Machine Use the following instructions to assemble the main unit and its components. To see how the machine will look fully assembled, see "Getting Acquainted With Your Machine," on p. 2-9. 2 Attaching Components NOTE Make sure the tabs are inserted into the - Canon FAXPHONE L170 | Basic Guide - Page 30
Setting Up Your Machine Installing the Paper Cassette 1 Attach the extension cover on the back of the machine. 2 2 Pull out the paper cassette. 3 Attach the cassette extension to the cassette. 4 Insert the paper cassette into the machine. Assembling the Machine 2-5 - Canon FAXPHONE L170 | Basic Guide - Page 31
Connect the machine to your computer as follows: 1 Make sure the computer is turned off and the machine is unplugged. 2 Connect the USB cable to your machine and PC during software installation to ensure the proper operation of the printer driver. (See the Software Guide.) 2-6 Making Connections - Canon FAXPHONE L170 | Basic Guide - Page 32
the supplied telephone line to . Connect the other end of line to a wall telephone jack. 2 If you connect an answering machine to the machine, be sure to read your answering machine's manual. NOTE You can also connect the extension phone to the jack marked if you have not connected the handset - Canon FAXPHONE L170 | Basic Guide - Page 33
use it. While the machine is warming up, the message appears in the LCD display: PLEASE WAIT 12/31/2004 WED 15:11 FaxOnly STANDARD NOTE If the toner cartridge has not been installed yet, the message appears in the LCD display, and the Alarm indicator flashes. In - Canon FAXPHONE L170 | Basic Guide - Page 34
. d Slide guides Adjust to the width of documents. e Operation panel Controls the machine. f Output tray Holds printout. Received faxes. g Printer cover Open it when you install the cartridge, or remove jammed paper. h Multi-purpose feeder Used when printing paper one by one manually. i Cassette - Canon FAXPHONE L170 | Basic Guide - Page 35
Setting Up Your Machine Rear View 2 a USB port Connect the USB (Universal Serial Bus) cable. b Handset jack Connect the handset. c socket Connect the power cord. g Extension cover Protects paper supply in the cassette from dirt and dust. h Machine Serial Number 2-10 Getting Acquainted With Your - Canon FAXPHONE L170 | Basic Guide - Page 36
flashes when an error occurs, or when the machine is out of paper or toner. g Status Monitor button Use this button to check the status of copy, fax, print and report jobs. h Energy Saver button Use this button to set or cancel the energy saver mode manually. The button lights green when the - Canon FAXPHONE L170 | Basic Guide - Page 37
Machine Special Function Buttons (One-Touch Speed Dial Panel Open) 21 22 23 24 25 26 27 28 2 29 30 Receive Mode Report 31 32 Delayed Transmission Polling Space Delete Clear to poll the other fax to receive a document. f Clear button Use this button to clear an entire entry during - Canon FAXPHONE L170 | Basic Guide - Page 38
to 'High', 'Low', or 'OFF'. b Speaker Volume Switch Adjust the volume of the handset so you can hear suitable from the speaker. Setting Up Your Machine Getting Acquainted With Your - Canon FAXPHONE L170 | Basic Guide - Page 39
other functions are operating, or when the In Use/Memory indicator lights up - When paper jams occur - When an error code appears and the Alarm indicator flashes - When no paper is loaded in the cassette Setting the Energy Saver Mode Manually 1 Press [Energy Saver]. The LCD is turned off and - Canon FAXPHONE L170 | Basic Guide - Page 40
Setting Up Your Machine The Toner Cartridge Handling and Storing Cartridges • Do not open the drum protective shutter on the cartridge. If the drum surface is exposed to light and damaged, print 2 quality may deteriorate. • Do not stand the cartridge on end, and do not turn it upside down. If - Canon FAXPHONE L170 | Basic Guide - Page 41
necessary. • Be sure to remove the toner cartridge from the machine when disposing of the machine. 2 CAUTION DO NOT PLACE THE CARTRIDGE IN FIRE. TONER POWDER IS FLAMMABLE. Installing/Replacing the Toner Cartridge The machine uses a Canon S35 Cartridge. The procedure on the next page explains - Canon FAXPHONE L170 | Basic Guide - Page 42
and pull out the seal completely with the other hand. TAB 6 Open the printer cover. NOTE If you are replacing the old cartridge with the new one, remove the old cartridge from the machine. Then, discard the old toner cartridge immediately according to the local laws and regulations for disposal of - Canon FAXPHONE L170 | Basic Guide - Page 43
Hold the cartridge and position the arrow mark on the cartridge towards the inside of the machine as shown below. 2 8 Align the projections on both sides of the cartridge to the guides in the machine and slide the cartridge completely into the machine. 9 Close the printer cover. 2-18 The Toner - Canon FAXPHONE L170 | Basic Guide - Page 44
user information into the machine. NOTE If you pause while entering information and do not make an entry for more than 60 seconds, the machine time until the machine returns to the standby mode can be specified in a range of 1 minute to 9 minutes. You can also turn off AUTO CLEAR function. (See - Canon FAXPHONE L170 | Basic Guide - Page 45
] under the One-Touch Speed Dial panel. ● To delete a character: ❑ Press [Delete] under the One-Touch Speed Dial panel. ● To delete an entire entry: ❑ Press [Clear] under the One-Touch Speed Dial panel. Registering Information in the Machine 3-2 Guidelines for Entering Information - Canon FAXPHONE L170 | Basic Guide - Page 46
. you used memory You can select if FAX or TEL is displayed before the number sending and dialed their fax number using speed dialing. ( TEL NUMBER MARK, p. 15-6). Your name or company name. The page number of the fax. To enter the sender information in your machine, follow the procedures - Canon FAXPHONE L170 | Basic Guide - Page 47
the Machine CLEAR Enter only the last 2 digits of the year. 4 Press [Stop/Reset] to return to standby mode. Registering Your Fax Number and Name Follow this procedure to register your fax characters, including spaces) ➞ press [Set]. Canon :A ➞ USER SETTINGS 3.TX TERMINAL ID For details on - Canon FAXPHONE L170 | Basic Guide - Page 48
telephone line type: 1 Press [Menu]. 2 Press [ (-)] or [ (+)] to select ➞ press [Set] three times. 3 Press [ (-)] or [ (+)] to select dialing 5 Press [Stop/Reset] to return to standby mode. Setting the Daylight Saving Time This machine supports the daylight saving time system - Canon FAXPHONE L170 | Basic Guide - Page 49
, day of the week, and time when the daylight saving time ends. (e.g. OCTOBER LAST WEEK, SUNDAY and 02:00) 11 Press [Set]. 12 Press [Stop/Reset] to return to standby mode. Registering Information in the Machine 3-6 Personalizing Your - Canon FAXPHONE L170 | Basic Guide - Page 50
the machine. If you have any questions about paper and transparencies, contact the Canon upright. • If the paper is curled, uncurl it before loading it in the cassette or multi-purpose feeder. Failure to do has been printed on using a thermal transfer printer (Do not print on the reverse side.) - Canon FAXPHONE L170 | Basic Guide - Page 51
Size Paper Weight Paper Type Transparency, Label*, Envelope, Postcard. * A label that can be loaded in the cassette is a standard type (label standard card) only. entire area where the machine can technically print from your computer. Printing area (light shade): Canon recommends that you print - Canon FAXPHONE L170 | Basic Guide - Page 52
to add paper to the paper cassette. Here are a few tips you should follow when you load paper into the paper cassette. • Be sure to load paper of the correct size, weight, and quantity recommended for your machine. • Stack the paper so that the top and bottom edges and sides are straight and even - Canon FAXPHONE L170 | Basic Guide - Page 53
from the rear of the cassette. 3 Pinch and slide the length slide guide to fit the size of the paper stack you want to load. 4 IMPORTANT If the slide guides are not adjusted correctly for the size of the paper, the quality of your printouts may be adversely affected or jams may occur - Canon FAXPHONE L170 | Basic Guide - Page 54
If you do not completely insert the cassette into the machine, paper jams may occur. Do not load paper from the rear of the cassette. 4 7 Specify Press [Stop/Reset] to return to standby mode. IMPORTANT • Do not load different size and type of paper at the same time. • Do not load extra paper - Canon FAXPHONE L170 | Basic Guide - Page 55
a flat surface to even the envelopes. 5 Pull out the cassette completely. 6 Pinch and slide the length slide guide to fit the size of the envelopes you want to load. IMPORTANT If the slide guides are not adjusted correctly for the size of the envelopes, the quality of your printouts may be adversely - Canon FAXPHONE L170 | Basic Guide - Page 56
load limit mark of the paper guide. If the envelopes exceed the load limit mark, this may result in misfeeds. NOTE If you do not completely insert the cassette into the machine ➞ press [Set]. ❑ Press [Stop/Reset] to return to standby mode. NOTE You must set envelope size through - Canon FAXPHONE L170 | Basic Guide - Page 57
paper in the multi-purpose feeder is fed prior to the paper in the cassette. 1 Slide the slide guides to fit the size of the paper you want to load. 4 IMPORTANT If the slide guides are not adjusted correctly for the size of the paper, the quality of your printouts may be adversely - Canon FAXPHONE L170 | Basic Guide - Page 58
the appropriate paper type ➞ press [Set]. ❑ Press [Stop/Reset] to return to standby mode. 4 Loading an Envelope in the Multi-Purpose Feeder Use the multi-purpose feeder Slide the slide guides to fit the size of the envelope you want to load. IMPORTANT If the slide guides are not adjusted correctly - Canon FAXPHONE L170 | Basic Guide - Page 59
➞ press [Set]. ❑ Press [Stop/Reset] to return to standby mode. Testing the Machine After you have assembled your machine, installed the toner cartridge, loaded paper, you can make sure the machine is printing properly by making several copies of a document. For instructions, see Chapter 10, "Making - Canon FAXPHONE L170 | Basic Guide - Page 60
Orientation of the Document and the Paper Loading When you load a document in the ADF, the orientation of the document and the orientation of the paper in the cassette or in the multi-purpose feeder are as shown below. PAPER - Canon FAXPHONE L170 | Basic Guide - Page 61
the face up paper output. Select the area depending on your purpose by opening or closing the face up cover on the back of the machine. Open the face up cover for face up paper output, or close the face up cover for face down paper output. 4 IMPORTANT Do not open - Canon FAXPHONE L170 | Basic Guide - Page 62
Paper Output Area The paper is delivered with the printed side up out of the face up paper output on the back side of the machine. This way is convenient for printing on transparencies, envelopes, or labels which tend to curl, because the paper is delivered straight through the - Canon FAXPHONE L170 | Basic Guide - Page 63
4 Paper Handling 4-14 Selecting the Paper Output Area - Canon FAXPHONE L170 | Basic Guide - Page 64
manner you can search for the fax/telephone number registered for One-Touch Speed Dialing. The following pages describe how to register numbers for speed dialing. You will also find instructions for changing numbers and names registered under speed dialing buttons and codes, and how to use speed - Canon FAXPHONE L170 | Basic Guide - Page 65
Speed Dialing Storing Numbers for One-Touch Speed Dialing Your machine can store up to 32 fax numbers under One-Touch Speed Dial buttons. Follow this procedure steps 3 to 5. -orIf you have finished registering numbers, press [Stop/Reset] to return to standby mode. 7 After you register a number for - Canon FAXPHONE L170 | Basic Guide - Page 66
Press [Stop/Reset] to return to standby mode. ● To change the number and/or name: 3 Open One-Touch Speed Dial panel ➞ press [Clear] to delete the previous entry. 4 Press the numeric buttons to enter the new number ➞ press [Set] twice. TEL NUMBER ENTRY :A TEL=124xxxx ➞ Canon - Canon FAXPHONE L170 | Basic Guide - Page 67
to change the setting. See p.15-9 for more details. • If an error occurs during sending, the machine will print an error report. If this happens, try sending the fax again. See "Faxing Problems," on p. 13-12 for details about errors. NOTE • You can also use One-Touch Speed Dialing to send - Canon FAXPHONE L170 | Basic Guide - Page 68
times (See p.9-1). 6 Use the numeric buttons to enter the name you want to store (max. 16 letters, including spaces) ➞ press [Set]. Canon OPTICS :A ➞ CODED 03= SPD DIAL • For details on how to enter or delete letters, see "Entering Numbers, Letters, and Symbols," on p. 3-1. 7 To continue - Canon FAXPHONE L170 | Basic Guide - Page 69
[Set] twice after step 2 ➞ open One-Touch Speed Dial panel ➞ go to step 5. 5 Press [Clear] to delete the previous entry. 6 Press the numeric buttons to enter the new name ➞ press [Set]. Canon ITALIA :A CODED SPD DIAL ➞ 03= • For details on how to enter or delete letters, see "Entering Numbers - Canon FAXPHONE L170 | Basic Guide - Page 70
> setting. See p.15-9 for more details. • If an error occurs during sending, the machine will print an error report. If this happens, try sending the fax again. See "Faxing Problems," on p. 13-12 for details about errors. NOTE You can also use Coded Speed Dialing to send a document to more than one - Canon FAXPHONE L170 | Basic Guide - Page 71
for the number using the numeric buttons. For multiple entries, press [Coded Dial] between each entry. NOTE • You cannot register numbers in the groups that have not been registered for One-Touch or Coded Speed Dialing. • You can review the numbers registered under the group by pressing [ (-)] or - Canon FAXPHONE L170 | Basic Guide - Page 72
4 to 6. -orIf you have finished registering groups, press [Stop/Reset] to return to standby mode. Changing or Deleting a Number/Name Stored for One-Touch or Coded Speed Dialing. • You can review the numbers registered under the group by pressing [ (-)] or [ (+)]. 5 Press [Clear] to delete the - Canon FAXPHONE L170 | Basic Guide - Page 73
registering groups, press [Stop/Reset] to return to standby mode. Using Group Dialing To send a document to a group of numbers, follow these instructions. 1 Load the document in the ADF. For details on the types of documents you can fax, their requirements, and how to load documents, see "Document - Canon FAXPHONE L170 | Basic Guide - Page 74
other party's name but can not recall the One-Touch Speed Dial button, the code for Coded Speed Dialing, or Group Dialing where the number is registered. 1 Press [FAX]. If you are already in the Fax standby mode, you can skip this step. 2 Press [Directory]. 5 :A _ appears if - Canon FAXPHONE L170 | Basic Guide - Page 75
5 Speed Dialing 5-12 Directory Dialing - Canon FAXPHONE L170 | Basic Guide - Page 76
describes how to use your machine to send faxes. 6 CHAPTER Preparing to Send a Fax Document Requirements The documents you load into the machine must meet the following requirements. When loading a multi-page document: Size: (W × L) Quantity: Thickness Weight: Max.: 8 1/2" × 14" (216 × 356 mm - Canon FAXPHONE L170 | Basic Guide - Page 77
Sending Faxes ■ Problem documents • To prevent paper jams in the Automatic Document Feeder (ADF), do not use any of the following paper in the machine: WRINKLED OR CREASED PAPER CURLED OR ROLLED PAPER TORN PAPER CARBON PAPER OR COATED PAPER ONION SKIN OR CARBON-BACKED THIN PAPER 6 PAPER - Canon FAXPHONE L170 | Basic Guide - Page 78
machine first, then tap the edges of multiple page documents on a flat surface to even the stack. 2 Adjust the document guides to the width of the document. 6 3 Load the document faced down in the ADF LGL-size documents can be set in the ADF. If more than 50 sheets of LTR-size documents or 20 sheets - Canon FAXPHONE L170 | Basic Guide - Page 79
(ADF) until it stops. 6 NOTE • If you have further trouble with page jams while feeding, see "Removing Jammed Paper from the ADF," Canon's Ultra High Quality (UHQ™) imaging technology enables you to send faxes with a print quality that is very close to that of the original document. The machine - Canon FAXPHONE L170 | Basic Guide - Page 80
AUTO CLEAR> function activates or documents are scanned. Since of is set to 'OFF' in the factory default setting, the scanning density set using [Exposure] will remain unchanged. (See Chapter 15, "The Menu System.") • You can set the level of each scanning density (LIGHT - Canon FAXPHONE L170 | Basic Guide - Page 81
To use memory sending, you load the document, dial the fax number ➞ press [Start]. See p. 6-7 for more details on memory sending. Since the machine is multitasking, you can even scan a document into the memory while sending a document, receiving a document, or printing a report. Manual Sending Via - Canon FAXPHONE L170 | Basic Guide - Page 82
how to set the machine to redial automatically, see "Automatic Redialing With Memory Sending," on p. 6-10. 6 Follow this procedure for memory sending: 1 Load the document in the ADF. For details on the types of documents you can fax, their requirements, and how to load documents, see "Document - Canon FAXPHONE L170 | Basic Guide - Page 83
, or if the other party does not have a fax machine that can receive automatically. Follow this procedure for manual sending: 1 Load the document in the ADF. For details on the types of documents you can fax, their requirements, and how to load documents, see "Document Requirements," on p. 6-1, and - Canon FAXPHONE L170 | Basic Guide - Page 84
Canceling Sending Canceling Memory Sending While Documents Are Being Scanned Using the ADF 1 Press [Stop/Reset]. Scanning is canceled. After All Documents Are Scanned 6 1 While documents are being sent, press [Stop/Reset]. The machine asks you to confirm that you want to cancel. CANCEL DURING TX - Canon FAXPHONE L170 | Basic Guide - Page 85
with the numeric buttons, press [Redial/Pause]. To cancel manual redialing, press [Stop/Reset Automatic Redialing With Memory Sending With memory sending, you can set the machine to automatically dial the fax number again if the receiving fax machine does not answer or if the line is busy. You - Canon FAXPHONE L170 | Basic Guide - Page 86
Set] again ➞ use or the numeric buttons to enter the number of times you want the machine to redial ➞ press [Set] twice. REDIAL TIMES 02TIMES ➞ REDIAL INTERVAL 02MIN. 7 Press TX SETTINGS 02MIN. ➞ 4.TIME OUT 8 Press [Stop/Reset] to return to standby mode. Sending Faxes Redialing 6-11 - Canon FAXPHONE L170 | Basic Guide - Page 87
can also include one destination that you dial manually using the numeric buttons or [Redial/Pause]. Be sure to press [Set] after your entry with 6 the numeric keys. To send a fax to more than one location, do the following: 1 Load the document in the ADF. For details on the types of documents - Canon FAXPHONE L170 | Basic Guide - Page 88
TIME OUT> setting. See p. 15-9 for more details. 6 • If you want to review the numbers you entered, use the [ (-)] or [ (+)] to scroll through the numbers. 5 Press [Start]. The machine then scans the document into memory, and begins sending it to the destinations in numerical order, starting with - Canon FAXPHONE L170 | Basic Guide - Page 89
machine allows you to scan a document into its memory and send it automatically at a preset time. By using this feature, you can take advantage of lower long distance rates at night, for example. You can set up to 142 destinations and up to 20 reservations for delayed sending. Sending Faxes 1 Load - Canon FAXPHONE L170 | Basic Guide - Page 90
for delayed sending, simply follow the procedures described in this Basic Guide. • To cancel a delayed sending, see "Deleting a Fax Job," on p.11-2. • The machine can print a list of document stored in memory (DOCUMENT MEMORY LIST), along with the transaction number of each document. The document - Canon FAXPHONE L170 | Basic Guide - Page 91
6 Sending Faxes 6-16 Delayed Sending - Canon FAXPHONE L170 | Basic Guide - Page 92
have to manually activate reception of machine. the fax. AnsMode Fax/Tel Receives faxes automatically and routes voice calls to the answering machine. Answering machine connected to the machine. DRPD Fax/Tel Rings differently depending on whether Subscription to a DRPD service. Handset or - Canon FAXPHONE L170 | Basic Guide - Page 93
], the receive mode changes in the following order: FaxOnly ➞ DRPD ➞ Manual ➞ AnsMode ➞ FaxTel ➞ FaxOnly ➞ ... Receiving Faxes and Phone Calls Automatically: FaxTel Mode Set this mode if you want your machine to automatically switch between voice and fax calls. You can control precisely how your - Canon FAXPHONE L170 | Basic Guide - Page 94
setting = 15 sec.) The machine listens for fax tone (For 6 sec.) Fax tone detected Fax tone is not detected The telephone starts ringing If you donít pick up the handset (within 15 sec.) Document received automatically (Fax tone is detected and the FAXPHONE L170 switches to receive mode.) Pick - Canon FAXPHONE L170 | Basic Guide - Page 95
the specified ring time set in step 6. 8 Press [Stop/Reset] to return to standby mode. Receiving Faxes Manually: Manual Mode To use this mode, you must have the handset or a telephone connected to the machine. In Manual Mode, the machine rings every time it receives a call, whether the call is - Canon FAXPHONE L170 | Basic Guide - Page 96
the first or second ring. • If the machine runs out of paper or toner in AnsMode, it receives all faxes into memory. The faxes then print automatically when you add paper or replace the toner cartridge. • When recording the outgoing message on the answering machine: - The entire message must be no - Canon FAXPHONE L170 | Basic Guide - Page 97
resend the remaining pages of the fax. If the machine receives a document into its memory, the LCD displays one of the following messages. These messages show the action you must take to correct the problem. REPLACE CARTRIDGE 7 Cause: The toner cartridge ran out of toner or is not installed properly - Canon FAXPHONE L170 | Basic Guide - Page 98
go into memory. Canceling an Incoming Fax To cancel an incoming fax, follow this procedure: 1 Press [Stop/Reset]. CANCEL DURING TX/RX? < YES NO > 2 Press [ (-)] to [Stop/Reset] receiving, or [ (+)] to resume receiving the fax. 7 Receiving Faxes Receiving Faxes in Memory When a Problem Occurs - Canon FAXPHONE L170 | Basic Guide - Page 99
7 Receiving Faxes 7-8 Receiving Faxes in Memory When a Problem Occurs - Canon FAXPHONE L170 | Basic Guide - Page 100
are holding. • If the other party is using a Canon fax machine which has the Polling ID function, ask them to set the Polling ID of their fax machine to 255 (1111 1111 binary number). For details on the Polling ID, see the other party's fax machine manual. In all other cases the Polling ID is not - Canon FAXPHONE L170 | Basic Guide - Page 101
document is on his fax machine and ready to be sent: when your machine polls that machine, the document is sent automatically. The machine can poll any fax machine that supports polling. Requesting Another Fax to Send a Document 1 Press [FAX]. If you are already in the Fax standby mode, you can - Canon FAXPHONE L170 | Basic Guide - Page 102
Menu. The polling box holds the document in the memory until the other party prompts (polls) your fax to send the document, or until you delete the up to 24 characters including spaces) using the numeric buttons ➞ press [Set]. CANON TOKYO :A SETUP FILE ➞ 2.PASSWORD • For details on how to enter - Canon FAXPHONE L170 | Basic Guide - Page 103
Document into the Memory for Polling Sending Follow this procedure to store a document in the polling box. The document remains in the polling box so that other fax machines can poll it. To use polling sending, you have to previously create a polling box. 1 Load the document in the ADF. For details - Canon FAXPHONE L170 | Basic Guide - Page 104
of a polling box. 1 Press [Menu]. 2 Press [ (-)] or [ (+)] to select ➞ press [Set]. 3 Press [ (-)] or [ (+)] to select ➞ are finished making changes, press [Stop/Reset] to return to standby mode. Setting Up and Using Polling Setting Up Polling Sending 8-5 - Canon FAXPHONE L170 | Basic Guide - Page 105
document for polling sending. 1 Press [Menu]. 2 Press [ (-)] or [ (+)] to select ➞ press [Set]. 3 Press [ (-)] or [ (+)] to select ➞ how to delete documents stored in memory, see "Deleting a Fax Job," on p. 11-2. 6 Press [Stop/Reset] to return to standby mode. - Canon FAXPHONE L170 | Basic Guide - Page 106
Special Features This chapter describes the special features of the machine. 9 CHAPTER Special Dialing This section explains special dialing features, such as dialing international numbers. Dialing Long Distance When you register a long distance number, you may - Canon FAXPHONE L170 | Basic Guide - Page 107
you have a pulse line, the machine enables you to use tone dialing once you have connected to the number you are calling. This allows you to take advantage of many services that require tones, such as selecting options from telephone "touch-line" services. 1 Press [FAX]. If you are already in the - Canon FAXPHONE L170 | Basic Guide - Page 108
to the office, you can review the contents of the memory, and enter the memory lock password to print all of the documents stored in memory. Turning Memory Lock ON and Setting the Password After Memory Lock is turned 'ON', the machine automatically enters the Memory Lock mode. The documents received - Canon FAXPHONE L170 | Basic Guide - Page 109
Management Reports. No report prints while in the Memory Lock mode. A report prints while the machine is in the Memory Lock mode. (The factory default setting is in bold face.) 7 Press [Stop/Reset] to return to standby mode. Turning Memory Lock OFF and Printing Documents Follow this procedure to - Canon FAXPHONE L170 | Basic Guide - Page 110
machine's convenient features is its ability to make up to 99 high-quality copies of a document. To make copies, do the following: 1 Load the document in the ADF. For details on how to place or load documents, see "Loading Documents in the ADF cancel copying, press [Stop/Reset]. Making Copies 10-1 - Canon FAXPHONE L170 | Basic Guide - Page 111
intend to make a copy and print with a thermal transfer printer using the same sheet of paper, make the copy first. it is output. Specifying the Paper Size At the factory, the paper size has already been set to - Canon FAXPHONE L170 | Basic Guide - Page 112
[ (-)] or [ (+)] to select the appropriate paper type (PLAIN PAPER, PLAIN PAPER L, HEAVY PAPER, HEAVY PAPER H, or TRANSPARENCY) ➞ press [Set]. 6 Press [Stop/Reset] to return to standby mode. 10 Making Copies Specifying the Paper Size and Type (Common for Cassette and Multi-Purpose Feeder) 10-3 - Canon FAXPHONE L170 | Basic Guide - Page 113
%, 100%, 129% and 200%. A: 50%, 70%, 100%, 141% and 200%. AB: 50%, 70%, 81%, 86%, 100%, 115%, 141% and 200%. "INCH" is set as the factory default. • To reset the copy ratio, press [Enlarge/Reduce] several times to display ratio ➞ press [Set]. 10-4 Setting Enlarging/Reducing - Canon FAXPHONE L170 | Basic Guide - Page 114
can use [ (-)] or [ (+)] to adjust the copy ratio. To increase the copy ratio, press [ (+)]. To decrease the copy ratio, press [ (-)]. NOTE To reset the copy ratio, press [Enlarge/Reduce] several times to display ratio ➞ press [Set]. 10 Making Copies Setting Enlarging/Reducing 10 - Canon FAXPHONE L170 | Basic Guide - Page 115
when or is set. Adjusting the Exposure (Density) You can adjust the copy exposure automatically or manually according to how light or dark your document is. Adjusting Automatically 1 Press [Copy]. If you are already in the Copy standby mode, you can skip this step. 2 Press - Canon FAXPHONE L170 | Basic Guide - Page 116
1 Press [Copy]. If you are already in the Copy standby mode, you can skip this step. 2 Press [Exposure] twice to select the manual mode. 3 Press [ (-)] or [ (+)] to adjust the copy exposure ➞ press [Set]. For a lighter copy exposure, press [ (-)]. For a darker copy exposure, press [ (+)]. DENSITY - Canon FAXPHONE L170 | Basic Guide - Page 117
Special Features The machine can perform the Collate Copy and Reserve Copy. SORT> ➞ press [Set]. 4 Press [ (-)] or [ (+)] to select ➞ press [Set]. 5 Press [Stop/Reset] to return to standby mode. The Collate Copy function is set to 'ON.' To perform copying, follow the procedure described in " - Canon FAXPHONE L170 | Basic Guide - Page 118
This feature allows you to reserve the next job while the machine is printing out a current job. 1 Load the document faced down to be reserved in the ADF. For details on how to load documents, see "Loading Documents in the ADF," on p. 6-3. 2 Use the numeric buttons to enter the number of copies - Canon FAXPHONE L170 | Basic Guide - Page 119
(-)] or [ (+)] to confirm the reservation number and number of documents. NOTE To finish confirming, press [Stop/Reset]. Deleting the Copy Job You Reserved 1 Press [Stop/Reset] while the machine is printing out. 2 Press [ (-)] or [ (+)] to display the job to be deleted ➞ press [Set]. SELECT 0045 - Canon FAXPHONE L170 | Basic Guide - Page 120
MONITOR 1.RX/TX STATUS ➞ 16:50 0056 TX 123xxxx NOTE • To return to standby mode, press [Stop/Reset]. • If you perform the procedure above when the machine is not sending or receiving faxes, appears, and the display returns to the display shown in step 1. • The transaction - Canon FAXPHONE L170 | Basic Guide - Page 121
fax number. 3 Press [ (-)] or [ (+)] to confirm the sending result and reservation. 15:34 0010 TX STNDBY [ 01]CANON USA NOTE • To return to standby mode, press [Stop/Reset of the reserved fax job by printing the DOCUMENT MEMORY LIST. (See p. 12-10.) 4 If you want to delete the fax job, press [ - Canon FAXPHONE L170 | Basic Guide - Page 122
ASCII cord. Using characters other than those in ASCII cord may have the LCD display garbled characters. System Monitor 11 Checking the Status of Copy, Fax, Print and Report Jobs 11-3 - Canon FAXPHONE L170 | Basic Guide - Page 123
there are multiple report jobs, press [ (-)] or [ (+)] to select the job you want to delete. REPORT STATUS 02 USER DATA LIST 5 Press [Set]. CANCEL REPORT? < YES NO > 6 If you decide to delete the job, press [ . System Monitor 11-4 Checking the Status of Copy, Fax, Print and Report Jobs - Canon FAXPHONE L170 | Basic Guide - Page 124
ACTIVITY REPORT 3 Press [Set]. The machine prints the ACTIVITY REPORT and the LCD returns to standby mode. 12/31 2004 09:58 FAX 8334423 WORLD ESTATE,INC. 001 ACTIVITY 0 #995 1 OK 00'18 ERROR CODE IF MARKED WITH AN ❉ IT ALREADY HAS BEEN PRINTED OUT. TRANSACTION NUMBER Activity Report 12-1 - Canon FAXPHONE L170 | Basic Guide - Page 125
Transmission (TX) Reports The machine normally prints a report only when an error occurs during sending (ERROR TX REPORT). However, you can set the machine to print a report every time you send a document (TX REPORT). If you send a document using memory, you can also select whether the first page - Canon FAXPHONE L170 | Basic Guide - Page 126
COMPANY LIMITED SAPORS LANE BOOLE DORSET BH25 8ER TELEPHONE BOOLE (945 13) 51617 FAX 123456 Our Ref. 350/PJC/EAC Dr. P. N. Cundall, Mining Surveys TRANSACTION OK ERROR INFORMATION 0013 1 _____ [ 01]732 2233 [ 03]1 914 438 3619 _____ JOHN BARRISTER SEYMOUR GREEN If you set your machine to print - Canon FAXPHONE L170 | Basic Guide - Page 127
you set it to do so. You can set the machine to print the RX REPORT every time you receive a document or only if an error occurs during receiving. See p. 15-8 for details on setting this option. 12/31 2004 09:58 FAX 8334423 WORLD ESTATE,INC. 001 ❉❉❉ RX REPORT ❉❉❉ RECEPTION OK TX - Canon FAXPHONE L170 | Basic Guide - Page 128
3 12/30 10:26 001 ST. TIME 23:30 NOTE If there are one or more documents in the image memory when the power is cut off, the machine will print the Memory Clear Report when the power is restored unless the machine is running out of paper or toner. 12 Reports and Lists Memory Clear Report 12-5 - Canon FAXPHONE L170 | Basic Guide - Page 129
Speed Dialing Lists Your machine can print speed dialing lists. These lists allow you to review the numbers and names registered under One-Touch Speed Dial buttons and Coded Speed Dialing codes (including Group Dialing numbers). Follow this procedure to print the lists. 12 1 Press [Menu]. 2 Press - Canon FAXPHONE L170 | Basic Guide - Page 130
DESTINATION TEL # DESTINATION ID BILL SEYMOUR GREEN NATALIE SMITH HUNT INVESTMENTS ADAM BOOKS.CPA SORTED 12/31 2004 10:32 FAX 8334423 WORLD ESTATE,INC. 001 ❉❉❉ CODED DIAL LIST ❉❉❉ NO. [❉ 08] 732 2233 [❉ 01] 555 1234 [❉ 04] 1 617222322 [❉ 03] 1 516 911 4411 [❉ 02] 1 914 438 3619 - Canon FAXPHONE L170 | Basic Guide - Page 131
Group Dial List 12/31 2004 13:36 FAX 833 4423 WORLD ESTATE,INC. [ 05] CANON GROUP ❉ ❉ ❉ GROUP DIAL TEL # LIST ❉ ❉ ❉ [ 01] 876 2398 [ 02] 613 9076 [❉ 01] 225 7823 [❉ 10] 233 7766 001 CANON TX CANON OH CANON NY CANON CA 12 Reports and Lists 12-8 Speed Dialing Lists - Canon FAXPHONE L170 | Basic Guide - Page 132
the data registered in your machine. This list is useful when you want to review the user data information you may have entered (such as your name and number, the date and time) and all other settings currently selected. Follow this procedure to print the USER'S DATA LIST. 1 Press [Menu]. 2 Press - Canon FAXPHONE L170 | Basic Guide - Page 133
RX NO.) of each document. 12 1 Press [FAX]. If you are already in the Fax standby mode, you can skip this step. 2 Open One-Touch Speed Dial panel ➞ press [Report]. Press [ (-)] or [ (+)] to select ➞ press [Set]. The machine prints the DOCUMENT MEMORY LIST and the LCD returns to - Canon FAXPHONE L170 | Basic Guide - Page 134
the problem by yourself. Clearing Jams This section describes how to remove jammed paper. Removing Jammed Paper from Inside the Machine When print media jams inside the machine, the LCD displays and . CAUTION There are some areas inside the machine and cartridge - Canon FAXPHONE L170 | Basic Guide - Page 135
deterioration. • To avoid possible damage to the printer, do not touch the pins near the left end of the transfer roller. Troubleshooting PINS TRANSFER ROLLER NOTE Do not expose the cartridge to light for more than 5 minutes. If necessary, put the cartridge in its original protective bag or wrap - Canon FAXPHONE L170 | Basic Guide - Page 136
up paper out of the machine. 6 If the leading edge of the paper is visible but has not entered the imaging area, pull the paper forwards and roll it inwards. IMPORTANT • Do not pull the jammed paper forward from the cassette. It may cause a malfunction. 13 Troubleshooting Clearing Jams 13-3 - Canon FAXPHONE L170 | Basic Guide - Page 137
jammed paper is badly folded, similar to the folds of an accordion, ease the jammed paper loose and then pull it out of the machine 9 Close the printer cover. 10 Pull out the cassette. When pulling out the cassette, be sure to pull it out slowly and completely. Troubleshooting 13-4 Clearing Jams - Canon FAXPHONE L170 | Basic Guide - Page 138
hand on it, paper may be torn. • Do not touch the paper feed roller. If you touch it, this may result in misfeeds. ● When feeding paper their original position. If the levers are left pushed down, the paper jam error will not be resolved. • Never push down the paper release levers while printing - Canon FAXPHONE L170 | Basic Guide - Page 139
set paper into the manual feed slot and perform printing operation again in this step. IMPORTANT • After you replace the cartridge and close the printer cover, the machine should be ready for operating. If the machine returns to the ready state for operating, troubleshooting has been successful. If - Canon FAXPHONE L170 | Basic Guide - Page 140
in the setting of the Menu. Then reset the machine by opening the printer cover and then closing it. INSTALL CARTRIDGE LOAD LTR SIZE PAPER MEM IN USE nn % MEMORY FULL The cartridge is not installed or not Install the cartridge correctly. (See pages 2-16 to 2-18) installed correctly - Canon FAXPHONE L170 | Basic Guide - Page 141
in the cassette or multi-purpose feeder. Then reset the machine by opening the printer cover and then closing it. The machine received the fax in memory Load correct paper size in the cassette, replace the cartridge, or because paper or toner ran out, a paper clear the paper jam. (See p.7-6.) jam - Canon FAXPHONE L170 | Basic Guide - Page 142
paper in the multi-purpose feeder is loaded properly, and that the slide guides are adjusted correctly. (See "Loading Paper," on p. 4-3.) A Make sure the paper exit path is clear. Multiple sheets feed into the machine at the same time. Q Is paper loaded correctly? A Make sure the paper stack - Canon FAXPHONE L170 | Basic Guide - Page 143
for the machine. (See Chapter 4, "Paper Handling.") Transparencies do not feed correctly. Q Are the transparencies loaded correctly? A Make sure the transparencies in the cassette or the transparency in the multi-purpose feeder is loaded properly, and that the slide guides are adjusted - Canon FAXPHONE L170 | Basic Guide - Page 144
Is the machine installed in a proper location? A Check that the machine is installed in the proper location. (For information about specifications of the machine, see SETTINGS> of the Menu. (See "Loading Envelopes in the Cassette," on p. 4-5.) Troubleshooting Paper Feeding Problems 13-11 - Canon FAXPHONE L170 | Basic Guide - Page 145
been provided with an incorrect number? A Dial the number again, or check that you have the correct number. Q Does the other party's fax machine have enough paper? A Call the other party and ask them to make sure paper is loaded in their fax machine. Troubleshooting 13-12 Faxing Problems - Canon FAXPHONE L170 | Basic Guide - Page 146
(See "Loading Documents in the ADF," on p. 6-3.) Faxes sent from the machine are spotted or dirty. 13 Q Is the machine (sending fax machine) working properly? A Check the machine by making a copy. For more information, see Chapter 10, "Making Copies." If the copy is clear, the problem may be - Canon FAXPHONE L170 | Basic Guide - Page 147
set to mode. (See "5.MAN/AUTO SWITCH," on p. 15-10.) Q Is the memory full? A Wait for the machine to finish any fax or print jobs stored in the memory or delete them from the memory. (See "Deleting a Fax job," p. 11-2.) Then ask the other party to resend the fax. Q Did an error occur - Canon FAXPHONE L170 | Basic Guide - Page 148
sure the scanning glass of their fax machine is clean. Faxes do not print. 13 Troubleshooting Q Is the cartridge installed properly? A Make sure the cartridge is installed properly. For more information, see "Installing/Replacing the Toner Cartridge," on p. 2-16. Faxing Problems 13-15 - Canon FAXPHONE L170 | Basic Guide - Page 149
the Toner Cartridge," on p. 2-16. A Select in in of the Menu. With this setting, the machine will not store documents in the memory even if the toner has run out. (See "2.TONER SUPPLY LOW," on p. 15-11.) Q Is the correct paper loaded in - Canon FAXPHONE L170 | Basic Guide - Page 150
Q Is the telephone line connected in securely? A Check that the telephone cables are connected securely to the jacks on the machine, the telephone jack on your wall and the jack on your telephone. (See "Connecting the Telephone Line," on p. 2-7.) 13 Troubleshooting Telephone Problems 13-17 - Canon FAXPHONE L170 | Basic Guide - Page 151
after you feed them in the ADF. Q Are the scanning glass and rollers of the ADF clean? A Clean the scanning glass and rollers of the ADF. (See "Cleaning the ADF Area," on p. 14-2.) NOTE For additional troubleshooting, see "Print Quality Problems," on p. 13-19. Troubleshooting 13-18 Copying - Canon FAXPHONE L170 | Basic Guide - Page 152
Replacing the Toner Cartridge," on p. 2-16.) Q Is the machine adjusted to room temperature? If not, condensation might build up inside the machine. A Allow at least 2 hours for the machine to adjust to room temperature before attempting to use it. 13 Troubleshooting Print Quality Problems 13 - Canon FAXPHONE L170 | Basic Guide - Page 153
" on p. v.) Copies are too dark or too light. Q Is the exposure adjusted correctly? A Adjust the exposure correctly using [Exposure]. (See "Adjusting the Exposure (Density)," on p. 10-6.) Q Is the machine in the toner saver mode? A Set to "OFF" in - Canon FAXPHONE L170 | Basic Guide - Page 154
Printing Problems The Alarm indicator comes on. Q Does the machine feed paper correctly, or is there paper in the cassette or multi-purpose feeder? A Clear the paper jam, or load paper in the cassette or multi-purpose feeder. (For instructions on clearing paper jam, see "Clearing Jams," on p. - Canon FAXPHONE L170 | Basic Guide - Page 155
your machine: • The machine's name: FAXPHONE L170 • The machine serial number (on a label on the back of the machine) SERIAL NUMBER • Where you purchased the machine 13 • A detailed description of the problem • The steps you have taken to solve the problem, and the results Troubleshooting 13 - Canon FAXPHONE L170 | Basic Guide - Page 156
periodic cleaning, and replacing of the toner cartridge as needed. 14 CHAPTER Cleaning the Machine Clean your machine regularly to keep it in good operating condition. NOTE Follow these precautions whenever you clean the machine: - When cleaning the machine's exterior or the scanning glass, be - Canon FAXPHONE L170 | Basic Guide - Page 157
lines are appearing on printouts. If you have trouble getting the glass clean, wipe with a cloth load a document is the ADF, always check to make sure that any paste, ink, or correction fluid that is on the document is completely dry. NOTE When you unplug the machine, any documents stored in memory - Canon FAXPHONE L170 | Basic Guide - Page 158
. • Clean with a soft cloth that will not scratch the glass or rollers. • Use a soft, dry, clean cloth to wipe up paper dust around the rollers. SCANNING GLASS 4 Clean the shaded areas of the operation panel and the machine. Dirt and dust particles that collect on the underside of the operation - Canon FAXPHONE L170 | Basic Guide - Page 159
or your computer, remove the telephone line or printer cable. 3 Open the printer cover. 4 Grip the end of the cartridge, and remove it from the machine. In order to avoid direct sunlight, place the cartridge in the protective bag that the cartridge came in when you purchased it. 5 Close the - Canon FAXPHONE L170 | Basic Guide - Page 160
change ➞ press [Set]. COPY SETTINGS 2.STANDARD EXPOSURE ➞ STANDARD EXPOSURE MANUAL NOTE • For details on submenus, see "Menu Descriptions," on p. • If you press [Stop/Reset] before [Set] is pressed, the item you have selected will not be registered. • Press [Stop/Reset] to exit from the Menu. - Canon FAXPHONE L170 | Basic Guide - Page 161
specified in millimeters.) Sets the paper type to be used on the multi-purpose feeder. PLAIN PAPER, TRANSPARENCY, PLAIN PAPER L, HEAVY PAPER, HEAVY PAPER H (The factory default setting is in bold face.) The Menu System 15-2 Menu Descriptions - Canon FAXPHONE L170 | Basic Guide - Page 162
off. 2.ALARM VOLUME Adjusts the alarm volume. ON 1 to 3 OFF The volume is turned off. 3.TX DONE TONE Adjusts the volume of the done tone sounded when the machine has finished sending faxes. ON 1 to 3 ERROR ONLY 1 to 3 OFF The volume is turned off. 15 (The factory default setting - Canon FAXPHONE L170 | Basic Guide - Page 163
OFF 5.PRINTING END TONE ON ERROR ONLY OFF 6.SCANNING END TONE ON ERROR ONLY OFF 7.LINE MONITOR VOL. ON OFF 4.PRINT EXPOSURE 5.TONER SAVER MODE ON OFF 6.DISPLAY LANGUAGE Descriptions Adjusts the volume of the done tone sounded when the machine has finished receiving faxes. 1 to 3 1 to 3 The volume - Canon FAXPHONE L170 | Basic Guide - Page 164
a big number. When you make 15 copies of photographs, select a small number. 1 to 9 (5) (The factory default setting is in bold face.) *1 STANDARD EXPOSURE automatically changes to MANUAL when TEXT/PHOTO or PHOTO is selected. *2 STD. IMAGEQUALITY automatically changes to TEXT ORIGINAL when AUTO - Canon FAXPHONE L170 | Basic Guide - Page 165
USER TEL NO. 2.TEL LINE TYPE TOUCH TONE ROTARY PULSE 3.TX START SPEED 4.RX START SPEED 2.UNIT NAME 3.TX TERMINAL ID 1.TTI POSITION 2.TEL NUMBER MARK 15 Descriptions Specifies the basic operation settings in the Fax number. FAX, TEL (The factory default setting is in bold face.) The Menu - Canon FAXPHONE L170 | Basic Guide - Page 166
SETTINGS 1.TX REPORT OUTPUT NO PRINT ERROR ONLY REPORT WITH TX IMAGE ON OFF Descriptions Adjusts the scanning density. Sets for dark documents. 3 to 9 (7) Sets for standard documents. 2 to 8 (5) Sets for light documents. 1 to 7 (3) Enables/disables the offhook alarm that alerts you when the handset - Canon FAXPHONE L170 | Basic Guide - Page 167
. ECM (Error Correction Mode) transmission is turned on or off. All transmissions are conducted with ECM if the other party's fax supports ECM. ECM is turned off. Sets the length of the pause you insert into a dialing sequence. 01 to 15SEC (02 SEC) (The factory default - Canon FAXPHONE L170 | Basic Guide - Page 168
] to scan document. Otherwise, AUTO CLEAR function activates and the LCD returns to standby mode after 2 minutes. Sets the reception functions. ECM (Error Correction Mode) reception is turned on or off. All receptions are conducted with ECM if the other party's fax supports ECM. ECM is turned off - Canon FAXPHONE L170 | Basic Guide - Page 169
manually with a connected extension telephone. The Menu System ON The machine switches to document receive mode after ringing for a specified time. F/T RING TIME Sets the length of time to elapse before the machine switches to the document receiving. 01 to 99SEC (15SEC) (The factory default - Canon FAXPHONE L170 | Basic Guide - Page 170
. The keep printing function is turned on. With this setting, the machine will not store documents in memory if the toner has run out. Re-set to RX TO MEMORY after replacing the cartridge with a new one. (The factory default setting is in bold face.) 15 The Menu System Menu Descriptions 15-11 - Canon FAXPHONE L170 | Basic Guide - Page 171
MEMORY LOCK RX and FAX DEFAULT. 1.MEMORY LOCK RX Set the Memory Lock functions. OFF Prints a document as soon as the machine receives it. ON Receives and stores all documents in memory Memory Lock mode. OUTPUT YES A report prints while the machine is in the Memory Lock mode. (The factory - Canon FAXPHONE L170 | Basic Guide - Page 172
the FAX DEFAULT functions. Sets the fax resolution. The setting of resolution set using [Image Quality] remains even after the AUTO CLEAR function eight times that of STANDARD) Sets the machine's standard scanning density. OFF, LIGHT, STANDARD, DARK (The factory default setting is in bold face.) - Canon FAXPHONE L170 | Basic Guide - Page 173
to the next job automatically without indicating an error code. The auto error skip is off. Skip the error and shift to the next job manually. Sets the length of time before the machine returns an error when no data is received from the computer. The error time out is on. Sets time out period - Canon FAXPHONE L170 | Basic Guide - Page 174
clear function. If the machine remains idle for a certain period of time, the display returns to the standby mode. The auto clear function is turned on. 1MIN. to 9MIN. (2MIN.) The auto clear time ends. (The factory default setting is in bold face.) 15 The Menu System Menu Descriptions 15-15 - Canon FAXPHONE L170 | Basic Guide - Page 175
1.USER DATA Name 2.SPEED DIAL LIST 1.1-TOUCH LIST 1.NO SORT 2.SORT 2.CODED DIAL LIST 1.NO SORT 2.SORT 3.GROUP DIAL LIST 3.CANCEL REPORT REPORT STATUS CANCEL REPORT? YES CANCEL REPORT? NO Descriptions Prints out a list of items set or registered in the Menu. Prints the list of the fax/telephone - Canon FAXPHONE L170 | Basic Guide - Page 176
memory used Uses direct transmission when memory mm) (main machine only, no trays, no handset) Weight: 24.7 lb Part 15 Class B, IC Class B PTT: FCC part 68, IC CS-03, Energy Star Compliant PC Interface: USB 1.1 * Based on Canon FAX Standard Chart No.1, JBIG, standard mode ** Based on Canon FAX - Canon FAXPHONE L170 | Basic Guide - Page 177
weight: Laser Beam printing Fax printing speed: Approx. 19 pages/minute** Automatic dialing: - One-Touch Speed Dialing (32 locations) - Coded Toner saver: Economy mode for printing received faxes decreases toner consumption by approx. 30% * Based on 20 lb (75 g/m2) paper ** Based on Canon FAX - Canon FAXPHONE L170 | Basic Guide - Page 178
size: Zoom: Multiple copies: 300 × 300 dpi 100% 50-200% Up to 99 copies of a document Telephone • Automatic FAX/TEL switchover • Answering machine connection (CNG detecting signal) • Telephone connection • Handset connection • Remote reception by telephone (Default reception ID: 25) • Tone button - Canon FAXPHONE L170 | Basic Guide - Page 179
S35 Cartridge (Yield: Approx. 3,500 pages) A Specifications * FAXPHONE L170 is equipped with a printer engine of 600 dpi resolution. By adopting Canon's own Image Refinement, an 1200 dpi enhanced × 600 dpi image can be obtained. ** S35 S-Cartridge is a starter cartridge supplied with the machine - Canon FAXPHONE L170 | Basic Guide - Page 180
a: 8.5" b: Max. 0.2" c: Max. 0.2" d: 11.0" e: Max. 0.2" f: Max. 0.2" Legal size 8.5" Max. 0.2" Max. 0.2" 14.0" Max. 0.2" Max. 0.2" A4 size 210mm max. 5.0mm max. 5.0mm 297mm max. 5.0mm max. 5.0mm A Specifications Printer A-5 - Canon FAXPHONE L170 | Basic Guide - Page 181
Max. 5.0mm Max. 5.0mm 220mm Max. 5.0mm Max. 5.0mm CAUTION For some envelope types, the edges of the envelope can not be printed on. A Specifications A-6 Printer - Canon FAXPHONE L170 | Basic Guide - Page 182
document : 39 3/8" (1 meter) 4 9/64" (105 mm) The figure below shows how much of a letter-, A4-, or legal-size document the machine scans when faxing or scanning. MAX. 5/32" (4.0 mm) A4/LETTER/LEGAL A Specifications MAX. 5/32" (4.0 mm) MAX. 1/8" (3.0 mm) MAX. 5/32" (4.0 mm) The margin at - Canon FAXPHONE L170 | Basic Guide - Page 183
Printer Driver System requirements: IBM or compatible computer with the following Pentium processor: Microsoft Windows® 98, Windows® Me, Windows® 2000, or Windows® XP -Windows® 98: A 90-megahertz (MHz) Pentium processor or higher/At least 32 MB of RAM and 100 MB of available hard disk space - - Canon FAXPHONE L170 | Basic Guide - Page 184
of the machine's fax transactions, both sent and received. Application program Software prepared for a specific function or set of functions. Developers who make application programs include drivers that support different types of printers. ASCII Acronym for American Standard Code for Information - Canon FAXPHONE L170 | Basic Guide - Page 185
to an outside party or fax machine. Dialing methods include One-Touch, Coded Speed Dialing, Group Dialing, Directory fax or voice call. Dual access (Multitasking) Enables the machine to receive a fax, even if it is copying or printing a document. Also enables you to load other faxes into memory - Canon FAXPHONE L170 | Basic Guide - Page 186
machine to reduce system and line errors when sending or receiving from another fax manually. F FAX/TEL switching This option allows you to set the machine to automatically detect whether a call is from a fax or telephone. If the call is from another fax Speed Dialing or Coded Speed Dialing numbers - Canon FAXPHONE L170 | Basic Guide - Page 187
called is the number redialed. Memory broadcast Allows you to send a scanned fax to as many as 142 locations at once, using a combination of One-Touch Speed Dialing, Coded Speed Dialing, and regular dialing. Memory sending Scans a document into memory before the machine dials the number(s) and sends - Canon FAXPHONE L170 | Basic Guide - Page 188
Windows XP installed. To use the machine as a printer, install the supplied printer driver in your PC. Pulse See Rotary pulse. R RAM Random Access Memory. Memory that is used for temporary storage of information such as: documents you want to print, scanned and received documents, and downloaded - Canon FAXPHONE L170 | Basic Guide - Page 189
in the machine's memory for automatic dialing so that you can save time dialing frequently called destinations. Regular dialing Pressing the individual numeric buttons to dial a fax or telephone number. Remote receiving ID The two-digit code that enables you to manually activate fax reception using - Canon FAXPHONE L170 | Basic Guide - Page 190
data services may require that you use tone dialing. Tone/pulse setting The ability to set the machine to match the telephone dialing system your telephone line uses: touch-tone or rotary pulse. Toner A black, resin coated powder contained in the toner cartridge. The machine applies the toner to - Canon FAXPHONE L170 | Basic Guide - Page 191
G G-8 Glossary - Canon FAXPHONE L170 | Basic Guide - Page 192
, 6-10 incoming fax, 7-7 memory sending, 6-9 Cassette, 2-9 loading envelopes, 4-5 loading paper, 4-3 CD-ROM, 2-2 CHANGE CARTRIDGE message, 7-6 CHANGE PAPERSIZE message, 13-7 CHECK DOCUMENT message, 13-7 CHECK PRINTER message, 13-7 Clear button, 2-12 Coded Dial button, 2-11 Coded Speed Dial List - Canon FAXPHONE L170 | Basic Guide - Page 193
INSTALL CARTRIDGE message, 13-7 I L LCD display, 2-11 LCD Messages, 13-7 LOAD LTR SIZE PAPER message, 13-7 Long distance dialing, 9-1 M Maintenance cleaning, 14-1 I-2 MAKING SPACE IN MEM message, 13-8 Manual Mode, 7-1, 7-4 Manual sending, 6-6, 6-8 MEM IN USE nn % message, 13-7 Memory Clear Report - Canon FAXPHONE L170 | Basic Guide - Page 194
, 2-9 PRINTER DATA ERROR message, 13-7 Printer driver, 1-4 PRINTER SETTINGS, 15-14 R Rear view, 2-10 REC. PAPER JAM message, 7-6, 13-8 Receive mode AnsMode, 7-1 FaxOnly, 7-1 FaxTel, 7-1 Manual, 7-1 setting, 7-2 Receive Mode button, 2-12 RECEIVED IN MEMORY message, 13-8 Recording paper loading in the - Canon FAXPHONE L170 | Basic Guide - Page 195
I I-4 Index
-
 1
1 -
 2
2 -
 3
3 -
 4
4 -
 5
5 -
 6
6 -
 7
7 -
8
-
9
-
10
-
11
-
12
-
13
-
14
-
15
-
16
-
17
-
18
-
19
-
20
-
21
-
22
-
23
-
24
-
25
-
26
-
27
-
28
-
29
-
30
-
31
-
32
-
33
-
34
-
35
-
36
-
37
-
38
-
39
-
40
-
41
-
42
-
43
-
44
-
45
-
46
-
47
-
48
-
49
-
50
-
51
-
52
-
53
-
54
-
55
-
56
-
57
-
58
-
59
-
60
-
61
-
62
-
63
-
64
-
65
-
66
-
67
-
68
-
69
-
70
-
71
-
72
-
73
-
74
-
75
-
76
-
77
-
78
-
79
-
80
-
81
-
82
-
83
-
84
-
85
-
86
-
87
-
88
-
89
-
90
-
91
-
92
-
93
-
94
-
95
-
96
-
97
-
98
-
99
-
100
-
101
-
102
-
103
-
104
-
105
-
106
-
107
-
108
-
109
-
110
-
111
-
112
-
113
-
114
-
115
-
116
-
117
-
118
-
119
-
120
-
121
-
122
-
123
-
124
-
125
-
126
-
127
-
128
-
129
-
130
-
131
-
132
-
133
-
134
-
135
-
136
-
137
-
138
-
139
-
140
-
141
-
142
-
143
-
144
-
145
-
146
-
147
-
148
-
149
-
150
-
151
-
152
-
153
-
154
-
155
-
156
-
157
-
158
-
159
-
160
-
161
-
162
-
163
-
164
-
165
-
166
-
167
-
168
-
169
-
170
-
171
-
172
-
173
-
174
-
175
-
176
-
177
-
178
-
179
-
180
-
181
-
182
-
183
-
184
-
185
-
186
-
187
-
188
-
189
-
190
-
191
-
192
-
193
-
194
-
195
 |
 |

ii
FAXPHONE L170 Basic Guide
About the Manuals for the Machine
The manuals for this machine are divided as follows. Please refer to them for detailed information.
The manuals supplied with optional equipment are included in the list below.
Guides with this symbol are book manuals.
CD-ROM
Guides with this symbol are PDF manuals included on the
accompanying CD-ROM. (See footnote.)
•
Setting up the Machine
•
Installing Printer Driver
Set-Up Instructions
•
Document and Paper Handling
•
Sending and Receiving Faxes
•
Speed Dialing
•
Making Copies
•
Maintenance
•
Troubleshooting
•
The Menu System
Basic Guide
(This Document)
•
Installing Printer Driver Software
•
Printer Properties
•
Troubleshooting Printer Driver Issues
Software Guide
CD-ROM
•
To view the manual in PDF format, Adobe Reader/ Acrobat Reader/Acrobat is required. If Adobe Reader/ Acrobat Reader/Acrobat is not installed on your system, please download
it from the Adobe Systems Incorporated website (http://www.adobe.com).