Canon FAXPHONE L170 Basic Guide - Page 115
Improving Copied Image, Adjusting the Image Quality (Resolution), Adjusting the Exposure (Density)
 |
UPC - 013803038477
View all Canon FAXPHONE L170 manuals
Add to My Manuals
Save this manual to your list of manuals |
Page 115 highlights
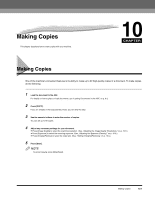
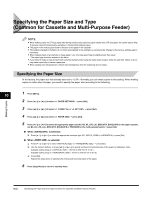
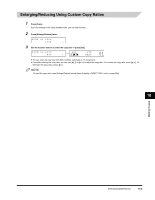
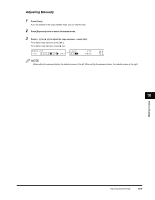
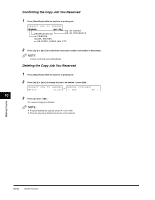
Improving Copied Image Adjusting the Image Quality (Resolution) You can adjust image quality to the appropriate level best suited for a document with text or photos. 3 modes are available for adjusting the image quality. Making Copies 10 1 Press [Copy]. If you are already in the Copy standby mode, you can skip this step. 2 Press [Image Quality] repeatedly until the image quality you want appears. You can select from the following: - for text-only documents - for documents with text and photographs - for photographs NOTE Copy exposure automatically changes to manual mode when or is set. Adjusting the Exposure (Density) You can adjust the copy exposure automatically or manually according to how light or dark your document is. Adjusting Automatically 1 Press [Copy]. If you are already in the Copy standby mode, you can skip this step. 2 Press [Exposure] to select the auto mode ➞ press [Set]. DENSITY AUTO EXPOSURE ➞ 100% A LTR TEXT 01 The copy exposure is adjusted automatically. NOTE Image quality mode automatically changes to when is set. 10-6 Improving Copied Image
-
 1
1 -
2
-
3
-
4
-
5
-
6
-
7
-
8
-
9
-
10
-
11
-
12
-
13
-
14
-
15
-
16
-
17
-
18
-
19
-
20
-
21
-
22
-
23
-
24
-
25
-
26
-
27
-
28
-
29
-
30
-
31
-
32
-
33
-
34
-
35
-
36
-
37
-
38
-
39
-
40
-
41
-
42
-
43
-
44
-
45
-
46
-
47
-
48
-
49
-
50
-
51
-
52
-
53
-
54
-
55
-
56
-
57
-
58
-
59
-
60
-
61
-
62
-
63
-
64
-
65
-
66
-
67
-
68
-
69
-
70
-
71
-
72
-
73
-
74
-
75
-
76
-
77
-
78
-
79
-
80
-
81
-
82
-
83
-
84
-
85
-
86
-
87
-
88
-
89
-
90
-
91
-
92
-
93
-
94
-
95
-
96
-
97
-
98
-
99
-
100
-
101
-
102
-
103
-
104
-
105
-
106
-
107
-
108
-
109
-
 110
110 -
 111
111 -
 112
112 -
 113
113 -
 114
114 -
 115
115 -
 116
116 -
 117
117 -
 118
118 -
 119
119 -
 120
120 -
121
-
122
-
123
-
124
-
125
-
126
-
127
-
128
-
129
-
130
-
131
-
132
-
133
-
134
-
135
-
136
-
137
-
138
-
139
-
140
-
141
-
142
-
143
-
144
-
145
-
146
-
147
-
148
-
149
-
150
-
151
-
152
-
153
-
154
-
155
-
156
-
157
-
158
-
159
-
160
-
161
-
162
-
163
-
164
-
165
-
166
-
167
-
168
-
169
-
170
-
171
-
172
-
173
-
174
-
175
-
176
-
177
-
178
-
179
-
180
-
181
-
182
-
183
-
184
-
185
-
186
-
187
-
188
-
189
-
190
-
191
-
192
-
193
-
194
-
195
 |
 |