Canon HV40 VIXIA HV40 Instruction Manual
Canon HV40 - VIXIA Camcorder - 1080p Manual
 |
UPC - 705105064512
View all Canon HV40 manuals
Add to My Manuals
Save this manual to your list of manuals |
Canon HV40 manual content summary:
- Canon HV40 | VIXIA HV40 Instruction Manual - Page 1
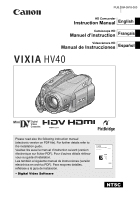
Camcorder Instruction Manual English Caméscope HD Manuel d'instruction Français Videocámara HD Manual de Instrucciones Español Mini Digital Video Cassette Please read also the following instruction manual (electronic version on PDF file). For further details refer to the installation guide - Canon HV40 | VIXIA HV40 Instruction Manual - Page 2
SHOCK AND TO REDUCE ANNOYING INTERFERENCE, USE THE RECOMMENDED ACCESSORIES ONLY. COPYRIGHT WARNING: Unauthorized recording of copyrighted materials may infringe on the rights of copyright owners and be contrary to copyright laws. HD Camcorder, VIXIA HV40 A systems This device complies with Part - Canon HV40 | VIXIA HV40 Instruction Manual - Page 3
be of sufficient magnitude to constitute a risk of electric shock to persons. The exclamation point, within an equilateral triangle, is intended to alert the user to the presence of important operating and maintenance (servicing) instructions in the literature accompanying the product. Introduction - Canon HV40 | VIXIA HV40 Instruction Manual - Page 4
4 IMPORTANT SAFETY INSTRUCTIONS In these safety instructions the word "product" refers to the Canon HD Camcorder VIXIA HV40 A and all its accessories. 1 Read these instructions. 2 Keep these instructions. 3 Heed all warnings. 4 Follow all instructions. 5 Do not use this apparatus near water. 6 - Canon HV40 | VIXIA HV40 Instruction Manual - Page 5
away from heat sources such as radiators, heat registers, stoves, or other products (including amplifiers) that produce heat. When replacement of the power supply is required, please return it to the responsible nearest Canon Service Center and please replace it with the same type number CA-570. - Canon HV40 | VIXIA HV40 Instruction Manual - Page 6
6 The Adapter can be used with a power supply between 100 and 240 V AC. For areas where 120 V AC power is not used, you will need a special plug adapter. Contact your nearest Canon Service Center for further information. This Class B digital apparatus complies with Canadian ICES-003. - Canon HV40 | VIXIA HV40 Instruction Manual - Page 7
spent with family and friends, with high-definition video recordings of a quality second only to actually being there. What is High-Definition Video? High-definition video (HDV) allows you to record video of unparalleled high quality on regular miniDV tapes. HDV is composed of 1,080 horizontal - Canon HV40 | VIXIA HV40 Instruction Manual - Page 8
High-Definition Video 7 About this Manual 11 Getting to Know the Camcorder Supplied Accessories 13 Components Guide 14 Screen Displays 17 Preparations Getting Started Charging the Battery Pack 20 Inserting and Removing a Tape 22 Inserting and Removing a Memory Card 22 Preparing the Camcorder - Canon HV40 | VIXIA HV40 Instruction Manual - Page 9
Functions Using the CUSTOM Key 61 On-Screen Displays 61 Flash...63 Mini Video Light 64 Self Timer ...64 Audio Recording Level 65 Digital Effects 67 Editing Functions Still Image Options Erasing Still Images 69 Protecting Still Images 69 Initializing the Memory Card 70 External Connections - Canon HV40 | VIXIA HV40 Instruction Manual - Page 10
/Others 99 Cleaning the Video Heads 99 Using the Camcorder Abroad 100 General Information System Diagram 101 Optional Accessories 102 Product Codes 105 Specifications 106 Index ...109 Trademark Acknowledgements • miniSD™ is a trademark of SD Card Association. • Microsoft, Windows and - Canon HV40 | VIXIA HV40 Instruction Manual - Page 11
you for purchasing the Canon VIXIA HV40. Please read this manual carefully before you use the camcorder and retain it for future reference. Should your camcorder fail to operate correctly, refer to the Troubleshooting table ( 89). Conventions Used in the Manual IMPORTANT: Precautions related to - Canon HV40 | VIXIA HV40 Instruction Manual - Page 12
of the guide. About the Operating Modes The camcorder's operating mode is determined by the positions of the switch and the / switch. In the manual, indicates Recording movies on the tape 28 CAMERA (Memory card) Recording still images on the memory card 29 (Tape) Playing movies from - Canon HV40 | VIXIA HV40 Instruction Manual - Page 13
Camcorder Supplied Accessories CA-570 Compact Power BP-2L13 Battery Pack Adapter (incl. power cord) WL-D87 Wireless Controller Lithium Button Battery CR2025 for Wireless Controller CTC-100/S Component STV-250N Stereo Video IFC-300PCU Cable Cable USB Cable DIGITAL VIDEO SOLUTION DISK Software - Canon HV40 | VIXIA HV40 Instruction Manual - Page 14
indicator ( 20) Memory card slot ( 22) / (tape/card) switch ( 12) Mode switch ( 48) Terminal cover MIC (microphone) terminal ( 66) AV terminal ( 71)/ (headphones) terminal ( 32) COMPONENT OUT terminal ( 71) Grip belt ( 23) Instant AF sensor ( 39) Flash ( 63) Mini video light ( 64) Remote sensor ( 23 - Canon HV40 | VIXIA HV40 Instruction Manual - Page 15
- The serial number label is located on the back surface of the battery attachment unit. Remove the battery pack to find it. DC IN terminal ( 20) HDV/DV terminal ( 71, 80) (rewind) button ( 31)/ Zoom out W (wide-angle) button ( 30) (fast forward) button ( 31)/ Zoom in T (telephoto) button ( 30 - Canon HV40 | VIXIA HV40 Instruction Manual - Page 16
16 Getting to Know the Camcorder Wireless Controller WL-D87 START/ STOP PHOTO ZOOM CARD DATE SEARCH REW PLAY FF STOP PAUSE SLOW ZERO SET MEMORY DISP. TV SCREEN WIRELESS CONTROLLER WL-D87 START/STOP button ( 28) CARD -/+ buttons ( 35) DATE SEARCH / buttons ( 34) REW button ( 31) -/ button ( 31 - Canon HV40 | VIXIA HV40 Instruction Manual - Page 17
) Remote sensor off ( 46) Audio level indicator (microphone) ( 65) Zoom ( 30), Exposure ( 52) Light metering mode ( 58) Drive mode ( 60) Still image quality/size ( 56) Number of still images available on the memory card AF frame ( 59) Camcorder shake warning ( 39) Advanced accessory shoe - Canon HV40 | VIXIA HV40 Instruction Manual - Page 18
When you attach an empty battery pack, the power may turn off without displaying " ". • Depending on the conditions under which the camcorder and the battery pack are used, the actual battery charge may not be indicated accurately. Number of still images available on the memory card Depending on the - Canon HV40 | VIXIA HV40 Instruction Manual - Page 19
Camcorder 19 Tape operation Time code (hours : minutes : seconds : frames) Remaining tape Data code ( 62) Recording made in [ HDV quality/size Date and time of recording Recording program ( 48) Manual focus ( 53) Light metering mode ( 58) Manual exposure ( 52) Image effect ( 55) Image size ( - Canon HV40 | VIXIA HV40 Instruction Manual - Page 20
before attaching the battery pack BATTERY RELEASE switch ONCE THE BATTERY PACK IS FULLY CHARGED 1 Disconnect the compact power adapter from the camcorder. 2 Unplug the power cord from the power outlet and the compact power adapter. TO REMOVE THE BATTERY PACK Slide BATTERY RELEASE in the direction - Canon HV40 | VIXIA HV40 Instruction Manual - Page 21
Canada only: The Lithium ion/polymer battery that powers the product is recyclable. Please call 1-800-8-BATTERY for information on how to recycle this battery. HDV Maximum Recording Time Viewfinder LCD [NORMAL] LCD [BRIGHT] Typical Recording Time* Viewfinder LCD [NORMAL] LCD [BRIGHT] Playback Time DV - Canon HV40 | VIXIA HV40 Instruction Manual - Page 22
22 Getting Started Inserting and Removing a Tape Use only videocassettes marked with the logo. To record in HDV standard we recommend using tapes specifically designed for high definition. IMPORTANT Do not interfere with the cassette compartment while it is opening or closing automatically, or - Canon HV40 | VIXIA HV40 Instruction Manual - Page 23
all memory cards before using them with this camcorder for the first time ( 70). Memory cards have front and back sides that are not interchangeable. Inserting a memory card facing the wrong direction can cause a malfunction of the camcorder. The Wireless Controller Inserting the Battery (Lithium - Canon HV40 | VIXIA HV40 Instruction Manual - Page 24
toward the lens (allowing the subject to monitor the LCD screen while you use the viewfinder). Rotating the panel 180 degrees is also useful if you the recording or the viewfinder screen. Using the bright setting will shorten the effective usage time of the battery pack. You can also adjust the - Canon HV40 | VIXIA HV40 Instruction Manual - Page 25
the Menus 25 Using the Menus Using the Menus Many of the camcorder's functions can be adjusted from the make further selections. Follow the additional operation guides that will appear on 1 Press FUNC. . 2 Select ( ) the icon and press ( ) to open the setup menus. You can also hold FUNC. - Canon HV40 | VIXIA HV40 Instruction Manual - Page 26
the menu. 1 Press FUNC. . 2 Select ( ) the icon and press ( ) to open the setup menus. 3 Select ( ) [DATE/TIME SETUP] and press ( ). 4 Select ( ) [T.ZONE/DST] and press ( ). The time zone setting the name of buttons on the camcorder and will not change, regardless of the language selected. - Canon HV40 | VIXIA HV40 Instruction Manual - Page 27
. 2 Select ( ) the icon and press ( ) to open the setup menus. 3 Select ( ) [DATE/TIME SETUP] and press ( ). 4 Select ( ) [DATE/TIME] and press menu. IMPORTANT If you do not use the camcorder for about 3 months, the built-in rechargeable lithium battery may discharge completely and the date - Canon HV40 | VIXIA HV40 Instruction Manual - Page 28
first to check if the camcorder operates correctly. If necessary, clean the video heads ( 99). ( 12) 1 Holding the lock button pressed down, set the switch to CAMERA. 2 Move the / switch to (tape). If necessary, you can change the recording standard (HDV or DV) ( 40). 3 Press START/STOP - Canon HV40 | VIXIA HV40 Instruction Manual - Page 29
Still Images Before using a memory card for the first time, be sure to initialize it with this camcorder ( 70). ( 12) 1 Holding the lock button pressed down, set the switch to CAMERA. 2 Move the / switch to (memory card). 3 Press PHOTO halfway. • Once the focus is automatically adjusted - Canon HV40 | VIXIA HV40 Instruction Manual - Page 30
cover and do not remove the memory card. - Do not disconnect the power source or turn off the camcorder. - Do not change the position of the / switch or the operating mode. NOTES If the subject is not suitable for autofocus, turns yellow. Adjust the focus manually ( 53). When the subject is - Canon HV40 | VIXIA HV40 Instruction Manual - Page 31
LCD display or close the LCD panel to use the viewfinder. ( 12) 1 Holding the video problems at the point where the standard of the recording (HDV/DV) changes. Basic Functions Special Playback Modes To enter most special playback modes you need to operate the buttons on the wireless controller - Canon HV40 | VIXIA HV40 Instruction Manual - Page 32
the tape and video heads, the camcorder will enter the stop mode ( ) if left in playback pause ( ) mode for 4 minutes 30 seconds. To resume the playback press / . Adjusting the Volume: Speaker and Headphones The camcorder plays the sound with the built-in speaker. When you're using the viewfinder - Canon HV40 | VIXIA HV40 Instruction Manual - Page 33
when you close the LCD panel, when you connect the stereo video cable to the AV/ terminal or when the AV/ terminal is set to [ PHONES]. NOTES Use commercially available headphones with a ∅ 3.5 mm minijack. When you turn off the camcorder, the [AV/PHONES] setting in mode will return to [ AV - Canon HV40 | VIXIA HV40 Instruction Manual - Page 34
or data code are not correctly displayed. If there are sections recorded in different standards (HDV/DV) on the same tape, the date search may not work correctly. NOTES End search cannot be used once you remove the cassette. If there are blank sections between recordings or sections recorded in - Canon HV40 | VIXIA HV40 Instruction Manual - Page 35
memory card slot cover and do not remove the memory card. - Do not disconnect the power source or turn off the camcorder use the joystick to move through the still images even if the joystick guide above does not appear on the screen. Push the joystick ( ) or ( ) and hold it pressed down. Release - Canon HV40 | VIXIA HV40 Instruction Manual - Page 36
( ) the number of images selected. Press ( ) to close the image jump screen and display the image. You can press ( ) again to hide the joystick guide. Magnifying the Playback Image During playback, movies and still images can be magnified up to 5 times. You can also select the area to be magnified - Canon HV40 | VIXIA HV40 Instruction Manual - Page 37
Options Lists Menu Options Lists Menu items not available appear grayed out. For details about how to select an item, refer to Using the Menus ( 25). FUNC. Menu Options Recording programs ( 48) Image effect ( 55) Mode switch: [ IMAGE EFFECT OFF], [ VIVID], [ NEUTRAL], [ LOW SHARPENING], [ SOFT - Canon HV40 | VIXIA HV40 Instruction Manual - Page 38
] is set to one of the widescreen (16:9) modes, [ HDV], [ HDV(PF30)], [ HDV(PF24)], [ HDV(24F)], or [ DV(WIDE)] [ STILL I.REC OFF], [LW 1920x1080], [SW 848x480] When [HD STANDARD] is set to [ DV(NORMAL)]: [ STILL I.REC OFF], [M 1440x1080], [S 640x480] Quality: [ SUPER FINE], [ FINE - Canon HV40 | VIXIA HV40 Instruction Manual - Page 39
Options Lists 39 Setup Menus CAMERA SETUP A.SL SHUTTER Mode switch: or P (only in the [ PROGRAM AE] recording program) [ ON], [ OFF] The camcorder automatically uses slow shutter speeds to obtain brighter recordings in places with insufficient lighting. The camcorder uses shutter speeds - Canon HV40 | VIXIA HV40 Instruction Manual - Page 40
to [ OFF] when using a tripod. SELF TIMER ( 64) [ ON], [ OFF] [ HDV], [ HDV(PF30)], [ HDV(PF24)], [ HDV(24F)], [ DV(WIDE)], [ DV(NORMAL)] Selects the video standard of the recording and in DV standard also the aspect ratio. [ HDV]: High-definition video at 1080i specifications with 16 - Canon HV40 | VIXIA HV40 Instruction Manual - Page 41
the Video ID-1 system will automatically switch to wide (16:9) mode. Otherwise, change the aspect ratio of the TV manually. To play back on a TV with normal aspect ratio (4:3) change the [TV TYPE] setting accordingly ( 43). DV REC MODE DV DV AUDIO DV [ 16bit], [ 12bit] When [HD STANDARD - Canon HV40 | VIXIA HV40 Instruction Manual - Page 42
], [COMPL.INIT.] PLAY/OUT SETUP* * In mode, the following menu options are divided into two menus, [ PLAY/OUT SETUP1] and [ PLAY/OUT SETUP2]; this will be indicated with the respective menu icon. PLAYBACK STD [ AUTO], [ HDV], [ DV] Select the video standard to be used for playback. [ AUTO - Canon HV40 | VIXIA HV40 Instruction Manual - Page 43
of the headphones with the joystick. * In mode, adjust the volume using the joystick guide ( 33). COMP.OUT [ 480i], [ 1080i/480i] You can select the video specifications to use when connecting the camcorder to a high-definition TV using the video component connection. Advanced Functions - Canon HV40 | VIXIA HV40 Instruction Manual - Page 44
high-definition TV. Refer to the table below. When the playback standard selected is different from that of the original recording, no video will be output. This setting will be unavailable while the camcorder is connected to an external device using the HDMI cable. DV OUTPUT [ DV LOCKED], [ HDV - Canon HV40 | VIXIA HV40 Instruction Manual - Page 45
specification of the video output when the camcorder is connected to an external device using the HDMI cable. For further details about the HDMI connection, refer to 74. DISPLAY SETUP to focus manually more easily. Using the assist functions will not affect the recordings on the tape or memory card. - Canon HV40 | VIXIA HV40 Instruction Manual - Page 46
and time will be displayed for 6 seconds. DATA CODE ( 61) [ DATE], [ TIME], [ DATE & TIME], [ CAMERA DATA] LANGUAGE ( 26) POWER SAVE [ ON], [ OFF] In order to save power when the camcorder is powered by a battery pack, it will automatically shut off if left without any operation for 5 minutes - Canon HV40 | VIXIA HV40 Instruction Manual - Page 47
FIRMWARE You can verify the current version of the camcorder's firmware. This menu option is usually grayed out. DATE/TIME SETUP T.ZONE/DST ( 26) DATE/TIME ( 27) DATE FORMAT [Y.M.D (2009.1.1 AM 12:00)], [M.D,Y (JAN. 1, 2009 12:00 AM)], [D.M.Y (1.JAN.2009 12:00 AM)] Changes the date - Canon HV40 | VIXIA HV40 Instruction Manual - Page 48
-PRIO. AE] You select the aperture value. Special Scene Recording Programs ( 51) [ PORTRAIT] The camcorder uses a large aperture, achieving a focus on the subject while blurring other distracting details. [ SNOW] Use this mode to record in bright ski resorts. It prevents the subject from being - Canon HV40 | VIXIA HV40 Instruction Manual - Page 49
camcorder adjusts various image settings to give a cinematic look to your recordings. POINTS TO CHECK Mode switch: ( 12) FUNC. ( 25) POINTS TO CHECK ( 12) Mode switch: Set the recording program to [ CINE MODE], as described in the previous section. FUNC. MENU REC/IN SETUP HD STANDARD HDV - Canon HV40 | VIXIA HV40 Instruction Manual - Page 50
camcorder automatically sets the appropriate shutter speed. Use low aperture values (larger lens opening) to softly blur the background in a portrait or high aperture values (smaller lens opening) to get a wider depth of field, giving a sharp focus . 1 If the joystick guide appears on the screen, - Canon HV40 | VIXIA HV40 Instruction Manual - Page 51
may flicker when recording with high shutter speeds. - Recording movies focus manually. [ SNOW]/[ BEACH] - The subject may become overexposed on cloudy days or in shaded places. Check the image on the screen. [ FIREWORKS] - To avoid camcorder shake, we recommend using a tripod. Make sure to use - Canon HV40 | VIXIA HV40 Instruction Manual - Page 52
To correct this you can use the automatic backlight correction or manually adjust the exposure. Manual Exposure Adjustment POINTS TO CHECK the camcorder automatically correct for the backlight with the press of a single button. POINTS TO CHECK Mode switch: ( 12) 1 If the joystick guide does not - Canon HV40 | VIXIA HV40 Instruction Manual - Page 53
case, focus manually. Reflective surfaces Subjects with low contrast or without vertical lines Fast moving subjects • Pressing FOCUS again will return the camcorder to autofocus. NOTES The camcorder will automatically return to autofocus when you set the mode switch to . Infinity Focus Use this - Canon HV40 | VIXIA HV40 Instruction Manual - Page 54
54 Adjusting the Picture: Exposure, Focus and Color Press MAGNIFY . • The image at the center Scene recording programs) Options Default value [ AUTO] Settings are automatically set by the camcorder. Use this setting for outdoor scenes. [ DAYLIGHT] For recording outdoors on a bright day. - Canon HV40 | VIXIA HV40 Instruction Manual - Page 55
Focus and Color 55 TO SET THE CUSTOM WHITE BALANCE 1 Point the camcorder at a white object, zoom in until it fills the whole screen and press ( ). When the adjustment is completed stops flashing and stays on. The camcorder . ( 25) Image Effects You can use the image effects to change the color - Canon HV40 | VIXIA HV40 Instruction Manual - Page 56
Image Recording Options Still Image Recording Options Selecting the Size and Quality of Still Images Still images are recorded on the memory card using the JPEG (Joint Photographic Experts Group) compression. As a general rule select a larger image size for higher quality. ( 12) Options Approximate - Canon HV40 | VIXIA HV40 Instruction Manual - Page 57
. Try using a card reader. Capturing a Still Image while Recording Movies You can record still images on the memory card even while the camcorder is set to mode. You can also capture simultaneously, as a still image on the memory card, the same picture you are recording as video on the - Canon HV40 | VIXIA HV40 Instruction Manual - Page 58
on the memory card while the screen continues to show the video recording. NOTES The still image cannot be recorded on the memory card while using the digital zoom or while a digital effect is activated. To record still images we recommend using the mode, which offers the best quality for - Canon HV40 | VIXIA HV40 Instruction Manual - Page 59
] Meters only the area within the spot AE point frame. Use this setting to adjust the exposure to match the subject in the center CAMERA SETUP Automatic Focus Priority When the focus priority is activated, the camcorder records a still image only after the focus has been adjusted automatically. FOCUS - Canon HV40 | VIXIA HV40 Instruction Manual - Page 60
program the focus priority AEB] (Auto Exposure Bracketing) The camcorder records a still image in three different exposures best. FUNC. Icon of the currently selected Drive Mode FUNC. Desired option CONTINUOUS SHOOTING/ HIGH exposures will be recorded on the memory card. NOTES The speed and maximum number - Canon HV40 | VIXIA HV40 Instruction Manual - Page 61
used functions. You can then activate the selected function using the CUSTOM key, without having to access any menu. FUNC. ( 25) FUNC. ( 12) FUNC. MENU SYSTEM SETUP make sure you adjust the focus and exposure correctly. [ camcorder keeps a data code containing the date and time and other camera - Canon HV40 | VIXIA HV40 Instruction Manual - Page 62
Default value DISPLAY SETUP/ DATA CODE CAMERA DATA] Displays the aperture (f-stop) and shutter speed used when recording the image. Pixel Count Shadows Highlights NOTES The histogram display will appear also after recording a still image while reviewing it within the time set for the [REVIEW - Canon HV40 | VIXIA HV40 Instruction Manual - Page 63
more powerful flash than the built-in flash. The procedure for setting the flash mode is the same as described above. For details about attaching and using the flash, refer to the instruction manual of the VFL-1. The VFL-1 can also be used as a video light. When a video accessory is attached - Canon HV40 | VIXIA HV40 Instruction Manual - Page 64
) : Set the camcorder in record pause mode. FUNC. ( 25) FUNC. MENU CAMERA SETUP Press LIGHT . • appears on the screen. • Press LIGHT again to turn the mini video light off. TO USE THE OPTIONAL VL-3 VIDEO LIGHT You can attach the optional VL-3 Video Light to the advanced accessory shoe if you - Canon HV40 | VIXIA HV40 Instruction Manual - Page 65
4 Press ( ) to save the setting and hide the joystick guide. TO USE THE MICROPHONE ATTENUATOR If the audio level is too high and the sound gets distorted, activate the microphone attenuator by setting [MIC ATT.] to [ ON] ( 41). 1 If the joystick guide does not appear on screen, press ( ) to display - Canon HV40 | VIXIA HV40 Instruction Manual - Page 66
MENU DISPLAY SETUP/ AUDIO LEVEL OTHER MICROPHONES You can also use commercially available microphones not compatible with the advanced accessory shoe, by connecting the external microphone to the MIC terminal. Use commercially available condenser microphones with their own power supply. You can - Canon HV40 | VIXIA HV40 Instruction Manual - Page 67
an effect, the sound will be recorded normally. The camcorder retains the setting last used even if you turn off the digital effects or change the these positions may be empty or show a different icon. 1 If the joystick guide does not appear on screen, press ( ) to display it. 2 Push the joystick - Canon HV40 | VIXIA HV40 Instruction Manual - Page 68
68 Other Functions TO FADE IN Push the joystick ( ) toward ... : ...in record pause mode, then press START/STOP to start recording with a fade in. : ...in playback pause mode, then press / to fade in and start the playback. TO FADE OUT Push the joystick ( ) toward ... : ...while recording, then - Canon HV40 | VIXIA HV40 Instruction Manual - Page 69
( 12) CARD OPERATIONS 1 If the joystick guide does not REVIEW] option (or immediately after recording it, if [REVIEW] is set to [ OFF]). ( 12) ERASE ALL IMAGES FUNC. YES Protecting Still Images You can protect still images from accidental erasure. ( 12) IMPORTANT Initializing the memory card - Canon HV40 | VIXIA HV40 Instruction Manual - Page 70
70 Still Image Options FUNC. PROTECT Initialize all memory cards before using them with this camcorder. Press ( ) ( 12) [ PROTECT]: The image files will be erased and the memory card can be used without any problem. IMPORTANT Initializing the memory card will erase all still images, even - Canon HV40 | VIXIA HV40 Instruction Manual - Page 71
refer also to the instruction manual of the connected device. AV/ Terminal Open the terminal cover to access. COMPONENT OUT Terminal The component video terminal is for video only. When you use connection type 1 do not forget the audio connections using the AV/ terminal. HDV/DV Terminal Check the - Canon HV40 | VIXIA HV40 Instruction Manual - Page 72
72 Connecting to a TV or VCR High Definition TV Sets (HDTV) Terminal on the Camcorder 1 Output connection (Signal Flow Connecting Cable Terminal on the Connected Device ) to an HDTV with component video input terminals. CTC-100/S Component Cable (Supplied) Red Blue Green Pr/Cr Pb/Cb Y STV- - Canon HV40 | VIXIA HV40 Instruction Manual - Page 73
Definition TV Sets Terminal on the Camcorder Connecting Cable Terminal on the Connected Device 2 Output connection (Signal Flow ) to a TV with a DV (IEEE1394) terminal. Input connection (Signal Flow ) from a TV or other digital video source with a DV (IEEE1394) output. DV Cable (Commercially - Canon HV40 | VIXIA HV40 Instruction Manual - Page 74
Stereo Video Cable is connected to the camcorder. We recommend powering the camcorder using the compact power adapter. If you connect to a TV using the HDMI connection -connection type 3 - or the video component connection -connection type 1 - you can enjoy the full resolution of high-definition TV - Canon HV40 | VIXIA HV40 Instruction Manual - Page 75
on the Tape HDV HDV DV Standard Supported by the External Digital Device* [PLAYBACK STD] Setting HDV [ [ AUTO] or HDV] [ DV [ [ AUTO] or HDV] [ [ AUTO] or [ DV [ DV] [ [DV OUTPUT] Setting HDV/DV] DV LOCKED] HDV/DV] or DV LOCKED] * To output video in high definition verify that the - Canon HV40 | VIXIA HV40 Instruction Manual - Page 76
We recommend powering the camcorder using the compact power adapter. When recording to a VCR using an analog connection -connection type 4 ( 71)-, the quality of the edited tape will be lower than that of the original. When recording to a digital video recorder using the HDV/DV terminal -connection - Canon HV40 | VIXIA HV40 Instruction Manual - Page 77
recommend powering the camcorder using the compact power adapter. Digital Video Dubbing You can input video from other digital video devices and record the input video on the tape in the camcorder. Video input will be recorded on the tape in the same standard of the original (HDV or DV). Connecting - Canon HV40 | VIXIA HV40 Instruction Manual - Page 78
record video signals in HDV standard (1080i specifications) or in DV standard. Note that signals from identically shaped DV (IEEE1394) terminals may be in different video standards. NOTES We recommend powering the camcorder using the compact power adapter. Copyright Signal Certain software tapes - Canon HV40 | VIXIA HV40 Instruction Manual - Page 79
NOTES We recommend powering the camcorder using the compact power adapter. You can also use the analog/digital conversion to transfer analog video recordings to a computer as digital video. The required equipment and operation is the same as described in Transferring Video Recordings ( 81) except in - Canon HV40 | VIXIA HV40 Instruction Manual - Page 80
USB Terminal Open the LCD panel cover to access. HDV/DV Terminal Check the type and orientation of the terminal and make sure you connect the DV cable properly. Terminal on the Camcorder 1 Output connection (Signal Flow USB port. Connecting Cable Terminal on the Connected Device ) to a PC or - Canon HV40 | VIXIA HV40 Instruction Manual - Page 81
software. NOTES We recommend powering the camcorder using the compact power adapter. Refer also to the instruction manual of the computer. The programs ZoomBrowser EX and Image Browser included with the supplied CD-ROM can only be used to transfer still images recorded on the memory card. Video - Canon HV40 | VIXIA HV40 Instruction Manual - Page 82
memory card are valuable, original data files. If you wish to use the image files on your computer, make copies of them first, and use the copied file, retaining the original. NOTES We recommend powering the camcorder using the compact power adapter. Refer also to the computer's instruction manual - Canon HV40 | VIXIA HV40 Instruction Manual - Page 83
• To cancel the transfer, select ( ) [CANCEL] and press ( ) or press FUNC. . MANUAL TRANSFER OPTIONS When you select [ SELECT & TRANSFER] or [ WALLPAPER] you can select the images you in advance, before connecting the camcorder to the computer using the USB cable. ( 12) External Connections - Canon HV40 | VIXIA HV40 Instruction Manual - Page 84
PIXMA printers marked with the PictBridge logo. Connecting the Camcorder to the Printer ( 12) 1 Insert the memory card containing the still images you want to print. 2 Turn on the printer. 3 Connect the camcorder to the printer using the USB connection -connection type 1 ( 80)- shown in the - Canon HV40 | VIXIA HV40 Instruction Manual - Page 85
We recommend powering the camcorder using the compact power adapter. Refer also to the printer's instruction manual. Printing with effect can be used with printers compatible with the Image Optimize function to achieve higher quality prints. Select [ON], [OFF] or [DEFAULT]. Canon PIXMA/SELPHY DS - Canon HV40 | VIXIA HV40 Instruction Manual - Page 86
, disconnect the USB cable and turn off the camcorder and the printer. After a short while, turn them on again, set the camcorder to mode and restore on a computer and transferred to the memory card. Printing Multiple Images on the Same Sheet When using Canon printers, you can print the same still - Canon HV40 | VIXIA HV40 Instruction Manual - Page 87
during printing: - Do not turn off the camcorder or the printer. - Do not change the position of the / switch. - Do not disconnect the USB cable. - Do not remove the memory card. If the message "BUSY." does not disappear, disconnect the USB cable and restore the connection after a short while - Canon HV40 | VIXIA HV40 Instruction Manual - Page 88
25) FUNC. ( 25) 1 Connect the camcorder to the printer using the USB connection - connection type 1 ( 80)- shown in the previous section PC Connection Diagrams. 2 Press FUNC. , select ( ) the icon and press ( ) to open the setup menus. FUNC. MENU CARD OPERATIONS PRINT ORD.ALL ERASE FUNC. YES - Canon HV40 | VIXIA HV40 Instruction Manual - Page 89
Information Trouble? Troubleshooting If you have a problem with your camcorder, refer to this checklist. Consult your dealer or a Canon Service Center if the problem persists. Power Source Problem Solution • Camcorder will not turn on. Battery pack is exhausted. Replace or charge the battery pack - Canon HV40 | VIXIA HV40 Instruction Manual - Page 90
TV is - located, keep a distance between the camcorder and the plasma TV. Video noise appears on the TV When using the camcorder in a room where a TV is located, - screen. keep a distance between the compact power adapter and the power or antenna cables of the TV. The tape stops during - Canon HV40 | VIXIA HV40 Instruction Manual - Page 91
32 and joystick guide in mode. When playing back a tape Video heads are dirty. Clean the video heads. 99 recorded in HDV standard the playback playback/dubbing. The camcorder is connected Video input from the HDV/DV terminal cannot be output through 74 using the HDMI cable, but there the - Canon HV40 | VIXIA HV40 Instruction Manual - Page 92
to the instruction manual of - external video device the connected device. connected to the HDV/DV Dubbing may work using the AV/ terminal. terminal using a DV cable. Others Problem Solution A rattling can be heard from the The internal lens fixture can move when the camcorder is turned - Canon HV40 | VIXIA HV40 Instruction Manual - Page 93
the HDV/DV standard of 42 PLAYBACK IS the recording you tried to play back. Change the [PLAYBACK STD] RESTRICTED to match the recording standard of the tape. HEADS DIRTY, USE Video heads are dirty. Clean the video heads. 99 CLEANING CASSETTE NO CARD There is no memory card in the camcorder - Canon HV40 | VIXIA HV40 Instruction Manual - Page 94
! You attempted to transfer a still image that cannot be displayed with - this camcorder. TOO MANY STILL IMAGES Disconnect the USB cable and decrease the number of still images - DISCONNECT USB CABLE on the memory card to less than 1800. If a dialog appeared on the computer screen, close it - Canon HV40 | VIXIA HV40 Instruction Manual - Page 95
instruction manual and contact the appropriate customer support center or service center. HARDWARE ERROR Cancel printing. Turn the printer off and then on again. Check the printer status. If the printer is equipped with a battery, it might be exhausted. In such case, turn off the printer, replace - Canon HV40 | VIXIA HV40 Instruction Manual - Page 96
Handling Precautions Battery Pack Camcorder Do not carry the camcorder by the LCD panel. Be careful when closing the LCD panel. Do not leave the camcorder in places subject to high temperatures (like the inside of a car under direct sunlight), or high humidity. Do not use the camcorder near strong - Canon HV40 | VIXIA HV40 Instruction Manual - Page 97
Do not turn off the camcorder, disconnect the power source or remove the memory card while the CARD access indicator is flashing. Do not use memory cards in places subject to strong magnetic fields. Do not leave memory cards in places subject to high humidity and high temperature. Do not disassemble - Canon HV40 | VIXIA HV40 Instruction Manual - Page 98
. The built-in lithium battery is recharged while you use the camcorder, however, it will become totally discharged if you do not use the camcorder for about 3 months. To recharge the built-in lithium battery: Connect the compact power adapter to the camcorder and leave it connected for - Canon HV40 | VIXIA HV40 Instruction Manual - Page 99
notice frequent video problems (blocky video artifacts, banding, etc.). - When playing back a tape recorded in HDV standard the playback is jerky or the sound stutters on and off. To maintain the best picture quality, we recommend using cassettes designed for high definition recording (Canon Digital - Canon HV40 | VIXIA HV40 Instruction Manual - Page 100
be loaded when condensation is detected. Using the Camcorder Abroad Power Sources You can use the compact power adapter to operate the camcorder and to charge battery packs in any country with power supply between 100 and 240 V AC, 50/60 Hz. Consult the Canon Service Center for information on plug - Canon HV40 | VIXIA HV40 Instruction Manual - Page 101
Adapter miniSD Card Card Reader/Writer IFC-300PCU USB Cable VCR TV/HDTV DVD Recorder/Digital Device with DV Terminal Computer DM-50 Directional Stereo Microphone Stereo Microphone (commercially available) PictBridge Compatible Printers * The BP-2L13 Battery Pack supplied with the camcorder - Canon HV40 | VIXIA HV40 Instruction Manual - Page 102
of non-genuine Canon accessories, although you may request such repairs on a chargeable basis. Battery Packs When you need extra battery packs, select one of the following models: BP-2L13, BP-2L14, NB-2LH, BP-2L24H. CB-2LW Battery Charger Use the battery charger for charging the battery packs. It - Canon HV40 | VIXIA HV40 Instruction Manual - Page 103
accessory shoe for cable-free operation. DM-50 Directional Stereo Microphone This highly sensitive, super-directional microphone attaches to the camcorder's advanced accessory shoe. It can be used as directional microphone (monaural) or stereo microphone. • Using the viewfinder to record video - Canon HV40 | VIXIA HV40 Instruction Manual - Page 104
for active shooting. SC-2000 Soft Carrying Case A handy camcorder bag with padded compartments and plenty of space for accessories. This mark identifies genuine Canon video accessories. When you use Canon video equipment, we recommend Canon-brand accessories or products bearing the same mark. - Canon HV40 | VIXIA HV40 Instruction Manual - Page 105
Codes Provided Accessories CA-570 Compact Power Adapter BP-2L13 Battery Pack WL-D87 Wireless Controller STV-250N Stereo Video Cable 8468A002AA 2069B002AA (D85-1712-000) D83-0752-000 3067A002AA (D82-0590-201) Optional Accessories NB-2LH Battery Pack 9612A001AA BP-2L14 Battery Pack 9582A002AA - Canon HV40 | VIXIA HV40 Instruction Manual - Page 106
(48 kHz/2 channels); 12 bit (32 kHz/4 channels) Television System HD High Definition Video (HDV) 1080/60i SD EIA standard (525 lines, 60 fields) NTSC color signal Compatible Tapes Videocassettes bearing the mark Tape Speed HDV 18.81 mm/s (0.74 ips) DV SP: 18.81 mm/s (0.74 ips); LP: 12.56 mm - Canon HV40 | VIXIA HV40 Instruction Manual - Page 107
-57 dBV (with 600 ohm microphone)/5 kohms or more Power/Others Power supply (rated) Power consumption (HDV, AF on) Operating temperature Dimensions (W x H x D) Weight (camcorder body only) 7.4 V DC (battery pack), 8.4 V DC (compact power adapter) 4.3 W (viewfinder), 4.5 W (LCD screen, normal - Canon HV40 | VIXIA HV40 Instruction Manual - Page 108
capacity Dimensions Weight Rechargeable Lithium Ion Battery 7.4 V DC 0 - 40 °C (32 - 104 °F) 1,200 mAh 33.3 x 25.8 x 45.2 mm (1.3 x 1.0 x 1.8 in.) 60 g (2.1 oz.) Weight and dimensions are approximate. Errors and omissions excepted. The information in this manual is verified as of February 2009 - Canon HV40 | VIXIA HV40 Instruction Manual - Page 109
Focus priority 40 FUNC. menu 25, 37 G Grip belt 23 H HDMI OUT terminal 71, 74 HDV/DV terminal 71, 80 Headphones 32 High-speed continuous shooting . . . . . 60 I Image effects 55 Image jump 35 Image stabilizer 40 Index screen 36 Initialization - Memory card 70 J Joystick 12 Joystick guide - Canon HV40 | VIXIA HV40 Instruction Manual - Page 110
mode 58 Lithium button battery 23, 98 LP mode 41 M Magnifying the playback image 36 Magnifying the recording image 53 Maintenance 99 Manual exposure adjustment 52 Manual focus 53 Memory card 22, 97 Microphone 66 Microphone attenuator 65 Mini video light 64 miniSD card 22 Mix balance 43 - Canon HV40 | VIXIA HV40 Instruction Manual - Page 111
W White balance 54 Wide angle 30 Wide TV (16:9 43 Wind screen 41 Wireless controller 23 Z Zero set memory 33 Zoom 30 Zoom speed 39 General Information 111 Additional Information - Canon HV40 | VIXIA HV40 Instruction Manual - Page 112
, schools, hospitals or for other commercial, industrial, or institutional applications. These uses are covered only by such specific warranty as Canon may issue with such sales. This Limited Warranty does not apply to accessories or consumables for the Equipment, which are sold "AS IS", without - Canon HV40 | VIXIA HV40 Instruction Manual - Page 113
the instruction manual; ii) the use of accessories, attachments, products, supplies, parts or devices with the Equipment that do not conform to Canon specifications or that cause abnormally frequent service problems; iii) repairs or services performed by any party other than a Canon Service Facility - Canon HV40 | VIXIA HV40 Instruction Manual - Page 114
1Z6 Q If you have any questions, call the Canon Canada Information Center toll free (in Canada only) at 1-800-OK-CANON (1-800-652-2666). Q Si vous avez des questions, veuillez téléphoner 1-800-OK-CANON (1-800-652-2666, sans frais au Canada seulement). CANON MEXICANA, S DE RL DE CV Blvd. Manuel Ávila
-
 1
1 -
 2
2 -
 3
3 -
 4
4 -
 5
5 -
 6
6 -
 7
7 -
8
-
9
-
10
-
11
-
12
-
13
-
14
-
15
-
16
-
17
-
18
-
19
-
20
-
21
-
22
-
23
-
24
-
25
-
26
-
27
-
28
-
29
-
30
-
31
-
32
-
33
-
34
-
35
-
36
-
37
-
38
-
39
-
40
-
41
-
42
-
43
-
44
-
45
-
46
-
47
-
48
-
49
-
50
-
51
-
52
-
53
-
54
-
55
-
56
-
57
-
58
-
59
-
60
-
61
-
62
-
63
-
64
-
65
-
66
-
67
-
68
-
69
-
70
-
71
-
72
-
73
-
74
-
75
-
76
-
77
-
78
-
79
-
80
-
81
-
82
-
83
-
84
-
85
-
86
-
87
-
88
-
89
-
90
-
91
-
92
-
93
-
94
-
95
-
96
-
97
-
98
-
99
-
100
-
101
-
102
-
103
-
104
-
105
-
106
-
107
-
108
-
109
-
110
-
111
-
112
-
113
-
114
 |
 |
NTSC
English
Français
Español
HD Camcorder
Instruction Manual
Caméscope HD
Manuel d’instruction
Videocámara HD
Manual de Instrucciones
Mini
Digital
Video
Cassette
Please read also the following instruction manual
(electronic version on PDF file). For further details refer to
the installation guide.
Veuillez lire aussi le manuel d’instruction suivant (version
électronique sur fichier PDF). Pour d’autres détails référez-
vous au guide d’installation.
Lea también el siguiente manual de instrucciones (versión
electrónica en archivo PDF). Para mayores detalles,
refiérase a la guía de instalación.
• Digital Video Software
Digital Video Software
Version 32
Instruction Manual
PUB.DIM-0918-000