Canon LC-830I Getting Started Guide - Page 11
Install Handset (Optional - drivers
 |
UPC - 013803067484
View all Canon LC-830I manuals
Add to My Manuals
Save this manual to your list of manuals |
Page 11 highlights
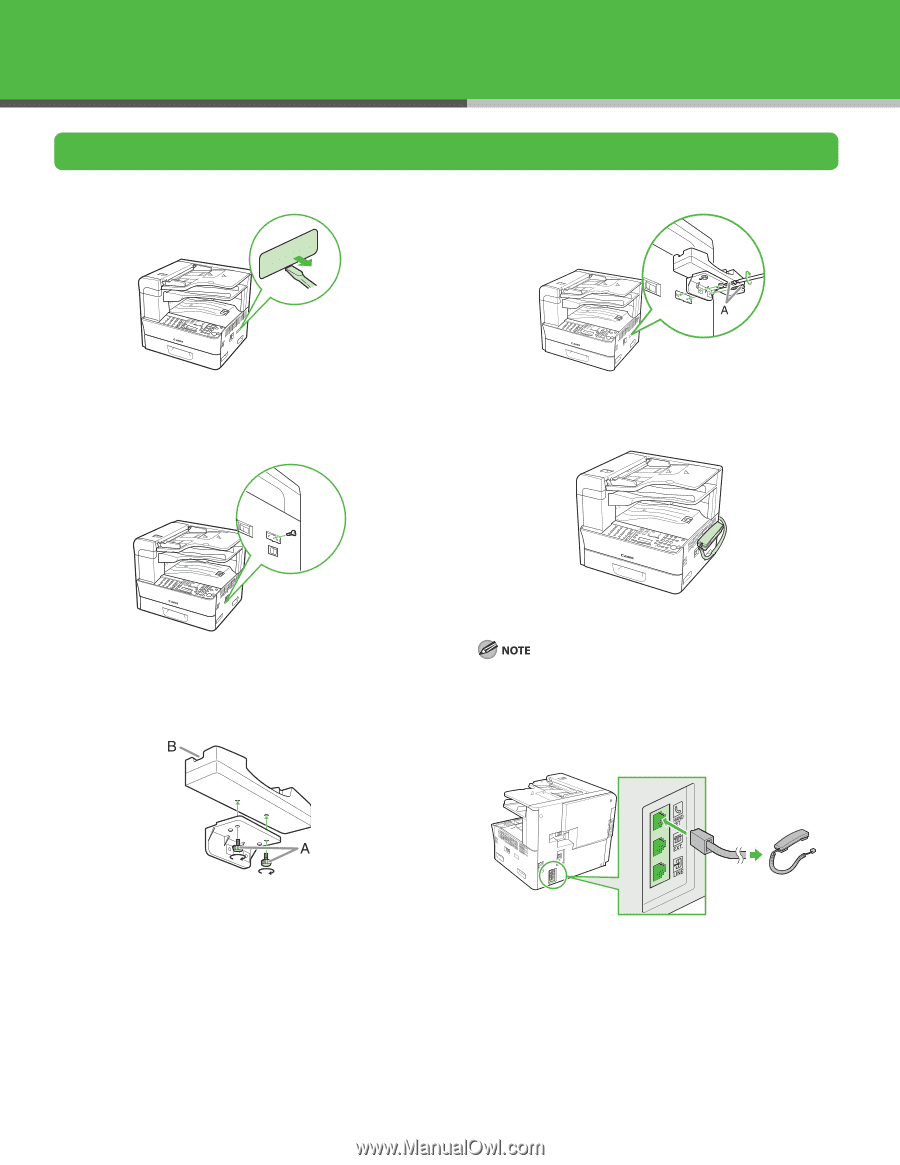
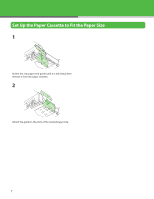
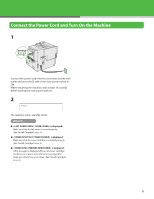
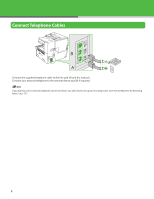
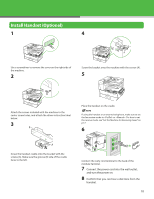
Install Handset (Optional) 1 4 Use a screwdriver to remove the cover on the right side of the machine. 2 Screw the bracket onto the machine with the screws (A). 5 Attach the screws included with the machine to the center screw holes, and attach the driver instruction label below. 3 Place the handset on the cradle. If using the handset or an external telephone, make sure to set the fax receive mode to or . For how to set the receive mode, see "Set the Machine for Receiving Faxes," on p.17. 6 Screw the handset cradle onto the bracket with the screws (A). Make sure the groove (B) side of the cradle faces to the left. Connect the curly cord terminal to the back of the modular terminal. 7 Connect the power cord into the wall outlet, and turn the power on. 8 Confirm that you can hear a dial tone from the handset. 10
-
 1
1 -
2
-
3
-
4
-
5
-
 6
6 -
 7
7 -
 8
8 -
 9
9 -
 10
10 -
 11
11 -
 12
12 -
 13
13 -
 14
14 -
 15
15 -
 16
16 -
17
-
18
-
19
-
20
-
21
-
22
-
23
-
24
-
25
-
26
-
27
-
28
-
29
-
30
-
31
-
32
-
33
-
34
-
35
-
36
-
37
-
38
 |
 |