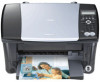
Canon MultiPASS MP390 MultiPASS MP390 Set-Up Sheet
Canon MultiPASS MP390 Manual
 |
View all Canon MultiPASS MP390 manuals
Add to My Manuals
Save this manual to your list of manuals |
Canon MultiPASS MP390 manual content summary:
- Canon MultiPASS MP390 | MultiPASS MP390 Set-Up Sheet - Page 1
. Install print head Install ink tanks Load print media Align print head These steps explain the setup procedure for use by connecting to a computer. Setup procedures Install MP Drivers Connect USB cable You can use the print, PC fax, scan functions - Canon MultiPASS MP390 | MultiPASS MP390 Set-Up Sheet - Page 2
. Ink Tanks: BCI-24 Black BCI-24 Color MP390 Telephone Line Cord Print Head Power Cord Set-Up Sheet User's Guide Setup CD-ROM The Setup CD-ROM contains the MP Drivers, as well as the electronic manuals Software Guide and Photo Application Guide. Please read these guides. NOTE A printer cable - Canon MultiPASS MP390 | MultiPASS MP390 Set-Up Sheet - Page 3
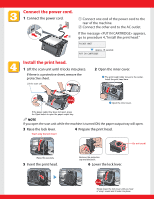
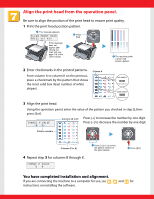
of the machine. w Connect the other end to the AC outlet. If the message appears, go to procedure 4, "Install the print head." Approx. 15 seconds Install the print head. 1 Lift the scan unit until it locks into place. If there is a protective sheet, remove the protective sheet - Canon MultiPASS MP390 | MultiPASS MP390 Set-Up Sheet - Page 4
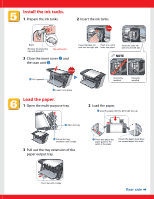
! 3 Close the inner cover q and the scan unit w. Insert the black ink Push it in until it tank into the right slot. locks into place. Insert the color ink tank into the left slot. NOTE Click q Lift it upward. Incorrectly installed Correctly installed w Lower it into place. Load the paper - Canon MultiPASS MP390 | MultiPASS MP390 Set-Up Sheet - Page 5
the position of the print head to ensure print quality. 1 Print the print head position pattern. q This message appears. w Press [Set]. If this message does not appear after closing the scan unit, see page 118 of the User's Guide. e The machine prints a print head position pattern. 2 Enter - Canon MultiPASS MP390 | MultiPASS MP390 Set-Up Sheet - Page 6
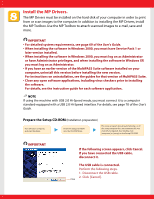
In addition to installing the MP Drivers, install the MP Toolbox. Use the MP Toolbox to attach scanned images to e-mail, save and more. IMPORTANT • For detailed system requirements, see page 69 of the User's Guide. • When installing the software in Windows 2000, you must have Service Pack 1 or later - Canon MultiPASS MP390 | MultiPASS MP390 Set-Up Sheet - Page 7
the MP Drivers. (Use when printing from PC applications or scanning images.) Follow the on-screen instructions to install the software. When the InstallShield Wizard Complete window appears, click [Finish]. If you are prompted to restart your computer after the installation, restart your computer - Canon MultiPASS MP390 | MultiPASS MP390 Set-Up Sheet - Page 8
. You now have completed installation of the software. For details of the operations, see the User's Guide. When installation of the MP Drivers completes, the icon appears on the desktop. You can register your machine online by double-clicking this icon. Canon, MultiPASS, and BCI are trademarks
-
 1
1 -
 2
2 -
 3
3 -
 4
4 -
 5
5 -
 6
6 -
 7
7 -
8
 |
 |
Set-Up Sheet
Set-Up Sheet
Thank you for purchasing the Canon MultiPASS MP390.To prepare your machine for
use, please follow the instructions in this
Set-Up Sheet
before referring to any other
documentation.
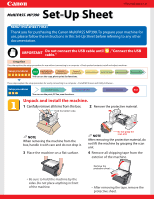
READ THIS SHEET FIRST
READ THIS SHEET FIRST
Do not connect the USB cable until
, "Connect the USB
cable."
IMPORTANT
Setup procedures
Start
Setup flow
Setup procedures
End
This side explains the setup procedure for use without connecting to a computer. <Check packed contents, install and adjust machine>
These steps explain the setup procedure for use by connecting to a computer.
<Install MP Drivers and Utility Software>
You can use the copy, photo print, fax functions.
You can use the print, PC fax, scan functions.
Connect
power cord
Connect
telephone line
Install Utility Software
Install print head
Install MP Drivers
Install ink tanks
Connect USB cable
Load print media
Align print head
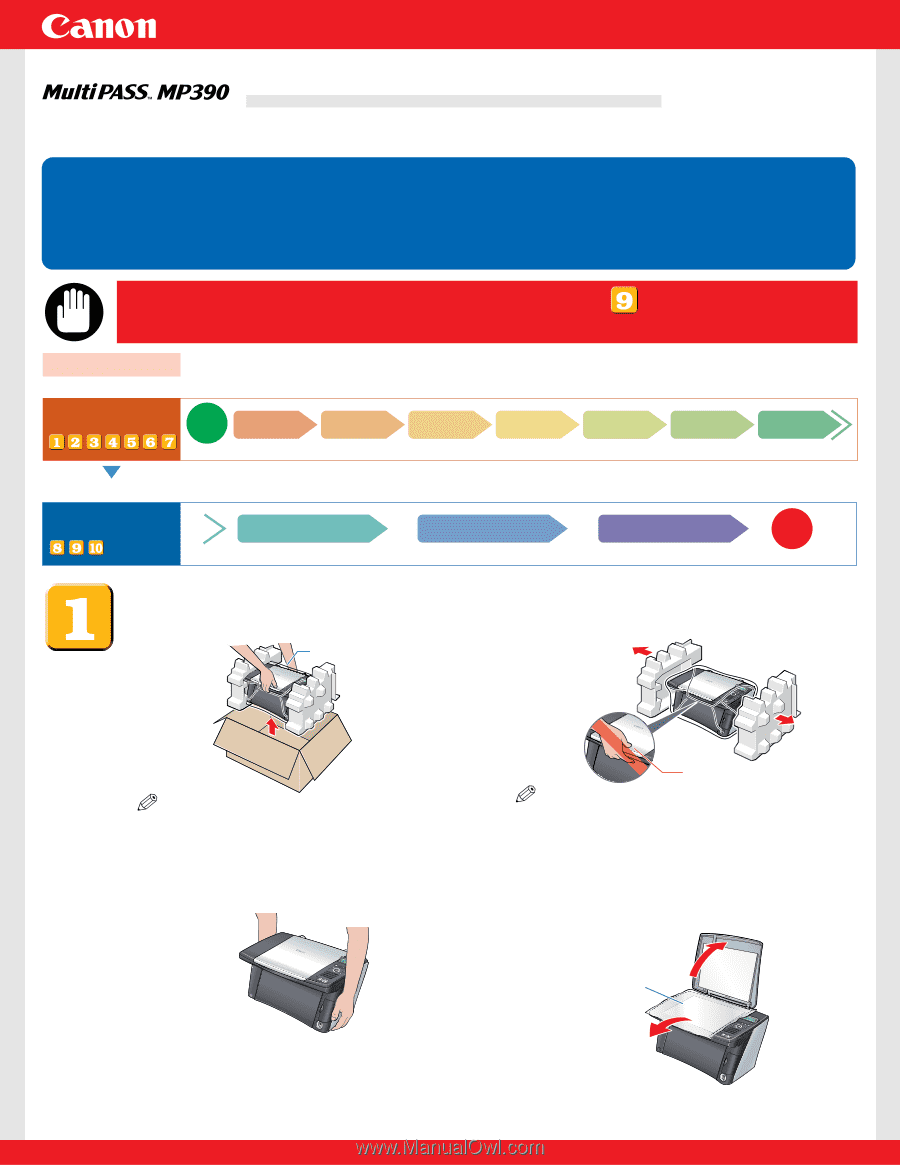
Unpack and install
the machine
Unpack and install the machine.
1
Carefully remove all items from the box.
NOTE
When removing the machine from the
box, handle it with care and do not drop it.
2
Remove the protective material.
NOTE
After removing the protective material, do
not lift the machine by grasping the scan
unit.
Hold the bottom side.
3
Place the machine on a flat surface.
•
Be sure to hold the machine by the
sides. Do not place anything in front
of the machine.
4
Remove all shipping tape from the
exterior of the machine.
•
After removing the tape, remove the
protective sheet.
Do not grasp the
scan unit.
HT3-2145-000-V.1.0
Remove the
protective sheet.