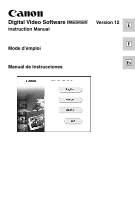
Canon Optura 30 Digital Video Software (Macintosh) Ver.12 Instruction Manual
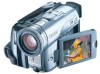
Canon Optura 30 - Optura 30 MiniDV Camcorder Manual
 |
UPC - 013803040913
View all Canon Optura 30 manuals
Add to My Manuals
Save this manual to your list of manuals |
Canon Optura 30 manual content summary:
- Canon Optura 30 | Digital Video Software (Macintosh) Ver.12 Instruction Manual - Page 1
Digital Video Software Macintosh Instruction Manual Version 12 E F Mode d'emploi Es Manual de Instrucciones - Canon Optura 30 | Digital Video Software (Macintosh) Ver.12 Instruction Manual - Page 2
to the sound and image data ("Data") contained in the Software, which are to be downloaded to the applicable Canon digital camera product, Canon grants you a personal, non-exclusive license to use the Data on a single Canon digital camera product only. YOU SHALL NOT ASSIGN, SUBLICENSE, RENT, LEASE - Canon Optura 30 | Digital Video Software (Macintosh) Ver.12 Instruction Manual - Page 3
.212 and 48 C.F.R. 227.7202-1 through 227.72024 (June 1995), all U.S. Government End Users shall acquire the SOFTWARE with only those rights set forth herein. Manufacturer is Canon Inc./30-2, Shimomaruko 3-chome, Ohta-ku, Tokyo 146-8501, Japan. 7. EXPORT RESTRICTIONS: You agree to comply with all - Canon Optura 30 | Digital Video Software (Macintosh) Ver.12 Instruction Manual - Page 4
10.OWNERSHIP: All rights, including but not limited to copyrights and trade secret rights, to the SOFTWARE belong to Canon, its affiliated corporations and third party licensors. Your use of the SOFTWARE is subject to the laws of the United States, and Canada, and other applicable copyright and - Canon Optura 30 | Digital Video Software (Macintosh) Ver.12 Instruction Manual - Page 5
the Digital Video Software 10 Connecting the Camcorder to a Computer 13 Downloading Images (ImageBrowser 14 Starting ImageBrowser 14 Downloading Images to the Computer 17 Using a PC Card Reader/Writer 19 Using Other ImageBrowser Functions 20 Camera Window 20 Camera Settings Window 21 - Canon Optura 30 | Digital Video Software (Macintosh) Ver.12 Instruction Manual - Page 6
or malfunction of the camcorder, the software, memory cards (MultiMediaCards or SD Memory Cards), personal computers, or peripheral devices, or due to use of a memory card not formatted by a Canon camcorder. Trademark Acknowledgments • Canon is a registered trademark of Canon Inc. • Macintosh and - Canon Optura 30 | Digital Video Software (Macintosh) Ver.12 Instruction Manual - Page 7
Checking Supplied Accessories Use the following accessories to download recorded images from a memory E card to your computer. • IFC-300PCU USB Cable • DIGITAL VIDEO SOLUTION DISK For Macintosh The explanations in this manual use mainly Mac OS X version 10.2 screen shots. 7 - Canon Optura 30 | Digital Video Software (Macintosh) Ver.12 Instruction Manual - Page 8
10.1/10.2/10.3): 128 MB or more USB Canon Utilities - ImageBrowser 120 MB or more - PhotoStitch 30 MB or more 800 × 600 pixels/32,000 colors or better, 1024 × ❍ A CD-ROM drive is required to install the software. ❍ Not all operations performed with a connection to a USB 2.0 compatible board - Canon Optura 30 | Digital Video Software (Macintosh) Ver.12 Instruction Manual - Page 9
Software This topic introduces the main features of the software programs contained on the DIGITAL VIDEO SOLUTION DISK For Macintosh. E ■ ImageBrowser ( 14) • Downloading images recorded onto a memory card panoramic images. This instruction manual explains how to install the software, what you - Canon Optura 30 | Digital Video Software (Macintosh) Ver.12 Instruction Manual - Page 10
OS X (version 10.1/10.2/10.3) Users: Your digital video camcorder is equipped with the standard Picture Transfer Protocol (PTP). This protocol enables you to download images by simply connecting the camera to a computer with the USB cable (using software such as iPhoto or Image Capture preinstalled - Canon Optura 30 | Digital Video Software (Macintosh) Ver.12 Instruction Manual - Page 11
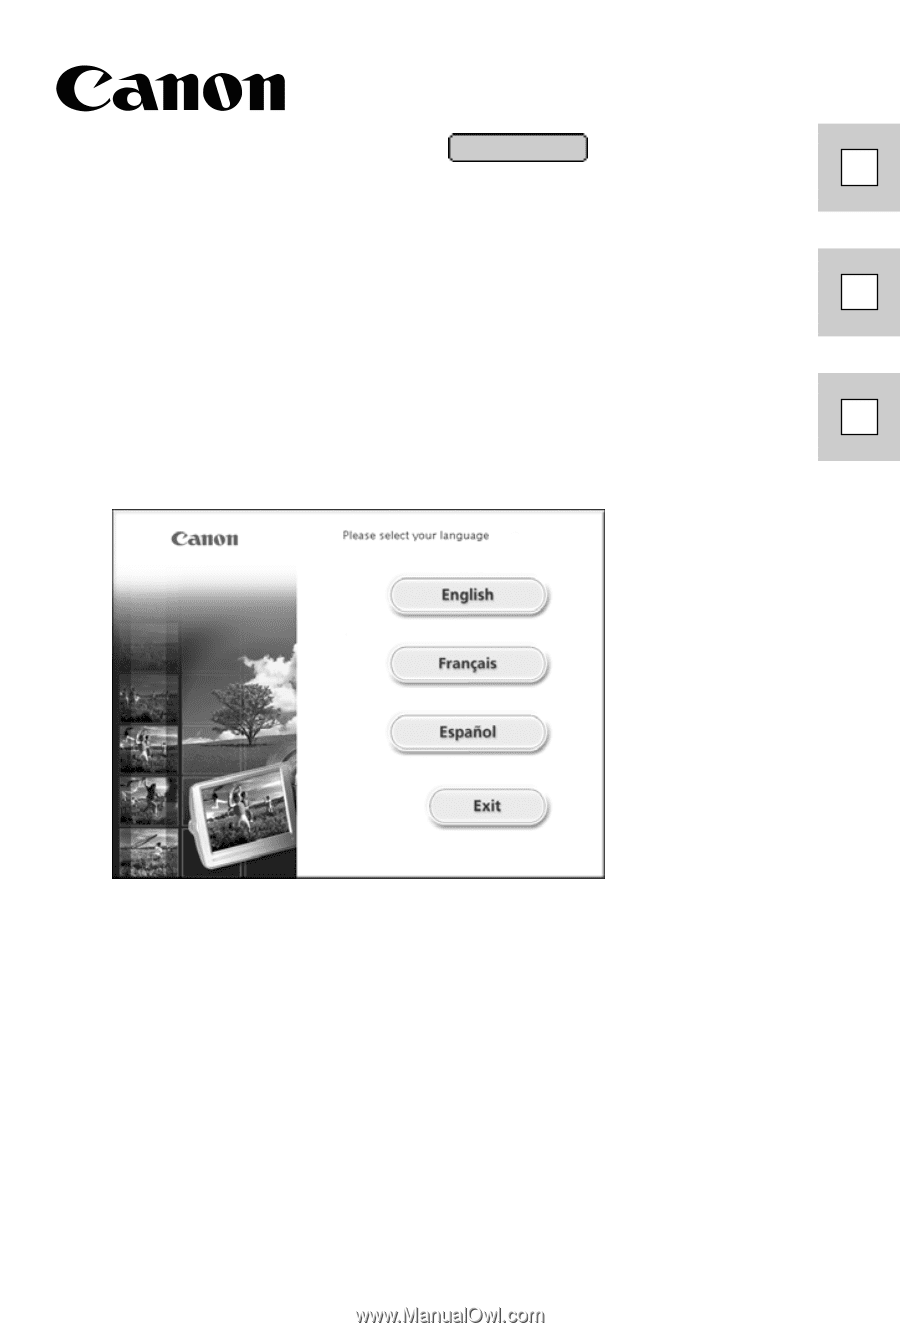
10.1/10.2/10.3): Double click the CD-ROM icon, followed by the [Mac OS X] and [Canon Digital Video Installer] icons. The installer panel opens. 4. Select your language. 5. Click Digital Video Software [Install]. Installer Panel 6. Select [Easy Installation] and Click [Next]. To install the - Canon Optura 30 | Digital Video Software (Macintosh) Ver.12 Instruction Manual - Page 12
Installing the Digital Video Software 7. Read the license agreement and click [Agree]. 8. Review the installation settings and click [Next]. Installation starts. 9. When the "Installation has finished." message appears, click [OK]. 10.After the installation is complete, restart the - Canon Optura 30 | Digital Video Software (Macintosh) Ver.12 Instruction Manual - Page 13
to a Computer ❍ Make sure the camcorder is being powered using the power adapter before connecting it to a computer. ❍ Be sure to install the Digital Video Software before you connect the E camcorder to the computer. ❍ Connect the USB cable directly to one of the computer's main USB ports - Canon Optura 30 | Digital Video Software (Macintosh) Ver.12 Instruction Manual - Page 14
. - Do not open the memory card cover, remove the memory card or detach the USB cable. - Do not turn off the camcorder or the computer. - Do not change the position of the POWER switch or the TAPE/ CARD switch. ❍ Images recorded onto the memory card or downloaded to the hard disk are important - Canon Optura 30 | Digital Video Software (Macintosh) Ver.12 Instruction Manual - Page 15
port] and [Canon Camera] are selected and click [Set]. E The Camera Window opens, displaying the camcorder images as thumbnails (small images). Macintosh How to Set ImageBrowser to Not Start Automatically 1. Click the Apple menu and select [Control Panels] and [Canon ImageBrowser Auto Launch - Canon Optura 30 | Digital Video Software (Macintosh) Ver.12 Instruction Manual - Page 16
section. The Communications Settings window appears. This window only appears the first time the camcorder is connected. Explorer View Section 4. Confirm that [USB port] and a Canon camcorder are selected and click [Set]. The Camera Window opens, displaying the camcorder images as thumbnails (small - Canon Optura 30 | Digital Video Software (Macintosh) Ver.12 Instruction Manual - Page 17
Downloading Images to the Computer E 1. Mac OS 9.0-9.2: Select [Macintosh HD] in the Macintosh HD]. Explorer View Section 2. Create a new folder for saving images from the memory card in the camcorder. Click the [File] menu and select [New Folder]. A folder with the name "Untitled" will be created. - Canon Optura 30 | Digital Video Software (Macintosh) Ver.12 Instruction Manual - Page 18
. • Downloaded images are saved to the computer and appear in the Browser area. Thumbnail Browser area Explorer View Section To disconnect the camcorder, click the close box (Mac OS 9.0-9.2) or the red close box (Mac OS X (version 10.1/10.2/10.3)) at the upper left of the Camera Window. The Camera - Canon Optura 30 | Digital Video Software (Macintosh) Ver.12 Instruction Manual - Page 19
are the same as when you connect the camcorder to the computer. Follow the procedure below to open the Camera Window. For instructions on how to connect the PC Card Reader/Writer, please refer to the PC Card Reader Manual. 1. Insert a memory card into the reader. Mac OS X (version 10.1/10 - Canon Optura 30 | Digital Video Software (Macintosh) Ver.12 Instruction Manual - Page 20
and camcorder settings. Menu options: Camera Settings, Communication Settings and My Camera. [CONNECT CAMERA]: Reconnects the camcorder to the computer. [SELECT]: Selects images. Menu options: Select All and Deselect All. [DELETE]: Deletes selected images. [DOWNLOAD]: Downloads selected - Canon Optura 30 | Digital Video Software (Macintosh) Ver.12 Instruction Manual - Page 21
also check the remaining memory card capacity, and format the memory card. 1. In the Camera Window, click the [SETUP OPTIONS] button and select [Camera Settings] from the displayed menu. 2. Check or change the settings. Click [OK] to close the window. Input a camcorder owner name here (up to - Canon Optura 30 | Digital Video Software (Macintosh) Ver.12 Instruction Manual - Page 22
of functions. You can drag this part of the frame to change the size of the Browser Window. [CANON CAMERA]: Displays the Camera Window. [SELECT]: Selects all images in a folder. Menu options: Select All and Deselect All. [SEND TO TRASH]: Deletes selected images. [REDUCE]: Reduces the size of - Canon Optura 30 | Digital Video Software (Macintosh) Ver.12 Instruction Manual - Page 23
Image Viewer Window The Image Viewer window opens when you double-click a still image, or when E you select a still still image appears. ADJUST COLOR Click here to display the Adjust Color window to adjust hue, saturation and lightness of the still image by dragging the respective slide. 23 - Canon Optura 30 | Digital Video Software (Macintosh) Ver.12 Instruction Manual - Page 24
wish to display the information. 2. From the [File] menu, select [Get Info]. • The File Information window appears. • If you wish to add a comment, input it in the [Comment] area. • Click [OK] to close the window. ❍ It depends on your camcorder model which image information will be displayed. ❍ When - Canon Optura 30 | Digital Video Software (Macintosh) Ver.12 Instruction Manual - Page 25
the thumbnails. Allows you to select the operating panel displayed below the Browser Area. If you select [View Mode] followed by [Preview] from the [View] menu, you can display a preview of an image in the Browser Area. To stop displaying the preview image, select [View Mode] followed by [List] in - Canon Optura 30 | Digital Video Software (Macintosh) Ver.12 Instruction Manual - Page 26
in the order of the creation date. 1. In the [View] menu, select [View Mode] followed by [TimeTunnel]. The image information will be line. You can change this date/time by double-clicking it on the display. A window similar to the one below appears. Specify the new date/time. Move the slider up - Canon Optura 30 | Digital Video Software (Macintosh) Ver.12 Instruction Manual - Page 27
Playing Back Movies From a Memory Card In the Camera Window and Browser Area, movies are displayed with the first scene as a still image with a movie icon ( ). When you double-click the E thumbnail in the Browser - Canon Optura 30 | Digital Video Software (Macintosh) Ver.12 Instruction Manual - Page 28
Browser area. 2. From the [Edit] menu, select [Movie Edit]. 3. Arrange images and click [2.Effect]. • To change the order of images, select an image and click [Move Left] or [Move Right]. • Operational instructions are displayed in the upper section of the window. Plays back the movie being edited - Canon Optura 30 | Digital Video Software (Macintosh) Ver.12 Instruction Manual - Page 29
. 6. Select a file format and click [Save]. • Select the destination folder, input the file name and click [Save]. • To exit MovieEdit Task, from the [MovieEdit Task] menu, select [Quit MovieEdit Task]. Macintosh 29 - Canon Optura 30 | Digital Video Software (Macintosh) Ver.12 Instruction Manual - Page 30
menu, select [Slide Show Options]. 2. Select the slide show settings and click [OK]. • [Auto Play]: Moves to the next still image automatically. Select the interval by sliding the control under [Play Interval] (from 1 to 30 seconds). • [Control with Mouse or Keypad]: Advances the slide show manually - Canon Optura 30 | Digital Video Software (Macintosh) Ver.12 Instruction Manual - Page 31
settings allow recording. E The sound cannot be played back on the camcorder. Adding Sound to a Still Image 1. In the Browser Area, select a still image and select [Record] from the [Sound] menu. The recording window appears. 2. Click and start recording when the [Save] button is enabled - Canon Optura 30 | Digital Video Software (Macintosh) Ver.12 Instruction Manual - Page 32
the Sound Panel You can use the sound panel to record, playback and adjust the volume. 1. From the [View] menu, select [View Settings] and select [Sound Panel] from the displayed menu. The sound panel appears. 2. In the Browser Area, select the still image with the sound attachment. You can record - Canon Optura 30 | Digital Video Software (Macintosh) Ver.12 Instruction Manual - Page 33
Messages You can attach selected images to an E-mail message. 1. Select the images you wish to send in the Browser Area. E 2. From the [Internet] menu, select [Create Image for Email]. 3. Specify the image size and click [Next]. When you select [Send without changing the file size], move on to - Canon Optura 30 | Digital Video Software (Macintosh) Ver.12 Instruction Manual - Page 34
starts automatically. Open a new e-mail message and attach the image. With some types of e-mail software, you can attach images to e-mail messages simply by dragging them from the Browser Area to the new message window. • Click [Preview] to check the changed image. • The image will be saved to the - Canon Optura 30 | Digital Video Software (Macintosh) Ver.12 Instruction Manual - Page 35
start automatically in step 5. Note that some e-mail software may not start automatically. Mac OS 9.0 - 9.2: From the Apple menu, select [Control Panel], E followed by [Internet] and click the [Email] tab. Change the setting in the displayed window. Mac OS X (version 10.1/10.2/10.3): From the - Canon Optura 30 | Digital Video Software (Macintosh) Ver.12 Instruction Manual - Page 36
detach the USB cable or turn off the camcorder while data is being transferred to the printer (when the camcorder's card access indicator is flashing). Doing so may cause memory card data to become corrupted. 1. Select the still image(s) you wish to print in the Browser Window. 2. Click [PRINT] and - Canon Optura 30 | Digital Video Software (Macintosh) Ver.12 Instruction Manual - Page 37
. The other options allow you to print an index or print onto Canon perforated paper. Canon perforated paper cannot be selected with Mac OS X (version 10.1/10.2/10.3). 4. Select a paper size and click [OK]. • The Print window opens, allowing you to change the layout and printing settings. • The - Canon Optura 30 | Digital Video Software (Macintosh) Ver.12 Instruction Manual - Page 38
starts. The Print Window Change the Image Size Drag the border to resize the still image. Change the default number of still images printed per page. Click this to rotate the selected still image. Click this to reset the layout. 38 Edit the Page Title Open the [Edit] menu and select [Edit - Canon Optura 30 | Digital Video Software (Macintosh) Ver.12 Instruction Manual - Page 39
. E ImageBrowser also supports the Exif 2.2 standard (or Exif Print). ❍ Still images shot with camcorders complying with the Exif Mac OS 9.0-9.2 1. Click the [Edit] menu in ImageBrowser and select [Preferences]. Macintosh 2. In the Preferences window, select [Print], set the image quality - Canon Optura 30 | Digital Video Software (Macintosh) Ver.12 Instruction Manual - Page 40
10.2/10.3) 1. Click the [ImageBrowser] menu in ImageBrowser and select [Preferences]. 2. In the [Preferences] window, select [Print], set the image quality 2.2 compliant camcorders and other images. Select this option to automatically correct only images shot with Exif 2.2 compliant camcorders. 40 - Canon Optura 30 | Digital Video Software (Macintosh) Ver.12 Instruction Manual - Page 41
camcorder. *Digital Print Order Format When you are using a SD memory card, make sure the protect switch is set to allow recording. The Edit Slide/DPOF window the [Edit] menu (printing of date and file number) are not supported by the camcorder. Macintosh 3. Click [Save to Camera]. The DPOF - Canon Optura 30 | Digital Video Software (Macintosh) Ver.12 Instruction Manual - Page 42
. The following instruction explains how to merge still images recorded in Stitch Assist mode with the camcorder. Still images recorded in Stitch Assist mode with Wide-converter or Teleconverter attached cannot be merged correctly. 1. Click the green stitch mark in the Camera Window. Still images - Canon Optura 30 | Digital Video Software (Macintosh) Ver.12 Instruction Manual - Page 43
order of the images and click [2.Merge]. Operational instructions are displayed in the upper section of the window. E 4. Click [Start]. 5. Select [3.Save] Image? window, click [Yes]. The Viewer window opens and displays the merged image. • To exit PhotoStitch, from the [PhotoStitch] menu, select - Canon Optura 30 | Digital Video Software (Macintosh) Ver.12 Instruction Manual - Page 44
still image information to a text file, or copy and rename movies and still images. 1. Select images in the Browser Area. 2. From the [Edit] menu, select [Write a still image]. 3. Select the export type and click [Next]. • [Resave the image]: Converts still images to another file format, resizes and - Canon Optura 30 | Digital Video Software (Macintosh) Ver.12 Instruction Manual - Page 45
4. Specify the export settings and click [Finish]. The options for the export settings vary according to the export type. Follow E the instructions displayed in the window. In each case, specify the destination folder and file name for the images to be exported. 45 Macintosh - Canon Optura 30 | Digital Video Software (Macintosh) Ver.12 Instruction Manual - Page 46
for card mix from the DIGITAL VIDEO SOLUTION DISK For Macintosh. ❍ Still images in EXIF-JPEG, TIFF, PICT, and Windows bitmap format can be added to a memory card. ❍ You can also add still images to a memory card by using drag and drop to move it from the browser area to the Camera window. Adding - Canon Optura 30 | Digital Video Software (Macintosh) Ver.12 Instruction Manual - Page 47
images will appear in the Camera Window. Adding Sample Images to the Memory Card You can add sample images for card mix to the memory card. 4 images for CARD CHROMA and CARD ANIMATION, and 2 images for CARD LUMINANCE and CAMERA CHROMA are provided on the DIGITAL VIDEO SOLUTION DISK For Macintosh - Canon Optura 30 | Digital Video Software (Macintosh) Ver.12 Instruction Manual - Page 48
] folder. The folders [CAMERA CHROMA], [CARD ANIMATION], [CARD CHROMA] or [CARD LUMINANCE] appear. 4. Open the [CAMERA CHROMA], [CARD ANIMATION], [CARD CHROMA] and [CARD LUMINANCE] folder, select the image you wish to copy to the camcorder and click [Open]. 5. In the Add Image window, click [Add - Canon Optura 30 | Digital Video Software (Macintosh) Ver.12 Instruction Manual - Page 49
the memory card. • Do not detach the USB cable. • Do not turn off the camcorder or computer. • Do not change the position of the POWER switch or TAPE/CARD switch. Displaying the My Camera Window 1. From the [Edit] menu in the Browser Window, select [My Camera]. The Select My Camera window appears - Canon Optura 30 | Digital Video Software (Macintosh) Ver.12 Instruction Manual - Page 50
Operation Sound, Selftimer Sound and Shutter Sound] and click [OK]. 3. Click [View Camera] to display the My Camera Settings of the camcorder. Alternatively, you can display the My Camera window from the Camera Window by clicking [SETUP OPTIONS] and selecting [My Camera] from the displayed menu. 50 - Canon Optura 30 | Digital Video Software (Macintosh) Ver.12 Instruction Manual - Page 51
My Camera Window E Saves the setting from the computer to the camcorder. Selects the type of the My Camera Settings. Displays the My Camera Settings saved on the computer. Adds an image / sound file to the [Computer] list. Plays back the sound setting selected in the [Computer] list. Saves - Canon Optura 30 | Digital Video Software (Macintosh) Ver.12 Instruction Manual - Page 52
Your Camcorder with the My Camera Settings Saving the My Camera Settings to the Camcorder 1. In the My Camera window, select the theme set you wish to save to the camcorder in the [Computer] list. • To change the settings individually, select the setting type in the [Type] list. • A window appears - Canon Optura 30 | Digital Video Software (Macintosh) Ver.12 Instruction Manual - Page 53
to use this setting on the camcorder, change the My Camera Setting on the camcorder itself. Refer to the Camcorder Instruction Manual for details. Adding Still Images to the My Camera Window To use still images recorded with your camcorder, you need to download them to the computer before you - Canon Optura 30 | Digital Video Software (Macintosh) Ver.12 Instruction Manual - Page 54
Uninstalling the Software Uninstall the software when you wish to delete it from your computer or when reinstallation is required to fix corrupted files. Uninstalling ImageBrowser and PhotoStitch Move the program's - Canon Optura 30 | Digital Video Software (Macintosh) Ver.12 Instruction Manual - Page 55
problems, detach the USB cable from the camcorder and computer and terminate the connection. Restart the computer and then reconnect the camcorder. ImageBrowser Operation ? Cannot download images ➜ The camcorder it not set to the correct mode. Turn the POWER switch to PLAY (VCR) and move the TAPE - Canon Optura 30 | Digital Video Software (Macintosh) Ver.12 Instruction Manual - Page 56
INC. U.S.A. CANADA ASIA Canon U.S.A., Inc. Canon Customer Care Center Tel (US): 1-800-828-4040 (Mon.-Fri., 9 AM to 8 PM Eastern Time) Canon Canada Inc. Tel (Canada): 1-800-OK-CANON (1-800-652-2666) Canon Hongkong Co., Ltd. 19/F., The Metropolis Tower, 10 Metropolis Drive, Hunghom, Kowloon, Hong
-
 1
1 -
 2
2 -
 3
3 -
 4
4 -
 5
5 -
 6
6 -
 7
7 -
8
-
9
-
10
-
11
-
12
-
13
-
14
-
15
-
16
-
17
-
18
-
19
-
20
-
21
-
22
-
23
-
24
-
25
-
26
-
27
-
28
-
29
-
30
-
31
-
32
-
33
-
34
-
35
-
36
-
37
-
38
-
39
-
40
-
41
-
42
-
43
-
44
-
45
-
46
-
47
-
48
-
49
-
50
-
51
-
52
-
53
-
54
-
55
-
56
 |
 |
Digital Video Software
Macintosh
Version 12
Instruction Manual
Mode d’emploi
Manual de Instrucciones
E
F
Es