Canon PC720 Service Manual - Page 157
Checks/remarks
 |
View all Canon PC720 manuals
Add to My Manuals
Save this manual to your list of manuals |
Page 157 highlights
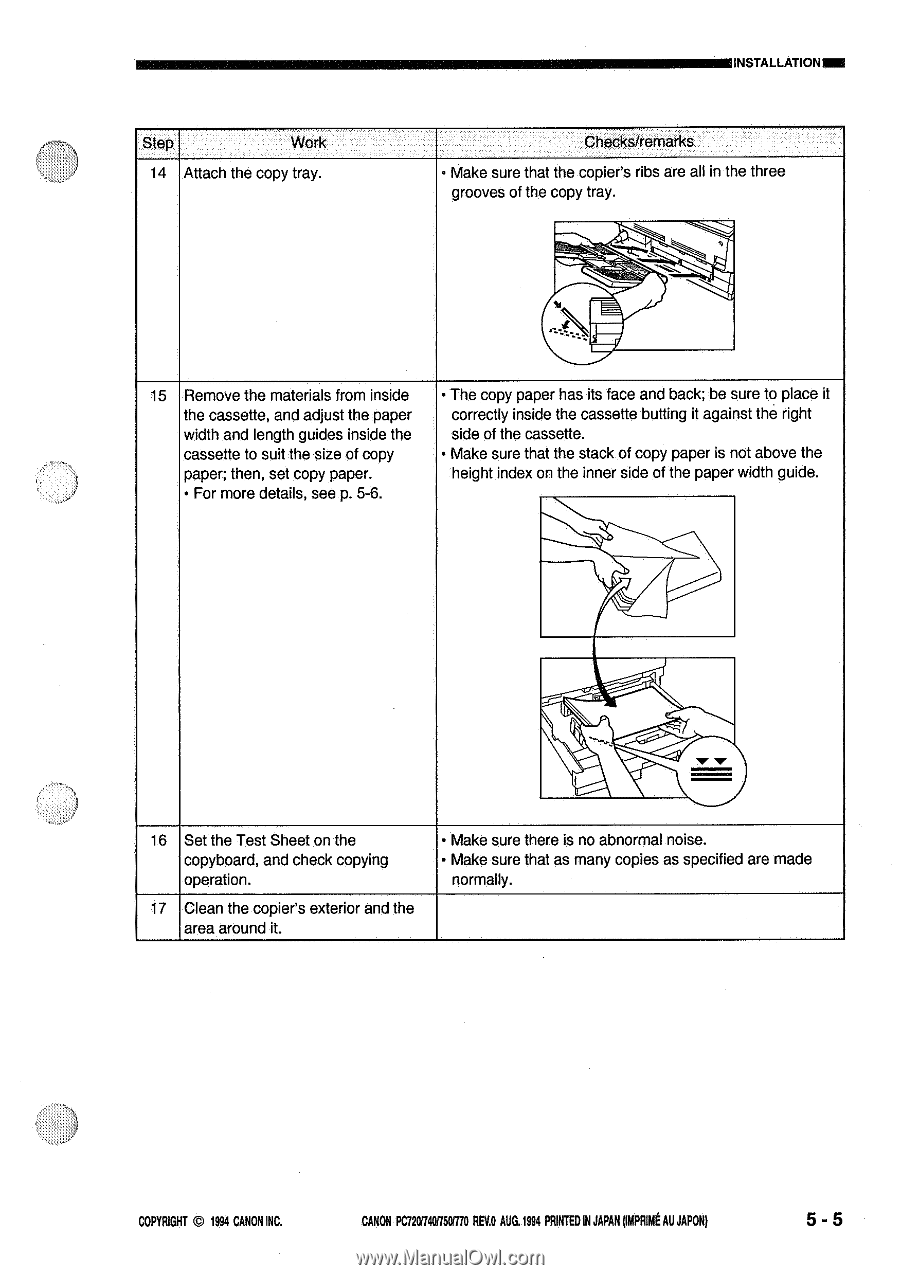
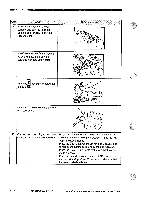
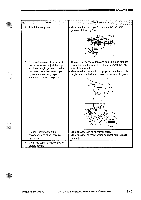
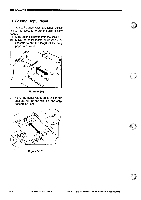
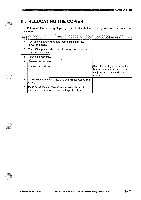
Step Work 14 Attach the copy tray. INSTALLATIONM Checks/remarks • Make sure that the copier's ribs are all in the three grooves of the copy tray. - ' ---,...-.. 15 Remove the materials from inside the cassette, and adjust the paper width and length guides inside the cassette to suit the size of copy paper; then, set copy paper. • For more details, see p. 5-6. • The copy paper has its face and back; be sure to place it correctly inside the cassette butting it against the right side of the cassette. • Make sure that the stack of copy paper is not above the height index on the inner side of the paper width guide. 16 Set the Test Sheet on the copyboard, and check copying operation. 17 Clean the copier's exterior and the area around it. • Make sure there is no abnormal noise. • Make sure that as many copies as specified are made normally. COPYRIGHT © 1994 CANON INC. CANON PC720740750/770 REV.O AUG.1994 PRINTED IN JAPAN (INPRIME AU JAPONI 5 - 5
-
 1
1 -
2
-
3
-
4
-
5
-
6
-
7
-
8
-
9
-
10
-
11
-
12
-
13
-
14
-
15
-
16
-
17
-
18
-
19
-
20
-
21
-
22
-
23
-
24
-
25
-
26
-
27
-
28
-
29
-
30
-
31
-
32
-
33
-
34
-
35
-
36
-
37
-
38
-
39
-
40
-
41
-
42
-
43
-
44
-
45
-
46
-
47
-
48
-
49
-
50
-
51
-
52
-
53
-
54
-
55
-
56
-
57
-
58
-
59
-
60
-
61
-
62
-
63
-
64
-
65
-
66
-
67
-
68
-
69
-
70
-
71
-
72
-
73
-
74
-
75
-
76
-
77
-
78
-
79
-
80
-
81
-
82
-
83
-
84
-
85
-
86
-
87
-
88
-
89
-
90
-
91
-
92
-
93
-
94
-
95
-
96
-
97
-
98
-
99
-
100
-
101
-
102
-
103
-
104
-
105
-
106
-
107
-
108
-
109
-
110
-
111
-
112
-
113
-
114
-
115
-
116
-
117
-
118
-
119
-
120
-
121
-
122
-
123
-
124
-
125
-
126
-
127
-
128
-
129
-
130
-
131
-
132
-
133
-
134
-
135
-
136
-
137
-
138
-
139
-
140
-
141
-
142
-
143
-
144
-
145
-
146
-
147
-
148
-
149
-
150
-
151
-
 152
152 -
 153
153 -
 154
154 -
 155
155 -
 156
156 -
 157
157 -
 158
158 -
 159
159 -
 160
160 -
 161
161 -
 162
162 -
163
-
164
-
165
-
166
-
167
-
168
-
169
-
170
-
171
-
172
-
173
-
174
-
175
-
176
-
177
-
178
-
179
-
180
-
181
-
182
-
183
-
184
-
185
-
186
-
187
-
188
-
189
-
190
-
191
-
192
-
193
-
194
-
195
-
196
-
197
-
198
-
199
-
200
 |
 |