Canon PowerShot SD870 IS Silver PowerShot SD870 IS DIGITAL ELPH / DIGITAL IXUS - Page 92
the exposure shift bar will appear in the LCD monitor.
 |
View all Canon PowerShot SD870 IS Silver manuals
Add to My Manuals
Save this manual to your list of manuals |
Page 92 highlights
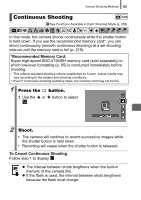
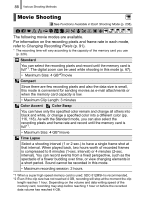
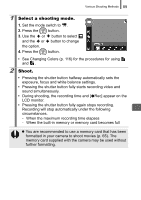
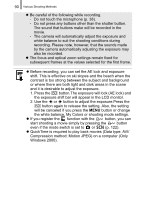
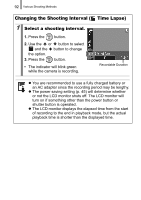
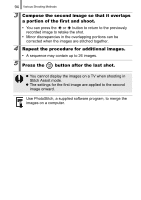
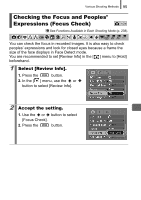
90 Various Shooting Methods z Be careful of the following while recording. - Do not touch the microphone (p. 38). - Do not press any buttons other than the shutter button. The sound that buttons make will be recorded in the movie. - The camera will automatically adjust the exposure and white balance to suit the shooting conditions during recording. Please note, however, that the sounds made by the camera automatically adjusting the exposure may also be recorded. z The focus and optical zoom settings remain fixed for subsequent frames at the values selected for the first frame. z Before recording, you can set the AE lock and exposure shift. This is effective on ski slopes and the beach when the contrast is too strong between the subject and background or where there are both light and dark areas in the scene and it is desirable to adjust the exposure. 1. Press the button.The exposure will lock (AE lock) and the exposure shift bar will appear in the LCD monitor. 2. Use the or button to adjust the exposure.Press the button again to release the setting. Also, the setting will be canceled if you press the MENU button or change the white balance, My Colors or shooting mode settings. z If you register the function with the button, you can start shooting a movie simply by pressing the button even if the mode switch is set to or (p. 122). z QuickTime is required to play back movies (Data type: AVI/ Compression method: Motion JPEG) on a computer (Only Windows 2000).
-
 1
1 -
2
-
3
-
4
-
5
-
6
-
7
-
8
-
9
-
10
-
11
-
12
-
13
-
14
-
15
-
16
-
17
-
18
-
19
-
20
-
21
-
22
-
23
-
24
-
25
-
26
-
27
-
28
-
29
-
30
-
31
-
32
-
33
-
34
-
35
-
36
-
37
-
38
-
39
-
40
-
41
-
42
-
43
-
44
-
45
-
46
-
47
-
48
-
49
-
50
-
51
-
52
-
53
-
54
-
55
-
56
-
57
-
58
-
59
-
60
-
61
-
62
-
63
-
64
-
65
-
66
-
67
-
68
-
69
-
70
-
71
-
72
-
73
-
74
-
75
-
76
-
77
-
78
-
79
-
80
-
81
-
82
-
83
-
84
-
85
-
86
-
 87
87 -
 88
88 -
 89
89 -
 90
90 -
 91
91 -
 92
92 -
 93
93 -
 94
94 -
 95
95 -
 96
96 -
 97
97 -
98
-
99
-
100
-
101
-
102
-
103
-
104
-
105
-
106
-
107
-
108
-
109
-
110
-
111
-
112
-
113
-
114
-
115
-
116
-
117
-
118
-
119
-
120
-
121
-
122
-
123
-
124
-
125
-
126
-
127
-
128
-
129
-
130
-
131
-
132
-
133
-
134
-
135
-
136
-
137
-
138
-
139
-
140
-
141
-
142
-
143
-
144
-
145
-
146
-
147
-
148
-
149
-
150
-
151
-
152
-
153
-
154
-
155
-
156
-
157
-
158
-
159
-
160
-
161
-
162
-
163
-
164
-
165
-
166
-
167
-
168
-
169
-
170
-
171
-
172
-
173
-
174
-
175
-
176
-
177
-
178
-
179
-
180
-
181
-
182
-
183
-
184
-
185
-
186
-
187
-
188
-
189
-
190
-
191
-
192
-
193
-
194
-
195
-
196
-
197
-
198
-
199
-
200
-
201
-
202
-
203
-
204
-
205
-
206
-
207
-
208
-
209
-
210
-
211
-
212
-
213
-
214
-
215
-
216
-
217
-
218
-
219
-
220
-
221
-
222
-
223
-
224
-
225
-
226
-
227
-
228
-
229
-
230
-
231
-
232
-
233
-
234
-
235
-
236
-
237
-
238
-
239
-
240
-
241
-
242
-
243
 |
 |
