Canon PowerShot SX540 HS User Manual - Page 19
Inserting the Battery Pack and Your Memory Card, Commercially Available
 |
View all Canon PowerShot SX540 HS manuals
Add to My Manuals
Save this manual to your list of manuals |
Page 19 highlights
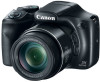
Inserting the Battery Pack and Your Memory Card (Commercially Available) Insert the included battery pack and a memory card (commercially available). Note that before using a new memory card (or a memory card formatted in another device), you should format the memory card with this camera (= 141). (2) 1 Open the cover. ●●Slide the cover (1) and open it (2). (1) 2 Insert the battery pack. ●●Holding the battery pack with the terminals (1) facing as shown, press the battery lock (2) in the direction of the arrow and insert the battery pack until the lock clicks shut. ●●If you insert the battery pack facing the wrong way, it cannot be locked into the correct position. Always confirm that the battery pack is facing the right way and (1) (2) locks when inserted. 3 Check the card's write-protect tab and insert the memory card. ●●Recording is not possible on memory cards with a write-protect tab when the tab is in the locked position. Slide the tab to the unlocked position. ●●Insert the memory card with the label (1) facing as shown until it clicks into place. (1) ●●Make sure the memory card is facing the right way when you insert it. Inserting memory cards facing the wrong way may damage the camera. 4 Close the cover. ●●Lower the cover (1) and hold it down as (1) you slide it, until it clicks into the closed position (2). (2) ●● For guidelines on how many shots or hours of recording can be saved on one memory card, see "Number of Shots per Memory Card" (= 180). Removing the Battery Pack and Memory Card Remove the battery pack. ●●Open the cover and press the battery lock in the direction of the arrow. ●●The battery pack will pop up. Remove the memory card. ●●Push the memory card in until it clicks, and then slowly release it. ●●The memory card will pop up. Before Use Basic Guide Advanced Guide 1 Camera Basics 2 Auto Mode / Hybrid Auto Mode 3 Other Shooting Modes 4 P Mode 5 Tv, Av, and M Mode 6 Playback Mode 7 Wi-Fi Functions 8 Setting Menu 9 Accessories 10 Appendix Index 19
-
 1
1 -
2
-
3
-
4
-
5
-
6
-
7
-
8
-
9
-
10
-
11
-
12
-
13
-
 14
14 -
 15
15 -
 16
16 -
 17
17 -
 18
18 -
 19
19 -
 20
20 -
 21
21 -
 22
22 -
 23
23 -
 24
24 -
25
-
26
-
27
-
28
-
29
-
30
-
31
-
32
-
33
-
34
-
35
-
36
-
37
-
38
-
39
-
40
-
41
-
42
-
43
-
44
-
45
-
46
-
47
-
48
-
49
-
50
-
51
-
52
-
53
-
54
-
55
-
56
-
57
-
58
-
59
-
60
-
61
-
62
-
63
-
64
-
65
-
66
-
67
-
68
-
69
-
70
-
71
-
72
-
73
-
74
-
75
-
76
-
77
-
78
-
79
-
80
-
81
-
82
-
83
-
84
-
85
-
86
-
87
-
88
-
89
-
90
-
91
-
92
-
93
-
94
-
95
-
96
-
97
-
98
-
99
-
100
-
101
-
102
-
103
-
104
-
105
-
106
-
107
-
108
-
109
-
110
-
111
-
112
-
113
-
114
-
115
-
116
-
117
-
118
-
119
-
120
-
121
-
122
-
123
-
124
-
125
-
126
-
127
-
128
-
129
-
130
-
131
-
132
-
133
-
134
-
135
-
136
-
137
-
138
-
139
-
140
-
141
-
142
-
143
-
144
-
145
-
146
-
147
-
148
-
149
-
150
-
151
-
152
-
153
-
154
-
155
-
156
-
157
-
158
-
159
-
160
-
161
-
162
-
163
-
164
-
165
-
166
-
167
-
168
-
169
-
170
-
171
-
172
-
173
-
174
-
175
-
176
-
177
-
178
-
179
-
180
-
181
-
182
-
183
-
184
-
185
-
186
 |
 |
