Canon VK-64 Network Video Recorder VK-64/VK-16/VK-Lite Setup Guide - Page 25
tem In, tallation Example, Add Camera, erver, Camera, Connect, tart Control
 |
View all Canon VK-64 manuals
Add to My Manuals
Save this manual to your list of manuals |
Page 25 highlights
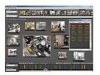
VK-Lite Installation System Installation Example 7 Select a camera server to register, and then click Add Camera Server. The Add Camera Server dialog box is displayed. 2 8 Configure the following settings in the Add Camera Server dialog box. • Enter the "User Name" and "Password", and then click Connect. Make sure that the live view is displayed in the Preview window. • Enter the "Camera Name", and select the "Location" and "Zone" of the camera. • Click Start Control, and adjust the viewing angle of the camera. 9 Click OK. Now, the camera server has been registered. The registered camera server information is displayed in the right list of the screen. 10 Repeat step 6 to 9 to register other camera servers, if necessary. 11 Check that all of the camera servers that you are using have been registered successfully in the right list of the screen. 12 Click Save Changes. The registered camera information is saved. / "Chapter 4 Register Camera Server and Set Recording Schedule" in Reference Administrator's Manual 25
-
 1
1 -
2
-
3
-
4
-
5
-
6
-
7
-
8
-
9
-
10
-
11
-
12
-
13
-
14
-
15
-
16
-
17
-
18
-
19
-
 20
20 -
 21
21 -
 22
22 -
 23
23 -
 24
24 -
 25
25 -
 26
26 -
 27
27 -
 28
28 -
 29
29 -
 30
30
 |
 |
