Canon VK-64 Network Video Recorder VK-64/VK-16/VK-Lite Setup Guide - Page 26
Step 6: Recording Schedule Configuration
 |
View all Canon VK-64 manuals
Add to My Manuals
Save this manual to your list of manuals |
Page 26 highlights
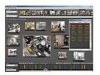
System Installation Example Step 6: Recording Schedule Configuration Configure the recording schedule settings after camera server registration. You can configurate recording schedule settings using the Recording Schedules tab in the Configuration and Preferences screen. The following example shows a normal schedule for continuous recording at 1 fps all day through Monday to Sunday. 1 Click the Recording Schedules tab in the Configuration and Preferences screen. 2 Drag to select the entire camera server schedule area. The Add Schedule Item dialog box is displayed. If it is not displayed, go to Camera Summary tub. Then, in the Edit Camera Server dialog box, choose Storage Server from the Storage Server drop-down menu. 3 Configure the following settings. • Click All Day. • Check the Monday to Sunday checkboxes. • Select "1 fps" from the drop-down list for recording frame rate. 4 Click OK. The configured schedule is displayed in the schedule area. 26
-
 1
1 -
2
-
3
-
4
-
5
-
6
-
7
-
8
-
9
-
10
-
11
-
12
-
13
-
14
-
15
-
16
-
17
-
18
-
19
-
20
-
 21
21 -
 22
22 -
 23
23 -
 24
24 -
 25
25 -
 26
26 -
 27
27 -
 28
28 -
 29
29 -
 30
30
 |
 |
