Canon XL2 CONSOLE_V1-1_ENG.pdf
Canon XL2 Manual
 |
View all Canon XL2 manuals
Add to My Manuals
Save this manual to your list of manuals |
Canon XL2 manual content summary:
- Canon XL2 | CONSOLE_V1-1_ENG.pdf - Page 1
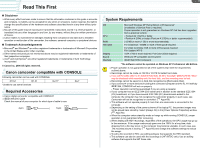
Custom Preset settings of the camcorder and analyze a shooting image using a waveform monitor and a vector scope to compose the image you want. Uninstalling the Software Troubleshooting This software is for use with Windows® XP (Service Pack 2) only. Shortcut Keys English - Canon XL2 | CONSOLE_V1-1_ENG.pdf - Page 2
from the Memory Card 6-52 Uninstall Uninstalling the Software 7-54 Uninstalling the AV/C Camera Storage Subunit-WIA Driver 7-54 Uninstalling of the Drivers 7-55 Appendix Troubleshooting Appx-59 Shortcut Keys (Default Settings Appx-61 - Canon XL2 | CONSOLE_V1-1_ENG.pdf - Page 3
. No part of this guide may be reproduced, transmitted, transcribed IEEE1394 (DV) Cable Check the manual of your computer for which type of or Professional* (Installation of Service Pack 2 required) Proper HDV, use editing software that supports the HDV standard. This software can also - Canon XL2 | CONSOLE_V1-1_ENG.pdf - Page 4
zone marker, an aspect marker and several other markers on the window and create new markers. • Perform the cache and frame recording. „ Differences from CONSOLE 1.0 • Supports XH G1 and XH A1 • New plug in: Color Correction, Skin Detail and Sky Detail • Allowed to save the Custom Preset file to the - Canon XL2 | CONSOLE_V1-1_ENG.pdf - Page 5
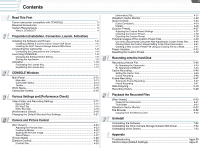
Chapter 1 Preparation (Installation, Connection, Launch, Activation) Installing the Software and Drivers...1-6 Installing CONSOLE and the Canon Virtual VCR Driver 1-6 Installing the AV/C Camera Storage Subunit-WIA Driver 1-7 Connecting the Camcorder ...1-8 Connecting the Camcorder to the Computer - Canon XL2 | CONSOLE_V1-1_ENG.pdf - Page 6
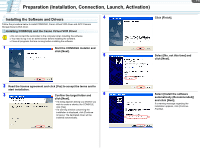
1-6 Preparation (Installation, Connection, Launch, Activation) Installing the Software and Drivers 4 Follow the procedure below to install CONSOLE, Canon Virtual VCR driver and AV/C Camera Storage Subunit-WIA driver. Installing CONSOLE and the Canon Virtual VCR Driver Do not connect the - Canon XL2 | CONSOLE_V1-1_ENG.pdf - Page 7
1-7 Preparation (Installation, Connection, Launch, Activation) 7 Click [Finish]. 4 Check if the driver has been installed correctly. Installing the AV/C Camera Storage Subunit-WIA Driver The AV/C Camera Storage Subunit-WIA driver is used for downloading and uploading the Custom Preset file ( - Canon XL2 | CONSOLE_V1-1_ENG.pdf - Page 8
need to turn off the computer. • Do not deactivate the DV CONTROL function while the camcorder is connected to the computer. • Refer to the computer manual for the location of the computer's IEEE1394 (DV) port. HDV/DV terminal on the camcorder DV cable IEEE1394 port on the computer • Follow the - Canon XL2 | CONSOLE_V1-1_ENG.pdf - Page 9
1-9 Preparation (Installation, Connection, Launch, Activation) Launching CONSOLE Changing the Software Event Setting When using CONSOLE, you need to deactivate the Windows program that automatically prompts you to choose an application when you connect the camcorder to the computer (set to "Take - Canon XL2 | CONSOLE_V1-1_ENG.pdf - Page 10
, the product ID will not be displayed. Product ID 5 Visit the Canon's download site where you downloaded the trial version software and follow the instructions on the site to purchase the license key. You will need the product ID obtained in the step above to purchase the license key. 6 Receive - Canon XL2 | CONSOLE_V1-1_ENG.pdf - Page 11
1-11 Preparation (Installation, Connection, Launch, Activation) 3 Click [Register] in the trial 5 Click [Register] after entering the license key and a user name. confirmation window. If you are already running the software, select [Version] [About CONSOLE] and click the [Register] button. - Canon XL2 | CONSOLE_V1-1_ENG.pdf - Page 12
Chapter 2 CONSOLE Windows Main Panel ...2-13 Menu Bar...2-13 Camcorder Status ...2-14 Toolbar ...2-14 Work Space ...2-15 Camcorder Screen ...2-15 - Canon XL2 | CONSOLE_V1-1_ENG.pdf - Page 13
CONSOLE Windows Various Settings and [Performance Check] Camera and Picture Control Recording onto the Hard Disk Playback the Recorded Files CONSOLE Windows 2-13 Main Panel 1 6 5 Menu Bar „ [File] Menu 1 2 3 1 Displays the [Option Settings] window ( 3-17). 2 Changes the default shortcut key - Canon XL2 | CONSOLE_V1-1_ENG.pdf - Page 14
CONSOLE Windows Various Settings and [Performance Check] Camera and Picture Control Recording onto the Hard Disk Playback the Recorded Files CONSOLE Windows 2-14 „ [Version] Menu „ Main Toolbar 1 2 3 4 1 1 Displays the version and the license information. Camcorder Status This status shows - Canon XL2 | CONSOLE_V1-1_ENG.pdf - Page 15
CONSOLE Windows Various Settings and [Performance Check] Camera and Picture Control Recording onto the Hard Disk Playback the Recorded Files CONSOLE Windows 2-15 Work Space You can register your own panel layouts to suit the purposes of the projects. 1 Select [View] [Work Space] [Add Work Space - Canon XL2 | CONSOLE_V1-1_ENG.pdf - Page 16
Chapter 3 Various Settings and [Performance Check] Video Folder and Recording Settings...3-17 [General] Tab...3-17 [DV Rec] Tab ...3-18 [HDV Rec] Tab ...3-18 [Performance Check]...3-19 Changing the Default Shortcut Key Settings 3-21 - Canon XL2 | CONSOLE_V1-1_ENG.pdf - Page 17
CONSOLE Windows Various Settings and [Performance Check] Camera and Picture Control Recording onto the Hard Disk Playback the Recorded Files 3-17 Various Settings and [Performance Check] Video Folder and Recording Settings You need to specify the video folder (a target folder), file name and - Canon XL2 | CONSOLE_V1-1_ENG.pdf - Page 18
AVI type that is compatible with your editing software. You can select the file type from [MPEG2TS] or [MPEG2ES]. For details, refer to the instruction manual of the software. 2 Select the [Preview resolution] of the HDV standard data. The size of the recording picture will not be changed. 3 Select - Canon XL2 | CONSOLE_V1-1_ENG.pdf - Page 19
CONSOLE Windows Various Settings and [Performance Check] Camera and Picture Control Recording onto the Hard Disk Playback the Recorded Files 3-19 Various Settings and [Performance Check] [Performance Check] You can check whether the selected video folder can be used for saving the recordings - Canon XL2 | CONSOLE_V1-1_ENG.pdf - Page 20
CONSOLE Windows Various Settings and [Performance Check] Camera and Picture Control Recording onto the Hard Disk Playback the Recorded Files 3-20 Various Settings and [Performance Check] 3 Click [Start] on the right side. The performance check of the system starts. 4 Review the result and click - Canon XL2 | CONSOLE_V1-1_ENG.pdf - Page 21
CONSOLE Windows Various Settings and [Performance Check] Camera and Picture Control Recording onto the Hard Disk Playback the Recorded Files 3-21 Various Settings and [Performance Check] Changing the Default Shortcut Key Settings 4 You can change the default shortcut key settings to convenient - Canon XL2 | CONSOLE_V1-1_ENG.pdf - Page 22
Chapter 4 Camera and Picture Control [Rec Viewer] ...4-23 Adjusting the Preview Size...4-23 Overlaying Marker...4-24 Splitting the Preview Image...4-27 Zebra Pattern ...4-27 [Focus Assist] ...4-28 [Camera Control] ...4-28 [Control] Tab...4-29 [Information] Tab ...4-31 Waveform Vector Monitor ...4-32 - Canon XL2 | CONSOLE_V1-1_ENG.pdf - Page 23
CONSOLE Windows Various Settings and [Performance Check] Camera and Picture Control Recording onto the Hard Disk Playback the Recorded Files Camera and Picture Control 4-23 Using the Recording tool to adjust the picture settings of the camcorder to create a picture in the [Rec Panel]. [Rec Viewer] - Canon XL2 | CONSOLE_V1-1_ENG.pdf - Page 24
CONSOLE Windows Various Settings and [Performance Check] Camera and Picture Control Recording onto the Hard Disk Playback the Recorded Files Camera and Picture Control 4-24 Overlaying Marker You can display the overlaying marker in the preview. The safety zone (90% and 80% of the preview image - Canon XL2 | CONSOLE_V1-1_ENG.pdf - Page 25
CONSOLE Windows Various Settings and [Performance Check] Camera and Picture Control Recording onto the Hard Disk Playback the Recorded Files Camera and Picture Control 4-25 „ Adding a New Marker 1 Click [Add]. 4 Select the [Aspect ratio] and click [Add]. 2 Select the marker group. • If the - Canon XL2 | CONSOLE_V1-1_ENG.pdf - Page 26
CONSOLE Windows Various Settings and [Performance Check] Camera and Picture Control Recording onto the Hard Disk Playback the Recorded Files Camera and Picture Control 4-26 „ Editing the Marker 1 Select a marker by placing a check mark and click the selected marker name. The marker is displayed in - Canon XL2 | CONSOLE_V1-1_ENG.pdf - Page 27
CONSOLE Windows Various Settings and [Performance Check] Camera and Picture Control Recording onto the Hard Disk Playback the Recorded Files Camera and Picture Control 4-27 Splitting the Preview Image You can split the preview image vertically or horizontally and compare the camcorder picture with - Canon XL2 | CONSOLE_V1-1_ENG.pdf - Page 28
CONSOLE Windows Various Settings and [Performance Check] Camera and Picture Control Recording onto the Hard Disk Playback the Recorded Files Camera and Picture Control 4-28 [Focus Assist] The [Focus Assist] window displays a part of the camcorder picture as in its original size (100%). You can - Canon XL2 | CONSOLE_V1-1_ENG.pdf - Page 29
clicking on this button registers the white balance setting. - For details about saving the white balance settings, refer to the camcorder instruction 3 manual. 4 Color Temperature Specifies the color temperature. Clicking or in the Kelvin text box increases and decreases the value by 100K - Canon XL2 | CONSOLE_V1-1_ENG.pdf - Page 30
and focus position of the camcorder with the [] and [ ] keys on the keyboard after clicking the slider with mouse. When you are using a manual video lens and selecting [Manual], you cannot control the zoom function from CONSOLE. When the focus switch of the lens is set to AF, or when you are - Canon XL2 | CONSOLE_V1-1_ENG.pdf - Page 31
CONSOLE Windows Various Settings and [Performance Check] Camera and Picture Control Recording onto the Hard Disk Playback the Recorded Files Camera and Picture Control 4-31 [Information] Tab This tab shows information of the hard disk recording. 1 Displays the recording file name, a recording - Canon XL2 | CONSOLE_V1-1_ENG.pdf - Page 32
CONSOLE Windows Various Settings and [Performance Check] Camera and Picture Control Recording onto the Hard Disk Playback the Recorded Files Camera and Picture Control 4-32 Waveform Vector Monitor This monitor shows a waveform and color information of the picture displayed in the [Rec Viewer]. 1 - Canon XL2 | CONSOLE_V1-1_ENG.pdf - Page 33
CONSOLE Windows Various Settings and [Performance Check] Camera and Picture Control Recording onto the Hard Disk Playback the Recorded Files Camera and Picture Control 4-33 2 [Line Select] You can select the image-scanning mode of the waveform monitor and the vector scope. 1 2 3 1 Switches - Canon XL2 | CONSOLE_V1-1_ENG.pdf - Page 34
levels of [Color Phase], [Chroma], [Area] and [Y Level] by moving the sliders. • For details about each parameter, refer to the camcorder instruction manual. • The area that will be corrected will appear as a white area alternating with the normal image. 3 Click of [A Area Select] to finish - Canon XL2 | CONSOLE_V1-1_ENG.pdf - Page 35
the sliders. Skin and sky details settings are managed on the [Detail] window. For details about each parameter, refer to the camcorder instruction manual. „ Setting the Skin Detail Area 1 Click the [Detail] tab and of [Area Select]. The [Hue], [Chroma], [Area] and [Y Level] sliders will be - Canon XL2 | CONSOLE_V1-1_ENG.pdf - Page 36
CONSOLE Windows Various Settings and [Performance Check] Camera and Picture Control Recording onto the Hard Disk Playback the Recorded Files Camera and Picture Control 4-36 3 Click of [Area Select] to finish „ Setting the Sky Detail the setting. 1 Click of [Effect] and select [Soft]. • - Canon XL2 | CONSOLE_V1-1_ENG.pdf - Page 37
, save and export the Custom Preset settings. For details, refer to the camcorder instruction manual. Depending on the camcorder connected, some parameters differ. For details, refer to the camcorder instruction manual. The [Custom Preset] window cannot be used when recording. When using XL2 - Canon XL2 | CONSOLE_V1-1_ENG.pdf - Page 38
CONSOLE Windows Various Settings and [Performance Check] Camera and Picture Control Recording onto the Hard Disk Playback the Recorded Files Camera and Picture Control 4-38 3 Adjust each slider to obtain the image Importing the Custom Preset you want. CONSOLE imports the Custom Preset file in - Canon XL2 | CONSOLE_V1-1_ENG.pdf - Page 39
CONSOLE Windows Various Settings and [Performance Check] Camera and Picture Control Recording onto the Hard Disk Playback the Recorded Files Camera and Picture Control 4-39 2 Select a Custom Preset file. • When importing a Custom Preset file from the card, select . - When selecting , you cannot - Canon XL2 | CONSOLE_V1-1_ENG.pdf - Page 40
CONSOLE Windows Various Settings and [Performance Check] Camera and Picture Control Recording onto the Hard Disk Playback the Recorded Files Camera and Picture Control 4-40 2 Select a destination to export the file. The information of the selected Custom Preset setting is displayed and the - Canon XL2 | CONSOLE_V1-1_ENG.pdf - Page 41
re-install it. For details about the steps 3 to 6, refer to "Inserting/Removing a Memory Card" and "Using the Custom Preset" on the camcorder instruction manual. 1 Adjust the Custom Preset settings. 2 Export (save) the adjusted Custom Preset file to both the card and the camcorder. ( 4-39) If you - Canon XL2 | CONSOLE_V1-1_ENG.pdf - Page 42
CONSOLE Windows Various Settings and [Performance Check] Camera and Picture Control Recording onto the Hard Disk Playback the Recorded Files Camera and Picture Control 4-42 Preset Variation Clicking on displays the [Variation] window. The [Variation] window shows still images captured from the - Canon XL2 | CONSOLE_V1-1_ENG.pdf - Page 43
Chapter 5 Recording onto the Hard Disk Recording a Movie File...5-45 By Operating the Camcorder ...5-45 By Operating CONSOLE...5-45 Cache Recording...5-46 Setting the Cache Time...5-46 Cache Recording ...5-46 Frame Recording...5-47 Setting the Frame Recording ...5-47 Frame Recording ...5-47 Data - Canon XL2 | CONSOLE_V1-1_ENG.pdf - Page 44
CONSOLE Windows Various Settings and [Performance Check] Camera and Picture Control Recording onto the Hard Disk Playback the Recorded Files 5-44 Recording onto the Hard Disk You can record video and audio from a connected camcorder on the hard disk of the computer by operating the camcorder or - Canon XL2 | CONSOLE_V1-1_ENG.pdf - Page 45
CONSOLE Windows Various Settings and [Performance Check] Camera and Picture Control Recording onto the Hard Disk Playback the Recorded Files 5-45 Recording onto the Hard Disk Recording a Movie File By Operating the Camcorder 1 Press the start/stop button on the camcorder. • Recording starts on - Canon XL2 | CONSOLE_V1-1_ENG.pdf - Page 46
CONSOLE Windows Various Settings and [Performance Check] Camera and Picture Control Recording onto the Hard Disk Playback the Recorded Files 5-46 Recording onto the Hard Disk Cache Recording You can set CONSOLE to store the camcorder picture before recording. When you start recording, the last 10 - Canon XL2 | CONSOLE_V1-1_ENG.pdf - Page 47
CONSOLE Windows Various Settings and [Performance Check] Camera and Picture Control Recording onto the Hard Disk Playback the Recorded Files 5-47 Recording onto the Hard Disk Frame Recording You can record frame by frame in the same file. This function enables you to easily create a stop motion - Canon XL2 | CONSOLE_V1-1_ENG.pdf - Page 48
CONSOLE Windows Various Settings and [Performance Check] Camera and Picture Control Recording onto the Hard Disk Playback the Recorded Files 5-48 Recording onto the Hard Disk Data Dropping • If the hard disk is accessed while recording, a part of the data input from the camcorder may not be - Canon XL2 | CONSOLE_V1-1_ENG.pdf - Page 49
Chapter 6 Playback the Recorded Files [Play Viewer] ...6-50 Output to the Camcorder...6-51 Time Slider ...6-51 Waveform Vector Monitor ...6-52 File Browser ...6-52 Copying from the Memory Card ...6-52 - Canon XL2 | CONSOLE_V1-1_ENG.pdf - Page 50
CONSOLE Windows Various Settings and [Performance Check] Camera and Picture Control Recording onto the Hard Disk Playback the Recorded Files 6-50 Playback the Recorded Files You can playback or view the recorded pictures using playback tools in [Play Panel]. [Play Viewer] You can playback and - Canon XL2 | CONSOLE_V1-1_ENG.pdf - Page 51
CONSOLE Windows Various Settings and [Performance Check] Camera and Picture Control Recording onto the Hard Disk Playback the Recorded Files 6-51 Playback the Recorded Files Output to the Camcorder Time Slider By connecting the camcorder to the monitor, you can output the recorded pictures from - Canon XL2 | CONSOLE_V1-1_ENG.pdf - Page 52
CONSOLE Windows Various Settings and [Performance Check] Camera and Picture Control Recording onto the Hard Disk Playback the Recorded Files 6-52 Playback the Recorded Files Waveform Vector Monitor A waveform of the playback picture and the color information are displayed. The functions are the - Canon XL2 | CONSOLE_V1-1_ENG.pdf - Page 53
Chapter 7 Uninstall Uninstalling the Software...7-54 Uninstalling the AV/C Camera Storage Subunit-WIA Driver 7-54 Uninstalling of the Drivers ...7-55 - Canon XL2 | CONSOLE_V1-1_ENG.pdf - Page 54
7-54 Uninstall Uninstalling the Software Uninstall the software if it has not been installed correctly, or if it is not required anymore. Close any programs that are running, and disconnect the IEEE1394 (DV) cable from the camcorder and the computer before uninstalling the software. You need to - Canon XL2 | CONSOLE_V1-1_ENG.pdf - Page 55
Storage Device], but that would not affect the uninstall process. • The uninstall process is complete. Uninstalling of the Drivers If you had problems uninstalling the driver, use the following procedures to remove it. Use the procedures below for the following circumstances too. - If you do - Canon XL2 | CONSOLE_V1-1_ENG.pdf - Page 56
7-56 Uninstall 5 Click the [Device Manager] button. 7 From the [start] menu, select [My Computer] and double-click the [C:] (local disk), [WINDOWS] and [INF] folders in succession. • If the [INF] folder is not visible in the [WINDOWS] folder, use the following procedures to show all files and - Canon XL2 | CONSOLE_V1-1_ENG.pdf - Page 57
7-57 Uninstall 8 Double-click the [oem*.INF] file. • A number such as "0" or "1" appears in place of the asterisk (*) above. You will also find another file called [oem*.PNF], which will have the same number as the [oem*.INF] file. The two constitute one set. There may be many file sets starting - Canon XL2 | CONSOLE_V1-1_ENG.pdf - Page 58
Appendix Troubleshooting...Appx-59 Shortcut Keys (Default Settings) ...Appx-61 - Canon XL2 | CONSOLE_V1-1_ENG.pdf - Page 59
[Settings] tab and the [Advanced] button. 3) Click the [Troubleshoot] tab and adjust the [Hardware acceleration] slider to [Full]. supported by CONSOLE ( 3). ÎThe DV CONTROL function of the camcorder is set to [OFF]. Set the DV CONTROL function to [ON]. For details, refer to the instruction manual - Canon XL2 | CONSOLE_V1-1_ENG.pdf - Page 60
Appendix The recorded picture is lacking. ÎThe recording speed of the hard disk is insufficient. Make a performance check ( 3-19). We recommend defragmenting the drive before you start recording. ÎA program other than CONSOLE is started. Close all programs other than CONSOLE before recording. If an - Canon XL2 | CONSOLE_V1-1_ENG.pdf - Page 61
Appendix Shortcut Keys (Default Settings) The shortcut key settings written in red can be changed ( 3-21), but the keys written in black cannot be changed. „ [Option Settings] „ [Camera Control] Switching the setting item Displaying/Hiding: [Ctrl] + [S] Next: [Tab] Start/Stop recording: [0] - Canon XL2 | CONSOLE_V1-1_ENG.pdf - Page 62
PUB.DIE-272 © CANON INC. 2006 The information on this manual is verified as of July 1st, 2006.
-
 1
1 -
 2
2 -
 3
3 -
 4
4 -
 5
5 -
 6
6 -
 7
7 -
8
-
9
-
10
-
11
-
12
-
13
-
14
-
15
-
16
-
17
-
18
-
19
-
20
-
21
-
22
-
23
-
24
-
25
-
26
-
27
-
28
-
29
-
30
-
31
-
32
-
33
-
34
-
35
-
36
-
37
-
38
-
39
-
40
-
41
-
42
-
43
-
44
-
45
-
46
-
47
-
48
-
49
-
50
-
51
-
52
-
53
-
54
-
55
-
56
-
57
-
58
-
59
-
60
-
61
-
62
 |
 |
PUB. DIE-272
English
CONSOLE is a software that enables you to adjust the settings of a camcorder from
a computer and to record on the tape in the camcorder and onto the computer’s
hard disk by connecting the camcorder using an IEEE1394 (DV) cable. You can
adjust and save the Custom Preset settings of the camcorder and analyze a
shooting image using a waveform monitor and a vector scope to compose the
image you want.
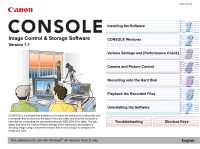
Image Control & Storage Software
Version 1.1
This software is for use with Windows
®
XP (Service Pack 2) only.
CONSOLE Windows
Various Settings and [Performance Check]
Camera and Picture Control
Recording onto the Hard Disk
Playback the Recorded Files
Troubleshooting
Shortcut Keys
Installing the Software
Uninstalling the Software