Canon XL2 CONSOLE_V1-1_ENG.pdf - Page 40
Practical Usages of the Custom Preset Files
 |
View all Canon XL2 manuals
Add to My Manuals
Save this manual to your list of manuals |
Page 40 highlights
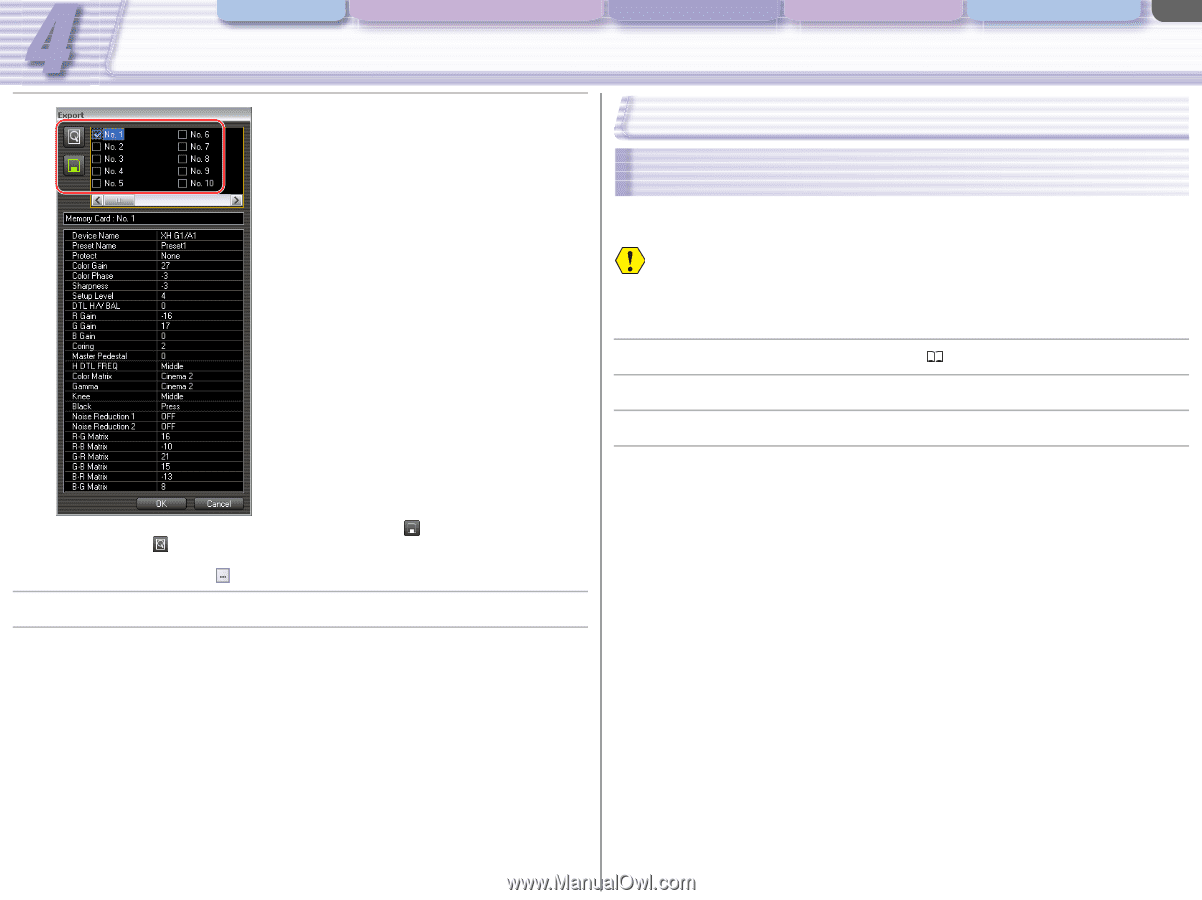
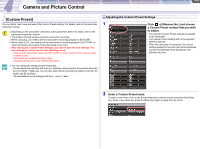
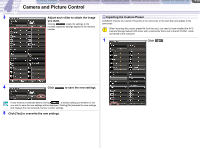
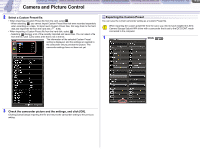
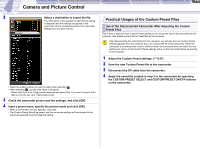
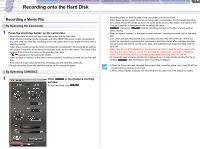
CONSOLE Windows Various Settings and [Performance Check] Camera and Picture Control Recording onto the Hard Disk Playback the Recorded Files Camera and Picture Control 4-40 2 Select a destination to export the file. The information of the selected Custom Preset setting is displayed and the settings are applied to the camcorder only to preview the picture.The camcorder settings have not been set yet. • Select the preset number you wish to export when selecting . • When selecting , specify a file name to be saved. - Select a file from a list of the recently exported and saved files. If you wish to export a file that is not in the list, click and select a file. 3 Check the camcorder picture and the settings, and click [OK]. 4 Input a preset name, specify the protect mode and click [OK]. • When a confirmation window appears, click [Yes]. • The Custom Preset file will be saved, and the camcorder settings will be returned to the previously selected Custom Preset file setting. Practical Usages of the Custom Preset Files Use of the Disconnected Camcorder After Adjusting the Custom Preset Files This is how to apply the new Custom Preset settings to the camcorder that is disconnected from the computer, after adjusting the Custom Preset files by the computer. After disconnecting the camcorder from the computer, you will lose the new Custom Preset settings adjusted from the computer if you do not save the file to the camcorder. When the camcorder's recording mode is set to Camera mode, the camcorder does not retain the new settings but returns to the Custom Preset settings active on the camcorder before connecting to the computer. 1 Adjust the Custom Preset settings. ( 4-37) 2 Save the new Custom Preset file to the camcorder. 3 Disconnect the DV cable from the camcorder. 4 Apply the saved file created in step 2 to the camcorder by operating the CUSTOM PRESET SELECT and CUSTOM PRESET ON/OFF buttons on the camcorder.
-
 1
1 -
2
-
3
-
4
-
5
-
6
-
7
-
8
-
9
-
10
-
11
-
12
-
13
-
14
-
15
-
16
-
17
-
18
-
19
-
20
-
21
-
22
-
23
-
24
-
25
-
26
-
27
-
28
-
29
-
30
-
31
-
32
-
33
-
34
-
 35
35 -
 36
36 -
 37
37 -
 38
38 -
 39
39 -
 40
40 -
 41
41 -
 42
42 -
 43
43 -
 44
44 -
 45
45 -
46
-
47
-
48
-
49
-
50
-
51
-
52
-
53
-
54
-
55
-
56
-
57
-
58
-
59
-
60
-
61
-
62
 |
 |