Canon XL2 CONSOLE_V1-1_ENG.pdf - Page 26
Click [Delete]., Click [Import].
 |
View all Canon XL2 manuals
Add to My Manuals
Save this manual to your list of manuals |
Page 26 highlights
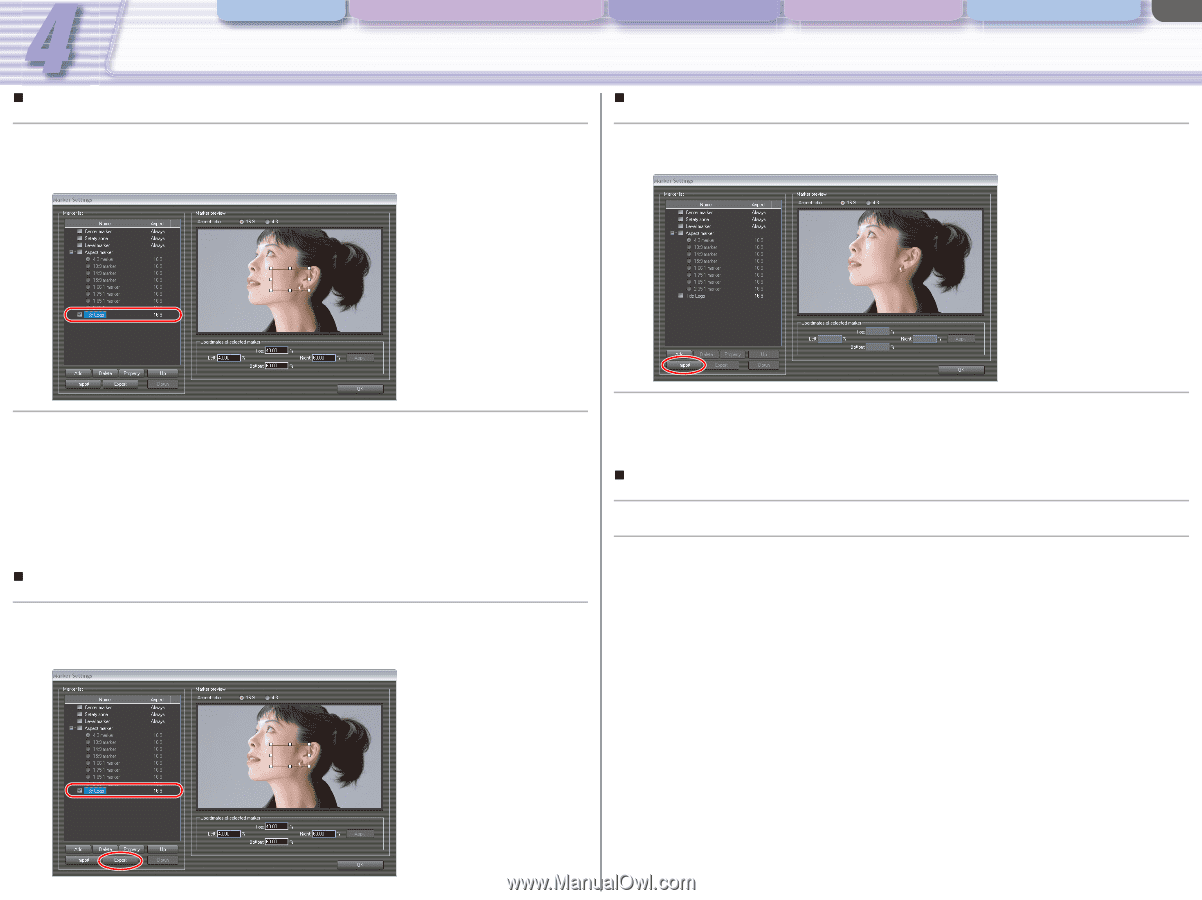
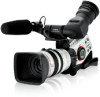
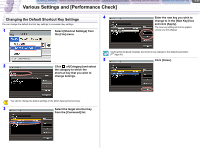
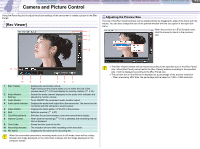
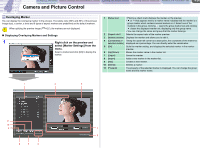
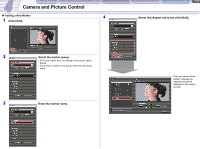
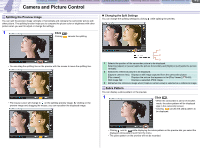
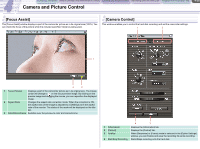
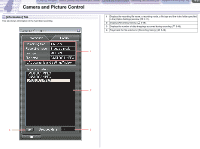
CONSOLE Windows Various Settings and [Performance Check] Camera and Picture Control Recording onto the Hard Disk Playback the Recorded Files Camera and Picture Control 4-26 „ Editing the Marker 1 Select a marker by placing a check mark and click the selected marker name. The marker is displayed in the marker preview. „ Importing the Marker 1 Click [Import]. When a window asking which marker to be imported, specify a marker that you wish to import. 2 Edit the marker by dragging with the mouse and/or entering the coordinates of the marker. • Drag the frame of the marker to move the marker. • Drag one of the square marks on the frame to change the marker size. • Taking the upper left corner as the base point, you can enter the coordinates of the marker as a percentage. Clicking [Apply] after entering the coordinates displays the marker at the specified coordinates. • The safety zone, center, level and aspect markers cannot be edited. „ Exporting the Marker 1 Select a marker you wish to save and click [Export]. When a window asking the destination folder and the file name is displayed, specify the destination folder and the file name. 2 Enter the information about the marker and click [Add]. • [Marker name] and [Aspect ratio] will be automatically entered according to the file. • Clicking [Add] imports the marker and displays the newly imported marker in the marker list. „ Deleting the Marker 1 Select a marker or a group you wish to delete. 2 Click [Delete]. • Click [Yes] when a confirmation window is displayed. • When deleting a group, the group and all the markers in the group will also be deleted. • The safety zone, center, level and aspect markers cannot be deleted.
-
 1
1 -
2
-
3
-
4
-
5
-
6
-
7
-
8
-
9
-
10
-
11
-
12
-
13
-
14
-
15
-
16
-
17
-
18
-
19
-
20
-
 21
21 -
 22
22 -
 23
23 -
 24
24 -
 25
25 -
 26
26 -
 27
27 -
 28
28 -
 29
29 -
 30
30 -
 31
31 -
32
-
33
-
34
-
35
-
36
-
37
-
38
-
39
-
40
-
41
-
42
-
43
-
44
-
45
-
46
-
47
-
48
-
49
-
50
-
51
-
52
-
53
-
54
-
55
-
56
-
57
-
58
-
59
-
60
-
61
-
62
 |
 |