Canon imageCLASS MF6530 imageCLASS MF6500 Series Starter Guide - Page 5
Connect Power Cord and Turn On the Machine, Set the Date and Time
 |
View all Canon imageCLASS MF6530 manuals
Add to My Manuals
Save this manual to your list of manuals |
Page 5 highlights
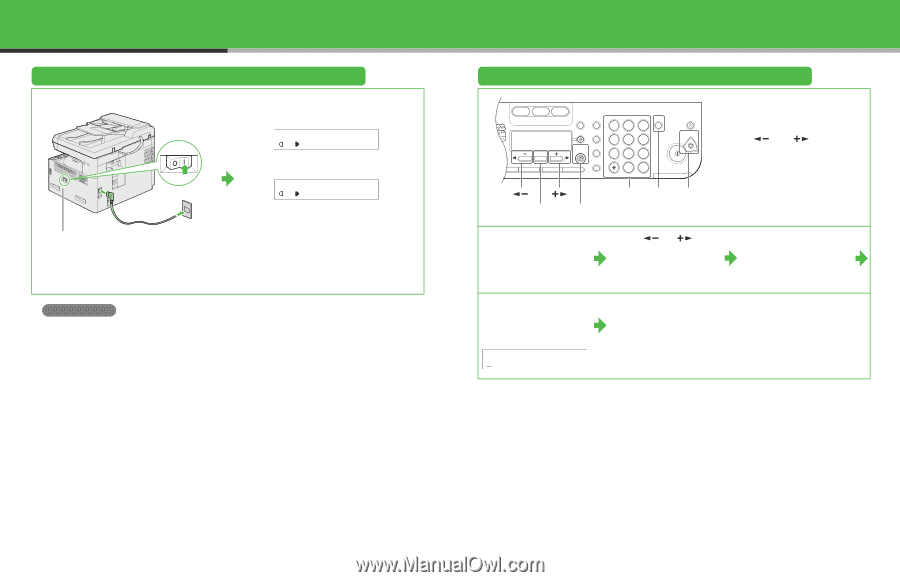
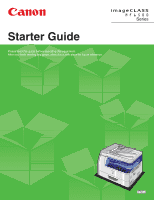
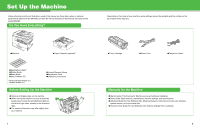
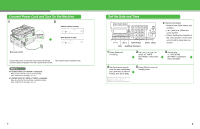
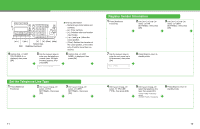
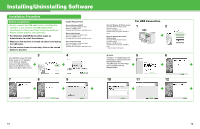
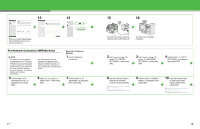
Connect Power Cord and Turn On the Machine 1 2 Without optional cassette 100% LTR A TEXT 01 With optional cassette 100% AUTO A TEXT 01 Main power switch Connect the power cord into the rear socket and the wall The machine enters standby mode. outlet and press the [I] side of the main power switch to ON. What if... ● is displayed: Make sure that the left cover is closed properly. (See "Install Toner Cartridge," on p. 3.) ● is displayed: Make sure that the toner cartridge is installed properly. (See "Install Toner Cartridge," on p. 3.) Set the Date and Time COPY FAX SCAN System Monitor View Settings @./ 1 ABC 2 DEF 3 Reset Collate GHI 4 JKL MNO 56 Paper Select Additional 2 on 1 PQRS TUV WXYZ OK Functions 789 Frame Erase Image Quality Density Enlarge/Reduce Two-Sided SYMBOLS 0# Tone Clear C ON/OFF Stop Start Processing/ Data Error Power [ ] [ ] Numeric Keys [Clear] [Stop] [OK] [Additional Functions] 1 Press [Additional Functions]. 2 Use [ ] or [ ] to select , then press [OK]. ● Entering Information - Numeric keys: Enter letters and numbers. - [ ] and [ ]: Move the cursor position. - [Clear]: Deletes the character at the cursor position, or the entire entry if held for more than one second. 3 Confirm that is displayed, then press [OK]. 4 Use the numeric keys to enter the date (month/day/ year) and time (in 24-hour format), then press [OK]. Ex. DATE&TIME SETTING 12/31/´06 11:19 5 Press [Stop] to return to standby mode. 7 8
-
 1
1 -
 2
2 -
 3
3 -
 4
4 -
 5
5 -
 6
6 -
 7
7 -
 8
8 -
 9
9 -
 10
10 -
 11
11 -
12
-
13
-
14
-
15
-
16
 |
 |