Canon imageFORMULA ScanFront 220 Instruction Manual
Canon imageFORMULA ScanFront 220 Manual
 |
View all Canon imageFORMULA ScanFront 220 manuals
Add to My Manuals
Save this manual to your list of manuals |
Canon imageFORMULA ScanFront 220 manual content summary:
- Canon imageFORMULA ScanFront 220 | Instruction Manual - Page 1
INSTRUCTIONS Please read this manual before using the scanner. After you finish reading this manual, keep it in a safe place for future reference. - Canon imageFORMULA ScanFront 220 | Instruction Manual - Page 2
sales region of the Network Scanner. ScanFront 220: Model M11058 ScanFront 220P: Model M11062 Trademarks • Canon and the Canon logo are registered trademarks of Canon Inc. in the United States and may also be trademarks or registered trademarks in other countries. • imageFORMULA is a trademark of - Canon imageFORMULA ScanFront 220 | Instruction Manual - Page 3
(INCLUDING, BUT NOT LIMITED TO, PROCUREMENT OF SUBSTITUTE GOODS OR SERVICES; LOSS OF USE, DATA, OR PROFITS; OR BUSINESS INTERRUPTION) HOWEVER Disclaimers The information in this document is subject to change without notice. CANON ELECTRONICS INC. MAKES NO WARRANTY OF ANY KIND WITH REGARD TO THIS - Canon imageFORMULA ScanFront 220 | Instruction Manual - Page 4
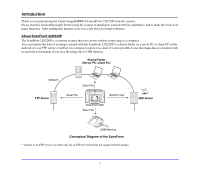
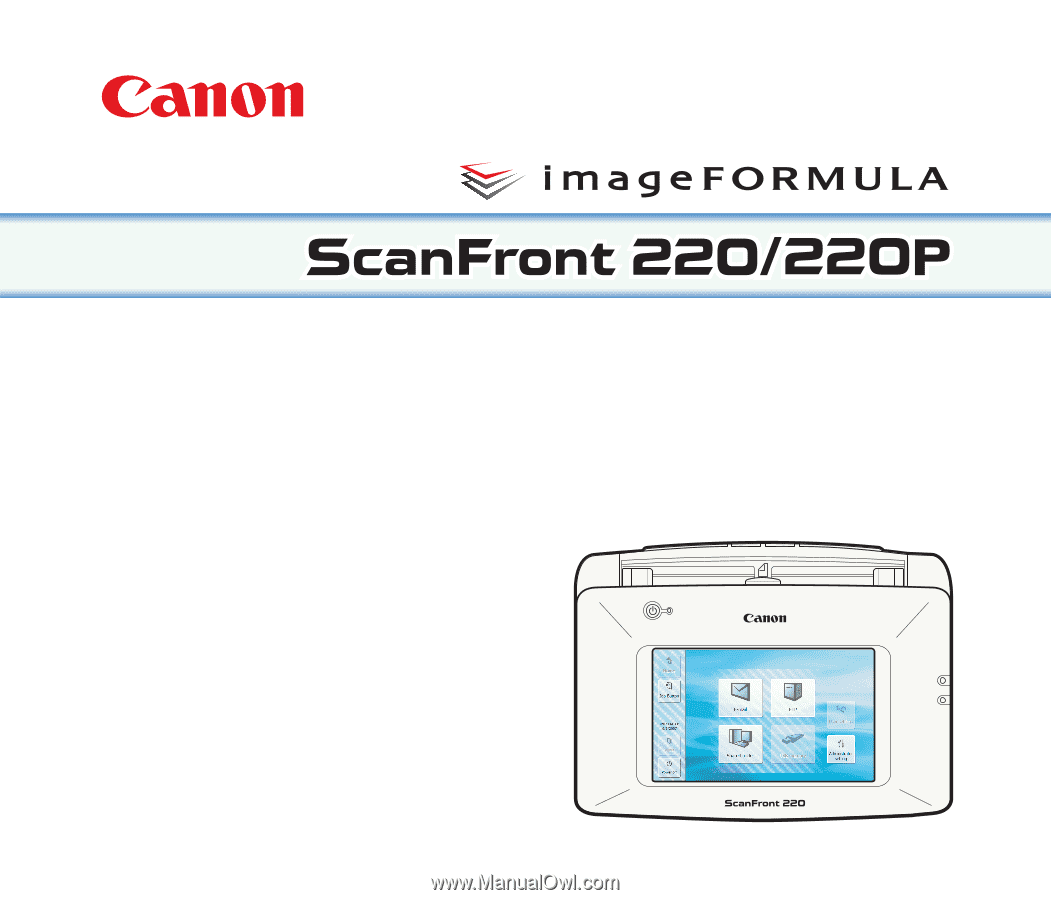
Introduction Thank you for purchasing the Canon imageFORMULA ScanFront 220/220P network scanner. Please read this manual thoroughly before using the scanner to familiarize yourself with its capabilities, and to make the most of its many functions. After reading this manual, store it in a safe place - Canon imageFORMULA ScanFront 220 | Instruction Manual - Page 5
of the Operation Guide in other languages can be found on the INSTRUCTIONS CD-ROM. INSTRUCTIONS (Electronic Manual): This Manual Describes how to use the scanner, and includes instructions for configuring the scanner settings, as well as handling, maintenance, and troubleshooting information. This - Canon imageFORMULA ScanFront 220 | Instruction Manual - Page 6
chapter describes the basic operating procedures for the scanner. Chapter 7 Maintenance This chapter describes how to clean the scanner and replace the feed roller. Chapter 8 Troubleshooting This chapter describes how to respond when problems occur or warning messages appear. Chapter 9 Appendices - Canon imageFORMULA ScanFront 220 | Instruction Manual - Page 7
Introduction i Manuals for the Scanner ii Symbols Used in This Manual ii How This Manual is Organized iii Chapter 1 Before Use 1. Important Safety Instructions 1-2 Installation Location 1-2 Power 1-2 Moving the Scanner 1-3 Handling 1-3 About the Fingerprint Sensor (ScanFront 220P only - Canon imageFORMULA ScanFront 220 | Instruction Manual - Page 8
6-24 File Formats 6-27 Security Settings for PDF Files 6-28 Delivery Options 6-29 Chapter 7 Maintenance 1. Routine Cleaning 7-2 Cleaning the Scanner Unit 7-2 Cleaning the Touch Panel 7-2 Cleaning the Fingerprint Sensor (ScanFront 220P 7-2 Cleaning the Scanning Glass and Rollers 7-3 v - Canon imageFORMULA ScanFront 220 | Instruction Manual - Page 9
7-8 Roller Replacement Kit 7-8 Replacing the Document Holding Guide 7-8 Checking the Page Count and Resetting the Counter 7-9 Chapter 8 Troubleshooting 1. Troubleshooting 8-2 2. Error Messages (ScanFront 8-5 3. Error Messages (Web Menu 8-7 4. Adjusting the Touch Panel 8-9 5. Initializing - Canon imageFORMULA ScanFront 220 | Instruction Manual - Page 10
Disposal 1-5 2. Features of the ScanFront 220/220P 1-6 ScanFront 220/220P 1-6 ScanFront 220P 1-7 3. Names and Functions of Parts 1-8 Front and Document Feed and Eject Trays ..........1-8 Side and Rear 1-9 4. Network Environment 1-10 Network Environment 1-10 Directory Service Support 1-10 - Canon imageFORMULA ScanFront 220 | Instruction Manual - Page 11
Chapter 1 Before Use 1. Important Safety Instructions To ensure the safe operation of this scanner, be sure to read the safety warnings and precautions described below. ❏ Installation Location The performance of this scanner is affected by the environment in which it is installed. Make sure that - Canon imageFORMULA ScanFront 220 | Instruction Manual - Page 12
devices. Model: MG1-3968 ● If you have any questions regarding the power supply, contact your local authorized Canon dealer or service representative for further information. ❏ Moving the Scanner ● When moving the scanner, always hold it with both hands to avoid dropping it. The weight of the - Canon imageFORMULA ScanFront 220 | Instruction Manual - Page 13
turn the power OFF, and disconnect the power plug from the power outlet. Then, contact your local authorized Canon dealer or service representative to have the unit serviced. ■ Do not install the scanner in a humid or dusty location. Doing so may result in a fire or electric shock. ■ Do not place - Canon imageFORMULA ScanFront 220 | Instruction Manual - Page 14
❏ About the Fingerprint Sensor (ScanFront 220P only) ● The following actions may damage the sensor or fingerprint sensor while charged with static electricity may cause the fingerprint sensor or scanner unit to malfunction. Before touching the fingerprint sensor, discharge any static electricity by - Canon imageFORMULA ScanFront 220 | Instruction Manual - Page 15
ScanFront 220/220P The main features of the ScanFront 220/220P are described below. ❏ ScanFront 220/220P ● Compact Network Document Scanner The network document scanner to operate the scanner. (See p. 2-6.) ● Supports Directory Services The scanner supports directory services (Active Directory and - Canon imageFORMULA ScanFront 220 | Instruction Manual - Page 16
effectively for some documents. ● Double Feed Detection by Length When the scanner detects a double feed by comparing the lengths of documents, it stops brightness and contrast before scanning the entire document. ❏ ScanFront 220P ● Fingerprint Authentication The authentication system that uses a - Canon imageFORMULA ScanFront 220 | Instruction Manual - Page 17
feed tray to match the length of the document. (See p. 2-4.) e Document Guides Adjust these to match the width of the document. (See p. 2-7.) f Panel Panel Touch this screen to operate the ScanFront. h Document Eject Tray Open this tray when using the ScanFront. If scanned documents are likely to - Canon imageFORMULA ScanFront 220 | Instruction Manual - Page 18
.1/Hi-Speed USB2.0 compatible USB memory device, USB keyboard, or USB mouse. p Power Connector (16 VDC) Connect the plug of the supplied AC adapter. (See p. 3-3.) q Service Switch This is a service switch. Do not insert any object into this hole. r Ventilation Holes 1-9 - Canon imageFORMULA ScanFront 220 | Instruction Manual - Page 19
address to assign to the scanner. ● DHCP Support The scanner supports DHCP (Dynamic Host Configuration Service Support ● Active Directory Active Directory is a directory service adopted by Windows 2000, and information registered to Active Directory can be used on other computers. The ScanFront - Canon imageFORMULA ScanFront 220 | Instruction Manual - Page 20
2-2 Plain Paper 2-2 Business Card 2-2 Card 2-3 2. Preparing the Scanner 2-4 Preparing the Document Feed Tray and Eject Tray 2-4 Feed Selection Paper Jam or Double Feed Error ... 2-9 5. Fingerprint Sensor (ScanFront 220P 2-11 Cautions for Handling the Fingerprint Sensor .....2-11 Fingerprint - Canon imageFORMULA ScanFront 220 | Instruction Manual - Page 21
Chapter 2 Handling 1. Documents The ScanFront can scan documents in a range of sizes from business have the same size, thickness, and weight. Scanning different types of paper at one time can cause the scanner to jam. • Always make sure that the ink on a document is dry before scanning it. Scanning - Canon imageFORMULA ScanFront 220 | Instruction Manual - Page 22
❏ Card Size 53.9 × 85.5 mm (Conforming to ISO Standards) Thickness 0.76 mm and below Insertion orientation Landscape CAUTION A card placed into the document feed tray in the portrait orientation may not be output properly because a load is placed on it during feeding. Furthermore, removing a card - Canon imageFORMULA ScanFront 220 | Instruction Manual - Page 23
Chapter 2 Handling 2. Preparing the Scanner When placing a document in the scanner, pull out the document feed tray so that it matches the size of insert the protrusions on both sides of the tray into the holes on the scanner. After connecting the tray, make sure that it is attached securely. 2-4 - Canon imageFORMULA ScanFront 220 | Instruction Manual - Page 24
You can insert a USB memory device to store image files or connect a USB keyboard or USB mouse to operate the scanner. USB Memory IMPORTANT • Insert the USB memory while the scanner is ON. Some USB memory may not be recognized properly if the power is turned ON after the USB memory is - Canon imageFORMULA ScanFront 220 | Instruction Manual - Page 25
❏ Using a PS/2 Keyboard and PS/2 Mouse You can connect a PS/2 keyboard and mouse to the PS/2 port and use them to operate the scanner. Green (Top): Mouse Purple (Bottom): Keyboard IMPORTANT Turn OFF the scanner before connecting or disconnecting the PS/2 mouse and keyboard. Chapter 2 Handling 2-6 - Canon imageFORMULA ScanFront 220 | Instruction Manual - Page 26
2 Handling 3. Placing Documents When placing documents into the scanner, place them face down into the tray with the top edge of the document at the bottom of tray. ❏ Placing a Document Follow the procedure below to place a document. 1. Adjust the document guides to be wider than the width of the - Canon imageFORMULA ScanFront 220 | Instruction Manual - Page 27
make sure the size of stack does not exceed the loading marks on the document guides. Chapter 2 Handling 3. Place the card face down in the landscape orientation with the top placed card. Inserting a finger into the scanner while the panel unit is closed may result in an injury. Lock lever 2-8 - Canon imageFORMULA ScanFront 220 | Instruction Manual - Page 28
Chapter 2 Handling 4. Clearing a Paper Jam or Double Feed Error When a paper jam or double feed error is detected, feeding and scanning stops. 1. Check the displayed message. If a paper jam or double feed error is detected at the first page of a document, the following messages appear. If a - Canon imageFORMULA ScanFront 220 | Instruction Manual - Page 29
IMPORTANT When the message above is displayed and the scanner transitions to Low Power Mode, all of the data scanned up until that point is discarded. (See "Low Power a roller replacement kit and replace the rollers (feed roller and retard roller), and document holding guides. (See p. 7-8.) 2-10 - Canon imageFORMULA ScanFront 220 | Instruction Manual - Page 30
Chapter 2 Handling 5. Fingerprint Sensor (ScanFront 220P) The ScanFront 220P is equipped with a fingerprint sensor for registering while charged with static electricity may cause the fingerprint sensor or scanner unit to malfunction. Before touching the fingerprint sensor, discharge any static - Canon imageFORMULA ScanFront 220 | Instruction Manual - Page 31
an error in fingerprint authentication: - The finger is wet or sweaty - The finger is dirty - The grooves of the fingerprint are filled with sweat or oil - The finger is dry (dry skin) - Part of the fingerprint is missing because of, for example, a wound or burn injury - The fingerprint has worn - Canon imageFORMULA ScanFront 220 | Instruction Manual - Page 32
Chapter 3 ScanFront Setup 1. Before Setting Up the Scanner 3-2 Installation Location 3-2 Interfaces 3-2 Connecting the AC Adapter 3-3 Connecting the Network Cable 3-3 2. Turning the Power ON and OFF 3-4 Turning the Power ON 3-4 Turning the Power OFF 3-4 3. Configuring the Scanner Settings - Canon imageFORMULA ScanFront 220 | Instruction Manual - Page 33
Chapter 3 ScanFront Setup 1. Before Setting Up the Scanner Before setting up the scanner, you need to move it to the installation site, and connect the AC adaptor and network cable. ❏ Installation Location The performance of this scanner is affected by the environment in which it is installed. - Canon imageFORMULA ScanFront 220 | Instruction Manual - Page 34
the procedure shown below to connect the AC adapter. CAUTION Make sure to use only the AC adapter and power cord included with the scanner. Chapter 3 ScanFront Setup a Connect the power cord and AC adapter. b Insert the plug of the AC adapter into the power connector. c Connect the power cord to - Canon imageFORMULA ScanFront 220 | Instruction Manual - Page 35
Chapter 3 ScanFront Setup 2. Turning the Power ON and OFF Use the power switch to turn the scanner ON, and press the [Power off] button on the touch panel to turn it OFF. ❏ Turning the Power ON Press the power switch to turn the scanner ON. The power indicator lights, and the Home screen or - Canon imageFORMULA ScanFront 220 | Instruction Manual - Page 36
Chapter 3 ScanFront Setup 3. Configuring the Scanner Settings The scanner setup consists of configuring the initial network settings from the [Administrator setting] screen, and then configuring the settings needed to use the scanner as described in Chapter 4 "Web Menu (Administrator Mode)". ❏ - Canon imageFORMULA ScanFront 220 | Instruction Manual - Page 37
Chapter 3 ScanFront Setup ❏ Web Menu (Administrator Mode) The following setting items are you can register and edit the My Job Button. Configure the scanner settings. Confirm the [Device Name] and [IP Address] settings of the scanner. Set the language displayed on the touch panel and the geographic - Canon imageFORMULA ScanFront 220 | Instruction Manual - Page 38
Module Version Information Log Settings Description Configure the settings for managing the scanner. Back up or restore the scanner settings. Display the version information, and update the version, of the ScanFront module. Record usage statistics to a log file. Web Menu (Administrator Mode) Yes - Canon imageFORMULA ScanFront 220 | Instruction Manual - Page 39
Chapter 3 ScanFront Setup 4. Configuring Administrator Settings Enter the administrator password and log in to configure administrator settings. ❏ Logging In to the Administrator Settings Follow the procedure below to configure the [Device name] and [IP address] needed to connect the scanner to a - Canon imageFORMULA ScanFront 220 | Instruction Manual - Page 40
Network Settings Under Network Settings, configure the device name and IP address needed to connect the scanner to a network. Chapter 3 ScanFront Setup IMPORTANT • The device name is the name for the scanner used on the network. When changing this setting, make sure to select a unique name that is - Canon imageFORMULA ScanFront 220 | Instruction Manual - Page 41
on p. 6-4. ❏ Roller Counter Reset Reset the counter after replacing the feed roller when the scanner no longer feeds properly. For details, see "Replacing the Rollers and Document Holding Guide" on p. 7-8. Hint • Scanner setting information can be backed up to a folder on a USB memory device if the - Canon imageFORMULA ScanFront 220 | Instruction Manual - Page 42
operating environment Delete all the user information registered on the ScanFront when, for instance, the users have changed because you language displayed on touch panel. If you change this setting, restart the scanner. Hint The display language setting can also be configured in [Language/Timezone - Canon imageFORMULA ScanFront 220 | Instruction Manual - Page 43
Chapter 4 Web Menu (Administrator Mode) Chapter 4 Web Menu (Administrator Mode) 1. Web Menu Overview 4-2 2. Logging In to the Web Menu 4-5 3. User Administration 4-6 Registering New Users 4-7 Restricting User Functions 4-8 Editing Users 4-9 4. Address Book Settings 4-11 Registering New - Canon imageFORMULA ScanFront 220 | Instruction Manual - Page 44
Administrator Mode)" on p. 3-6.) Settings Network Computer (Web Menu) ScanFront 220 IMPORTANT • For a Web browser, use Microsoft Internet Explorer when the ScanFront administrator or another user is logged in to the scanner. • Use the device name or IP address assigned to the scanner as the URL - Canon imageFORMULA ScanFront 220 | Instruction Manual - Page 45
sending e-mail from the scanner, settings for using an authentication server compatible with a directory service, settings for using an the following settings for managing the scanner: • Backup and restoration of all settings • Confirmation of ScanFront version information and module updates - Canon imageFORMULA ScanFront 220 | Instruction Manual - Page 46
Chapter 4 Web Menu (Administrator Mode) User Mode For details on configuring the User Mode settings, see Chapter 5 "Web Menu (User Mode)". a b c a User Settings (See "User Settings" on p. 5-4.) Use to change the user settings. b Address Book Settings (See "Address Book Settings" on p. 5-6.) Use to - Canon imageFORMULA ScanFront 220 | Instruction Manual - Page 47
Menu You can log in to the Web Menu using the following procedure. IMPORTANT Use the device name or the IP address assigned to the scanner as the URL for accessing the Web Menu. For details on the device name and the IP address, see "Configuring Administrator Settings" on p. 3-8. 1. Turn the - Canon imageFORMULA ScanFront 220 | Instruction Manual - Page 48
Chapter 4 Web Menu (Administrator Mode) 3. User Administration From the User Administration screen, you can register and manage users and restrict the functions available to users. bc d e a f a [New User] button Registers a new user. (See "Registering New Users" on p. 4-7.) b [Select All] - Canon imageFORMULA ScanFront 220 | Instruction Manual - Page 49
Device Authentication, and user authentication is performed on the ScanFront (device). Hint The authentication method for users logged Mode) Mail Address Enter the originating address for e-mail sent from the scanner. IMPORTANT • Users are not permitted to register and change e-mail addresses. - Canon imageFORMULA ScanFront 220 | Instruction Manual - Page 50
" on p. 4-18.) [OK] button Registers a user with the specified parameters, and updates the display on the scanner. Hint • When a user is registered, the startup display on the scanner switches from the Home screen to the Login screen. (See "Login Screen" on p. 6-4.) ❏ Restricting User Functions - Canon imageFORMULA ScanFront 220 | Instruction Manual - Page 51
the Home screen and displays the Job Button screen when the user logs in. Restriction to Send Restricts the destinations to which the scanner can send images. Deselect a destination to disable it. Ex.) When the destinations are restricted to shared folders only: Chapter 4 Web Menu (Administrator - Canon imageFORMULA ScanFront 220 | Instruction Manual - Page 52
By editing a user automatically registered by server authentication, you can set the user's e-mail address. Chapter 4 Web Menu (Administrator Mode) Edit Address Book Enables you to register and edit entries in the user's My Address Book. For details on configuring address books, see "Address Book - Canon imageFORMULA ScanFront 220 | Instruction Manual - Page 53
220 Exports the address book data as a file in CSV format. (See "Exporting and Importing Address Books" on p. 4-15.) c Import to ScanFront 220 Imports a previously exported address book data file. (See "Exporting and Importing Address Books" on p. 4-15.) d Address type Selects the type of addresses - Canon imageFORMULA ScanFront 220 | Instruction Manual - Page 54
server. IMPORTANT FTP servers that require firewall settings cannot be registered. Chapter 4 Web Menu (Administrator Mode) Name Enter the name to display on the scanner. FTP server Enter the IP address or host name of the FTP server. Folder path To specify a subfolder on the FTP server, enter the - Canon imageFORMULA ScanFront 220 | Instruction Manual - Page 55
publicly on the network. Name Enter the name to display on the scanner. Computer Name (Host Name) Enter the name of the computer containing the computer set as the FTP server or the address editing functions of the ScanFront to create a folder beforehand. User name/Password Enter the user name and - Canon imageFORMULA ScanFront 220 | Instruction Manual - Page 56
. 1. Add a checkmark to the check box of the address you want to copy and then click [Copy]. Name Enter the name to display on the scanner. Add from Address Book Allows you to select an address from an address book, add it to the group, and display it in the list - Canon imageFORMULA ScanFront 220 | Instruction Manual - Page 57
units. Exporting from the Scanner You can save the address book data to a specified folder. 1. Click [Export from ScanFront 220]. 2. Click [Save], specify a save location, and save the address book data. Hint • You can open the saved CSV file with software that supports CSV files such as spread - Canon imageFORMULA ScanFront 220 | Instruction Manual - Page 58
220 Exports the job button data as a file in DAT format. (See "Exporting and Importing Job Buttons" on p. 4-23.) c Import to ScanFront 220 Imports a previously exported job button data file. (See "Exporting and Importing Job Buttons" on p. 4-23.) d [New Job Button] button Registers a new job - Canon imageFORMULA ScanFront 220 | Instruction Manual - Page 59
❏ Registering New Job Buttons Click [New Job Button] to register a new job button. Job Button Settings Name of Job Button Enter the job button name to display on the touch panel. Hint • Job buttons are sorted and displayed by job button name. If you want to set to display job buttons in a particular - Canon imageFORMULA ScanFront 220 | Instruction Manual - Page 60
E-mail settings Subject Enter a subject for the e-mail message. Message Enter the text of the e-mail message. Delivery Options Action when the same named file exists Select the action to take when a file of the same name exists at the destination. • Display a message Displays a message confirming - Canon imageFORMULA ScanFront 220 | Instruction Manual - Page 61
image and continue scanning. File name Specify a name for the image file to be sent using letters (A-Z, a-z) and numbers (0-9). Add Date to File name The scanner adds 17 digits that indicate the date and time to the file name of the image to be sent. Ex.) May 14, 2007, 3:40:30 - Canon imageFORMULA ScanFront 220 | Instruction Manual - Page 62
OCR (Optical Character Recognition) When OCR is set to [ON], the scanner performs character recognition on textual portions of the document, and embeds the password. Printing allowed Enables the PDF file to be printed from a printer. Changes allowed Enables editing of the PDF file, such as adding or - Canon imageFORMULA ScanFront 220 | Instruction Manual - Page 63
for the front and back sides, clear the [Same as front] check box. Double feed detection by Ultrasonic (Only available with the ScanFront 220P) The scanner uses an ultrasonic sensor to detect when two or more documents are fed together, and stops feeding when a double feed is detected. IMPORTANT - Canon imageFORMULA ScanFront 220 | Instruction Manual - Page 64
Bleed-through reduction Eliminates bleed-through images, in which images on the reverse side of a scanned document appear on the scanned page, such as when scanning thin documents with text or images on both sides. Hint When using bleed-through reduction, adjust the bleed-through reduction level to - Canon imageFORMULA ScanFront 220 | Instruction Manual - Page 65
by importing the job button settings file registered on one ScanFront unit to the other units. Exporting from the Scanner You can save the job button settings file to a specified folder. 1. Click [Export from ScanFront 220]. Chapter 4 Web Menu (Administrator Mode) 3. Select a processing method for - Canon imageFORMULA ScanFront 220 | Instruction Manual - Page 66
Mode) 6. Device Configuration From the Device Configuration screen, you can configure the scanner settings. a a b c d b e c d e a Network Setting Confirm or change the network settings of the scanner. (See "Network Setting" on p. 4-25.) b Language/Timezone Configure the language displayed - Canon imageFORMULA ScanFront 220 | Instruction Manual - Page 67
hyphens (-) up to 15 characters long. • The device name must begin with a letter. You cannot end the device name with a hyphen. • You must restart the scanner after changing the device name. Security of Web Menu Add a checkmark to always use SSL for communication with the Web Menu. Hint If you add - Canon imageFORMULA ScanFront 220 | Instruction Manual - Page 68
Options You can set the type of user login screen that appears. Hint The login setting can also be changed under [Administrator setting] on the scanner. List type login Log in by selecting a user from the list. Key in type login Log in by entering a user name and password. IMPORTANT When - Canon imageFORMULA ScanFront 220 | Instruction Manual - Page 69
IMPORTANT • The e-mail address of the Administrator is used as the originating address when a user without a registered e-mail address sends an e-mail message. • When a sent e-mail message results in an error due to, for example, an incorrect e-mail address, an error notification is delivered from - Canon imageFORMULA ScanFront 220 | Instruction Manual - Page 70
a network authentication server compatible with a directory service. IMPORTANT • You can simplify user administration on the scanner by using e-mail addresses registered on an Server Configure the NTP server to synchronize the ScanFront with the correct time. (See "NTP Server" on p. 4-31.) 4-28 - Canon imageFORMULA ScanFront 220 | Instruction Manual - Page 71
. IMPORTANT If the destination mail server does not support divided attachments, it may not be possible to reconstitute a divided image file sent by the scanner. In such cases, turn off this setting, and divide the scanned documents manually before sending. Chapter 4 Web Menu (Administrator Mode - Canon imageFORMULA ScanFront 220 | Instruction Manual - Page 72
the authentication server. Domain Enter a domain name supported by Active Directory. Port number Enter the port number updates the password information saved on the scanner, but does not alter the password registered added to the login screens of the scanner and Web Menu (User Mode). Chapter 4 - Canon imageFORMULA ScanFront 220 | Instruction Manual - Page 73
for the log file is ".log". Chapter 4 Web Menu (Administrator Mode) ❏ NTP Server You can configure the NTP server settings to synchronize the ScanFront with the correct time. NTP Server Setting Select this check box to synchronize with the NTP server. NTP Server(primary) Enter the host name or - Canon imageFORMULA ScanFront 220 | Instruction Manual - Page 74
version information of the scanner. You can also acquire a version update file to update the ScanFront version. (See "Module Version Information/Update" on p. 4-34.) IMPORTANT For details on acquiring version update files, contact your dealer or a Canon service representative. c Log Settings Records - Canon imageFORMULA ScanFront 220 | Instruction Manual - Page 75
using the following procedure. Backup All Settings This option saves all the ScanFront settings to a specified folder. IMPORTANT The following settings are not included in the backup data because they are unique to the scanner unit: • IP address • Device name • Touch panel adjustment values 1. Click - Canon imageFORMULA ScanFront 220 | Instruction Manual - Page 76
the scanner. 1. Confirm that no administrator or user is logged in to the scanner. Hint If a user or administrator is logged in to the scanner, an use on the scanner. IMPORTANT If the scanner malfunctions, the version information is required when contacting support services. Acquiring Update Files - Canon imageFORMULA ScanFront 220 | Instruction Manual - Page 77
that appears, and click [OK] to perform the version update. IMPORTANT It takes several minutes to transfer the update file to the scanner. Do not operate the Web Menu or scanner until the Web Menu changes to the following display. 6. Click [OK] to close the Web Menu. IMPORTANT When the update file - Canon imageFORMULA ScanFront 220 | Instruction Manual - Page 78
❏ Log Settings You can configure settings for log files. Chapter 4 Web Menu (Administrator Mode) Make Log File Select this check box to create a log file. PC Name (Host Name) Enter the name of the computer containing the publicly shared folder where the log file will be saved. Location Enter the - Canon imageFORMULA ScanFront 220 | Instruction Manual - Page 79
Chapter 5 Web Menu (User Mode) 1. Web Menu Overview 5-2 2. Logging In to the Web Menu 5-3 3. User Settings 5-4 User Settings 5-5 4. Address Book Settings 5-6 Registering New Addresses 5-8 Copying Addresses 5-10 Exporting and Importing Address Books 5-11 5. Job Button Settings 5-12 - Canon imageFORMULA ScanFront 220 | Instruction Manual - Page 80
Explorer 6.0 or later. • In some cases, settings cannot be changed from the Web Menu when the ScanFront administrator or another user is logged in to the scanner. • Use the device name or IP address assigned to the scanner as the URL for logging in to the Web Menu. (See p. 5-3.) Web Menu (User Mode - Canon imageFORMULA ScanFront 220 | Instruction Manual - Page 81
when the device name is ScanFront220, and http://172.19.xxx.xxx for the IP address. from an account registered on the scanner (Device Authentication). For details, consult the ScanFront administrator. 5. Enter a user name and password to log in to the Web Menu. Hint If the Web Menu is set to - Canon imageFORMULA ScanFront 220 | Instruction Manual - Page 82
for [Screen after Login]. • E-mail address may not be registered for a user logged in by Server Authentication. For details on e-mail address settings, consult the ScanFront administrator. 5-4 - Canon imageFORMULA ScanFront 220 | Instruction Manual - Page 83
Address (Not Changeable) To change the e-mail address, contact the ScanFront administrator. SMTP/POP Before SMTP Authentication Appears when [Auth Method] entry. • [Change Password] updates the password information saved on the scanner, but does not alter the password registered on the server. • Job - Canon imageFORMULA ScanFront 220 | Instruction Manual - Page 84
220 Exports the address book data as a file in CSV format. (See "Exporting and Importing Address Books" on p. 5-11.) c Import to ScanFront 220 Imports a previously exported address book data file. (See "Exporting and Importing Address Books" on p. 5-11.) d Address type Selects the type of addresses - Canon imageFORMULA ScanFront 220 | Instruction Manual - Page 85
administrator has restricted editing of the address books, the following Address Book settings apply. For details, consult the ScanFront administrator. • If editing is restricted for only one address book (either the My Address Book or the Shared Address Book), users can only copy addresses - Canon imageFORMULA ScanFront 220 | Instruction Manual - Page 86
Server This option registers a network FTP server. IMPORTANT FTP servers that require firewall settings cannot be registered. Name Enter the name to display on the scanner. FTP server Enter the IP address or host name of the FTP server. Folder path To specify a subfolder on the FTP server, enter the - Canon imageFORMULA ScanFront 220 | Instruction Manual - Page 87
publicly on the network. Name Enter the name to display on the scanner. Computer Name (Host Name) Enter the name of the computer containing the computer set as the FTP server or the address editing functions of the ScanFront to create a folder beforehand. User name/Password Enter the user name and - Canon imageFORMULA ScanFront 220 | Instruction Manual - Page 88
]. 2. Add a checkmark to the check box of the address you want to copy and then click [Copy]. Name Enter the name to display on the scanner. Add from Address Book Allows you to select an address from an address book, add it to the group, and display it in the list - Canon imageFORMULA ScanFront 220 | Instruction Manual - Page 89
ScanFront 220]. Chapter 5 Web Menu (User Mode) Importing to the Scanner You can import previously exported address book data to the scanner. 1. Click [Import to ScanFront Hint • You can open the saved CSV file with software that supports CSV files such as spread sheet software in order to check the - Canon imageFORMULA ScanFront 220 | Instruction Manual - Page 90
220 Exports the job button data as a file in DAT format. (See "Exporting and Importing Job Buttons" on p. 5-19.) c Import to ScanFront 220 Imports a previously exported job button data file. (See "Exporting and Importing Job Buttons" on p. 5-19.) d [New Job Button] button Registers a new job - Canon imageFORMULA ScanFront 220 | Instruction Manual - Page 91
administrator has restricted editing of the job buttons, the following Job Button settings apply. For details, consult the ScanFront administrator. • If editing is restricted for only one set of job buttons (either the My Job Button or the Shared Job Button), users can copy - Canon imageFORMULA ScanFront 220 | Instruction Manual - Page 92
❏ Registering New Job Buttons Click [New Job Button] to register a new job button. Job Button Settings Name of Job Button Enter the job button name to display on the touch panel. Hint • Job buttons are sorted and displayed by job button name. If you want to set to display job buttons in a particular - Canon imageFORMULA ScanFront 220 | Instruction Manual - Page 93
E-mail settings Subject Enter a subject for the e-mail message. Message Enter the text of the e-mail message. Delivery Options Action when the same named file exists Select the action to take when a file of the same name exists at the destination. • Display a message Displays a message confirming - Canon imageFORMULA ScanFront 220 | Instruction Manual - Page 94
image and continue scanning. File name Specify a name for the image file to be sent using letters (A-Z, a-z) and numbers (0-9). Add Date to File name The scanner adds 17 digits that indicate the date and time to the file name of the image to be sent. Ex.) May 14, 2007, 3:40:30 - Canon imageFORMULA ScanFront 220 | Instruction Manual - Page 95
OCR (Optical Character Recognition) When OCR is set to [ON], the scanner performs character recognition on textual portions of the document, and embeds the password. Printing allowed Enables the PDF file to be printed from a printer. Changes allowed Enables editing of the PDF file, such as adding or - Canon imageFORMULA ScanFront 220 | Instruction Manual - Page 96
for the front and back sides, clear the [Same as front] check box. Double feed detection by Ultrasonic (Only available with the ScanFront 220P) The scanner uses an ultrasonic sensor to detect when two or more documents are fed together, and stops feeding when a double feed is detected. IMPORTANT - Canon imageFORMULA ScanFront 220 | Instruction Manual - Page 97
up your job button data as a settings file in DAT format, and import the backed up job button settings file to another ScanFront unit. Hint If you have multiple ScanFront units, you can use the same job buttons on all of them by importing the job button settings file registered on one - Canon imageFORMULA ScanFront 220 | Instruction Manual - Page 98
[Save], specify a save location, and save the job button settings file. Importing to the Scanner You can import a previously exported job button settings file to the scanner. 1. Click [Import to ScanFront 220]. Hint When importing is completed, the following message appears. Click [OK] to return - Canon imageFORMULA ScanFront 220 | Instruction Manual - Page 99
Chapter 6 Operating Procedures 1. Flow of Scanner Operations 6-2 2. Turning the Power ON and OFF 6-3 Turning the Power ON 6-3 Login 6-5 Key in Type Login 6-6 Fingerprint Authentication (Only Available with the ScanFront 220P 6-7 4. Screen Displayed after Login 6-8 Home Screen 6-8 Job Button - Canon imageFORMULA ScanFront 220 | Instruction Manual - Page 100
and screen transitions for the process from turning the scanner ON, to sending an image file are as follows screen enables setting a password for the user that logged in, and registration for the ScanFront 220P. Scan/Delivery Options screen (See p. 6-23.) Scanning starts immediately after a job - Canon imageFORMULA ScanFront 220 | Instruction Manual - Page 101
or the login screen appears. ❏ Turning the Power OFF Press the [Power off] button displayed at the bottom left of the panel to turn the scanner OFF. Home screen Power switch Power indicator Hint • It takes approximately 40 seconds for the Home screen to appear after the power switch is turned - Canon imageFORMULA ScanFront 220 | Instruction Manual - Page 102
Login Screen The login screen appears at the startup when the scanner is turned ON. ❏ Login Screen Types There are two types address is not registered in the user information. You must contact the ScanFront administrator in order to register your e-mail address. • Fingerprint authentication - Canon imageFORMULA ScanFront 220 | Instruction Manual - Page 103
password input screen appears. 2. Press [Password]. IMPORTANT Passwords are case-sensitive. Make sure to enter the password correctly. 4. Press [Login] to log in to the scanner. The keyboard screen appears. 5. The Home screen (or Job Button screen) appears. 6-5 - Canon imageFORMULA ScanFront 220 | Instruction Manual - Page 104
your user name and password to log in. 1. Press [User name] ([Password]). Chapter 6 Operating Procedures 3. Press [Login] to log in to the scanner. The keyboard screen appears. 2. Enter your user name (password) and then press [OK]. 4. The Home screen (or Job Button screen) appears. IMPORTANT - Canon imageFORMULA ScanFront 220 | Instruction Manual - Page 105
the procedure below for fingerprint authentication. For details on fingerprint registration, see "Fingerprint Registration (Only Available with the ScanFront 220P)" on p. 6-10. 1. Press [Fingerprint Authentication]. Chapter 6 Operating Procedures 3. The Home screen (or Job Button screen) appears if - Canon imageFORMULA ScanFront 220 | Instruction Manual - Page 106
memory is inserted in a USB port. b [User settings] button Enables setting of the user password and fingerprint registration (only with the ScanFront 220P). (See "User Settings Screen" on p. 6-9.) c [Administrator setting] button Opens the Administrator Settings screen. For details, see "Configuring - Canon imageFORMULA ScanFront 220 | Instruction Manual - Page 107
you to edit the user password and register a fingerprint (only available with the ScanFront 220P). ❏ Fingerprint Registration Fingerprint registration is enabled when you are using the ScanFront 220P. For details on fingerprint registration, see "Fingerprint Registration (Only Available with the - Canon imageFORMULA ScanFront 220 | Instruction Manual - Page 108
For details on handling the fingerprint sensor, see "Fingerprint Sensor (ScanFront 220P)" on p. 2-11. ❏ Fingerprint Authentication ● Follow the The finger is dirty - The grooves of the fingerprint are filled with sweat or oil - The finger is dry (dry skin) - Part of the fingerprint is missing - Canon imageFORMULA ScanFront 220 | Instruction Manual - Page 109
. IMPORTANT If the Home screen is not displayed, use of the Home screen has been restricted for the user by the ScanFront administrator. Confirm this with the administrator. 1. Press [User settings]. Chapter 6 Operating Procedures 3. Scan your fingerprint. Repeat scanning until the same fingerprint - Canon imageFORMULA ScanFront 220 | Instruction Manual - Page 110
5. Perform an authentication test for the registered fingerprint by scanning your fingerprint. Chapter 6 Operating Procedures 6. Press [Close] to end fingerprint registration. IMPORTANT If you want to change the registered fingerprint, start registration again from the beginning. 6-12 - Canon imageFORMULA ScanFront 220 | Instruction Manual - Page 111
scanning differ depending on the job button settings. For details on the overall flow from configuring settings to sending an image file, see "Flow of Scanner Operations" on p. 6-2. • It is not possible to save to USB memory from a job button. If you select an address and then press [Next], the - Canon imageFORMULA ScanFront 220 | Instruction Manual - Page 112
Chapter 6 Operating Procedures ❏ Address Selection Screen From the address selection screen, you can select the address to send an image file and register addresses. b a c e f d g a Address Book type Selects the address book type (Shared Address Book or My Address Book). If the address book - Canon imageFORMULA ScanFront 220 | Instruction Manual - Page 113
Chapter 6 Operating Procedures ❏ USB Memory Screen The USB Memory screen enables you to specify the folder in the USB memory to save the image file. a b c d e f a Path Enter the folder path of the USB memory. You can also press [Downward] to select a folder. b USB Memory Display Displays the - Canon imageFORMULA ScanFront 220 | Instruction Manual - Page 114
❏ Scanning This section describes the procedure for scanning. If you want to save the image file to USB memory, specify the folder in the USB memory to save the image file in Steps 2 to 4. (See "USB Memory Screen" on p. 6-15.) 1. Select a destination. Press a destination button to select a - Canon imageFORMULA ScanFront 220 | Instruction Manual - Page 115
the continue to scan confirmation screen, and the address confirmation screen of Step 10 appears. • When the confirmation message is left displayed and the scanner transitions to Low Power Mode, all of the data scanned up until that point is discarded. (See "Low Power Mode" on p. 4-26.) 7. Check the - Canon imageFORMULA ScanFront 220 | Instruction Manual - Page 116
8. Check the scanned images. Chapter 6 Operating Procedures : Display the image of the next page. : Display the image of the previous page. : Move the viewing area around an image when an enlarged view of the image is shown. : Rotate the image 90 degrees counterclockwise. : Rotate the image 90 - Canon imageFORMULA ScanFront 220 | Instruction Manual - Page 117
Chapter 6 Operating Procedures 8. Registering and Editing Addresses If an address to which you want to send an image file is not registered in the address book or the information of a registered address has not been updated, use the procedure below to register a new address or modify an address in - Canon imageFORMULA ScanFront 220 | Instruction Manual - Page 118
3. Press [Downward] to move to a level lower than the selected folder, or press [Edit] and [Create a new folder] to create a new folder. • User name/Password Enter the user name and password of an account with write permission for the shared folder. • Domain/Workgroup If the computer containing the - Canon imageFORMULA ScanFront 220 | Instruction Manual - Page 119
• [Add] button Select addresses to register to the group from [Address Book type] and [Address type]. The selected addresses are displayed in the list. Chapter 6 Operating Procedures IMPORTANT • When you add shared folders to groups, do not add multiple shared folders with different access - Canon imageFORMULA ScanFront 220 | Instruction Manual - Page 120
❏ Copying an Address You can copy addresses between My Address Book and Shared Address Book. 1. Select the address book entry to copy. 2. Select the address, press [Edit], and then press [Copy]. Chapter 6 Operating Procedures 4. Press [New] and paste the address. Hint If the address book already - Canon imageFORMULA ScanFront 220 | Instruction Manual - Page 121
from a job button, the settings are reset not to the setting values registered to the job button, but to the default values of the scanner. h [Start] button Starts scanning. i [Prescan] button When scanning starts, the first page of the document is scanned and then scanning stops. You can view - Canon imageFORMULA ScanFront 220 | Instruction Manual - Page 122
❏ Scan Settings The scan settings include basic condition settings (page size, mode, resolution, scanning side, and brightness) and detailed settings for scanning. Basic Condition Settings Paper size Mode Resolution Scanning side Paper Size Select the size of the document you want to scan. - Canon imageFORMULA ScanFront 220 | Instruction Manual - Page 123
[OFF] when scanning a document that contains pages of different lengths. Skip Blank Page Double feed detection by Ultrasonic (Only Available with the ScanFront 220P) The scanner uses an ultrasonic sensor to detect when two or more documents are fed together, and stops feeding when a double feed is - Canon imageFORMULA ScanFront 220 | Instruction Manual - Page 124
on both sides. Hint When using bleed-through reduction, adjust the bleed-through reduction level to match the type of document. Contrast The scanner detects from the scanned image that the document was fed askew and then straightens the image. • Prefer Quality Image processing is performed to - Canon imageFORMULA ScanFront 220 | Instruction Manual - Page 125
Back side Brightness/contrast Chapter 6 Operating Procedures ❏ File Formats You can select from the three available file formats TIFF, JPEG, and PDF, and the modes available for scanning vary, depending on the file format setting. (See "Mode" on p. 6-24.) TIFF format This is enabled when you scan - Canon imageFORMULA ScanFront 220 | Instruction Manual - Page 126
PDF format Chapter 6 Operating Procedures ❏ Security Settings for PDF Files Security is implemented for PDF files with the encryption and password settings in the security settings. Configure the following settings for saving in PDF format. • Compression Select the compression method. • Quality - Canon imageFORMULA ScanFront 220 | Instruction Manual - Page 127
• Printing allowed This permits printing of the PDF file with a printer. • Changes allowed This permits editing of the PDF file; for file to be sent using letters (A-Z, a-z) and numbers (0-9). Auto file name The scanner adds 17 digits that indicate the date and time to the file name of the image - Canon imageFORMULA ScanFront 220 | Instruction Manual - Page 128
(Job Button screen) setting. • The Job Button screen is displayed for a user for which use of the Home screen is restricted by the ScanFront administrator. • Logout The user is logged out after sending images. • Select screen after sending A dialog box for selecting the screen after sending images - Canon imageFORMULA ScanFront 220 | Instruction Manual - Page 129
7-2 Cleaning the Scanner Unit 7-2 Cleaning the Touch Panel 7-2 Cleaning the Fingerprint Sensor (ScanFront 220P 7-2 Cleaning the Scanning Glass and Rollers 7-3 Cleaning the Retard Roller 7-5 Cleaning the Feed Roller 7-6 2. Replacing the Rollers and Document Holding Guide 7-8 Roller Replacement - Canon imageFORMULA ScanFront 220 | Instruction Manual - Page 130
slightly dampened with water and well wrung out, to remove any dirt, and then use a clean, dry cloth to wipe the scanner. ❏ Cleaning the Fingerprint Sensor (ScanFront 220P) To clean the fingerprint sensor, use a soft, dry cloth to wipe off any dirt. Fingerprint Sensor IMPORTANT The portion of - Canon imageFORMULA ScanFront 220 | Instruction Manual - Page 131
dirty, the scanning glass and rollers inside the scanner may be dirty. Use the procedure below to and paper particles that have accumulated inside the scanner. 3. Use a clean, dry cloth to wipe Do not spray water or detergent directly on the scanner. Doing so may damage precision mechanisms, such as - Canon imageFORMULA ScanFront 220 | Instruction Manual - Page 132
may cause feed errors. 5. Remove any dirt from the document holding guide using a cloth that has been soaked in water and thoroughly wrung out and feed roller and finish cleaning them, make sure to reattach them to the scanner. 7. Gently close the panel unit. Press on both sides of the unit until - Canon imageFORMULA ScanFront 220 | Instruction Manual - Page 133
arrow b. 5. Place the roller in the roller compartment inside the roller cover, and then align the notch in the roller with the shaft of the scanner. 7-5 - Canon imageFORMULA ScanFront 220 | Instruction Manual - Page 134
6. Slide the roller lock lever in the direction of the arrow, and then insert it into the hole of the retard roller. Chapter 7 Maintenance ❏ Cleaning the Feed Roller Use the procedure below to remove and attach the feed roller during cleaning or replacement. CAUTION Do not use excessive force when - Canon imageFORMULA ScanFront 220 | Instruction Manual - Page 135
the roller lock lever to lock the feed roller into position. 5. Align the notch in the shaft of the roller with the shaft of the scanner, and place the feed roller into position. 8. Close the roller cover. Make sure that you hear a click, which indicates the cover has returned to its - Canon imageFORMULA ScanFront 220 | Instruction Manual - Page 136
document holding guide. For details, contact your local authorized Canon dealer or service representative. Product name: ScanFront 220/220P Roller the Counter" on p. 7-9.) • When the rollers start to wear out, problems such as paper jams and improper document feeding become more likely to occur. If - Canon imageFORMULA ScanFront 220 | Instruction Manual - Page 137
reset] button to display the [Roller counter reset] screen. Total pages scanned This counter is for the total number of document pages fed by the scanner. Pages scanned from the previous roller change This counter is for the number of document pages fed by the - Canon imageFORMULA ScanFront 220 | Instruction Manual - Page 138
Chapter 8 Troubleshooting 1. Troubleshooting 8-2 2. Error Messages (ScanFront 8-5 3. Error Messages (Web Menu 8-7 4. Adjusting the Touch Panel 8-9 5. Initializing ScanFront 8-11 - Canon imageFORMULA ScanFront 220 | Instruction Manual - Page 139
Chapter 8 Troubleshooting 1. Troubleshooting If any of the following problems occurs, solve the problem as described in of the ScanFront. The scanning glass is dirty. Clean the scanning glass. (See p. 7-3.) If there are scratches on a scanning glass, contact your local authorized Canon dealer. The - Canon imageFORMULA ScanFront 220 | Instruction Manual - Page 140
Troubleshooting 2-5.) Set the feed selection lever to page separation feeding. The scanner cannot connect to an FTP server that requires firewall settings to be and power plug. If the problem is not resolved after checking the connections, contact your local authorized Canon dealer. (1) The date and - Canon imageFORMULA ScanFront 220 | Instruction Manual - Page 141
Chapter 8 Troubleshooting Cannot connect to the network (device name conflict problem) Cannot delete a folder Cannot delete a the network, and change the device name setting. When you install two or more ScanFront scanners, take care to ensure duplicate device names are not set. Data has been saved - Canon imageFORMULA ScanFront 220 | Instruction Manual - Page 142
Chapter 8 Troubleshooting 2. Error Messages (ScanFront) If any of the following error messages appears, solve the problem as described in the corresponding solution. If you are unsure about any other message that appears, contact the support services. Failed to connect FTP server. Failed to - Canon imageFORMULA ScanFront 220 | Instruction Manual - Page 143
Chapter 8 Troubleshooting Password is incorrect. There is no file name specified. Enter a file Web menu. Contact the administrator of the ScanFront. The version of the ScanFront is being updated via the Web menu. Contact the administrator of the ScanFront. Write permission has not been granted for - Canon imageFORMULA ScanFront 220 | Instruction Manual - Page 144
Troubleshooting 3. Error Messages (Web Menu) If any of the following error messages appears, solve the problem as described in the corresponding solution. If you are unsure about any other message that appears, contact the support services The ScanFront is being used. End use of the ScanFront and - Canon imageFORMULA ScanFront 220 | Instruction Manual - Page 145
Troubleshooting combinations can be used. (See p. 4-18 and p. 5-16.) The scanner cannot be used with the selected mode and file format combination. Check which (See p. 4-18 and p. 5-16.) The ScanFront is being used. Try again after the ScanFront has finished being used. Modifying settings is not - Canon imageFORMULA ScanFront 220 | Instruction Manual - Page 146
Chapter 8 Troubleshooting 4. Adjusting the Touch Panel If there is no response when you press a button on the touch panel but there is a response when you press somewhere - Canon imageFORMULA ScanFront 220 | Instruction Manual - Page 147
IMPORTANT If you do not tap the panel within a period of 30 seconds after adjustment of the touch panel ends, the adjustment values will not take effect and the touch panel will return to the state prior to adjustment. Chapter 8 Troubleshooting 8-10 - Canon imageFORMULA ScanFront 220 | Instruction Manual - Page 148
Troubleshooting 5. Initializing ScanFront Initialize the ScanFront to protect user information when you submit the ScanFront ScanFront, including user information, address books, and job buttons. IMPORTANT Initializing the ScanFront [Yes]. 2. Press the [Format ScanFront 220] button. 4. Confirm the - Canon imageFORMULA ScanFront 220 | Instruction Manual - Page 149
Chapter 9 Appendices 1. Specifications 9-2 Unit Specifications 9-2 Network Specifications 9-3 Transfer Destinations 9-3 AC Adapter 9-3 Consumable Parts 9-3 External Dimensions 9-4 2. Index 9-5 - Canon imageFORMULA ScanFront 220 | Instruction Manual - Page 150
-through desktop scanner with network compatibility Feeding Method Automatic (feeding with page separation mode) Manual (feeding with bypass mode) Loadable Sheets 50 high Detection, Deskew, Fingerprint authentication (only available with the ScanFront 220P) External Dimensions 310 × 234 × 158 mm - Canon imageFORMULA ScanFront 220 | Instruction Manual - Page 151
start to wear out, problems such as paper jams and improper document feeding become more likely to occur. If this happens, replace the rollers regardless of the page count. • For information about the roller replacement kit, contact your local authorized Canon dealer or service representative. 9-3 - Canon imageFORMULA ScanFront 220 | Instruction Manual - Page 152
❏ External Dimensions Chapter 9 Appendices 310 mm 158 mm 108 mm 220 mm 212 mm 234 mm 99 mm 9-4 - Canon imageFORMULA ScanFront 220 | Instruction Manual - Page 153
Rollers 7-3 Chapter 9 Appendices Scanner Unit 7-2 Scanning Glass 7-3 Touch Panel 7-2 Conceptual Diagram of the ScanFront 1-i Connecting the AC Adapter Document Holding Guide 7-8 Documents 2-2 Double Feed Error 2-9 E Editing Users 4-9 Eject Tray 2-4 Error Messages ScanFront 8-5 Web Menu - Canon imageFORMULA ScanFront 220 | Instruction Manual - Page 154
H Handling 1-3 Home Screen 6-8 I Initializing ScanFront 8-11 Installation Location 1-2, 3-2 Interfaces 3-2 Power Mode 4-26 M Mail Server 4-29 Moving the Scanner 1-3 N Names and Functions of Parts 1-8 Network Kit 7-8 Routine Cleaning 7-2 S Safety Instructions 1-2 Scan Settings 5-15, 6-24 - Canon imageFORMULA ScanFront 220 | Instruction Manual - Page 155
T Timezone 4-25 Troubleshooting 8-2 Turning Off the Power 3-4, 6-3 Turning On the Power 3-4, 6-3 U Update 4-34 Update Files 4-34 Update the Version 4-34 USB Memory 6-15 USB Memory Screen 6-15 USB - Canon imageFORMULA ScanFront 220 | Instruction Manual - Page 156
SINGAPORE PTE. LTD. 1 HARBOUR FRONT AVENUE #04-01, KEPPEL BAY TOWER, SINGAPORE 098632 CANON HONGKONG COMPANY LTD. 19TH FLOOR, THE METROPOLIS TOWER, 10 METROPOLIS DRIVE, HUNGHOM, KOWLOON, HONG KONG. CANON KOREA BUSINESS SOLUTIONS INC. 168-12 SAMSEONG-DONG, GANGNAM-GU, SEOUL, KOREA PUB. CE-IE-579
-
 1
1 -
 2
2 -
 3
3 -
 4
4 -
 5
5 -
 6
6 -
 7
7 -
8
-
9
-
10
-
11
-
12
-
13
-
14
-
15
-
16
-
17
-
18
-
19
-
20
-
21
-
22
-
23
-
24
-
25
-
26
-
27
-
28
-
29
-
30
-
31
-
32
-
33
-
34
-
35
-
36
-
37
-
38
-
39
-
40
-
41
-
42
-
43
-
44
-
45
-
46
-
47
-
48
-
49
-
50
-
51
-
52
-
53
-
54
-
55
-
56
-
57
-
58
-
59
-
60
-
61
-
62
-
63
-
64
-
65
-
66
-
67
-
68
-
69
-
70
-
71
-
72
-
73
-
74
-
75
-
76
-
77
-
78
-
79
-
80
-
81
-
82
-
83
-
84
-
85
-
86
-
87
-
88
-
89
-
90
-
91
-
92
-
93
-
94
-
95
-
96
-
97
-
98
-
99
-
100
-
101
-
102
-
103
-
104
-
105
-
106
-
107
-
108
-
109
-
110
-
111
-
112
-
113
-
114
-
115
-
116
-
117
-
118
-
119
-
120
-
121
-
122
-
123
-
124
-
125
-
126
-
127
-
128
-
129
-
130
-
131
-
132
-
133
-
134
-
135
-
136
-
137
-
138
-
139
-
140
-
141
-
142
-
143
-
144
-
145
-
146
-
147
-
148
-
149
-
150
-
151
-
152
-
153
-
154
-
155
-
156
 |
 |
Please read this manual before using the scanner.
After you finish reading this manual, keep it in a safe place
for future reference.
INSTRUCTIONS