Canon imageFORMULA ScanFront 220 Instruction Manual - Page 33
Before Setting Up the Scanner, Installation Location, Interfaces
 |
View all Canon imageFORMULA ScanFront 220 manuals
Add to My Manuals
Save this manual to your list of manuals |
Page 33 highlights
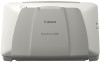
Chapter 3 ScanFront Setup 1. Before Setting Up the Scanner Before setting up the scanner, you need to move it to the installation site, and connect the AC adaptor and network cable. ❏ Installation Location The performance of this scanner is affected by the environment in which it is installed. Make sure that the location where the scanner is installed meets the following environmental requirements. ● Provide adequate space around the scanner for operation, maintenance, and ventilation. At least 400 mm At least 600 mm ● Avoid installing the machine in direct sunlight. If this is unavoidable, use curtains to shade the scanner. ● Avoid locations where a considerable amount of dust accumulates. ● Avoid warm or humid locations, such as in the vicinity of a water faucet, water heater, or humidifier, and avoid locations where the fumes from ammonia, paint thinner, or other volatile chemicals may be present. ● Avoid locations that are subject to vibration. ● Avoid exposing the scanner to rapid changes in temperature. If the room in which the scanner is installed is cold but rapidly heated, water droplets (condensation) may form inside the scanner. This may result in a noticeable degradation in scanning quality. The following conditions are recommended for optimal scanning quality: Room temperature: 10 °C to 32.5 °C (50 °F to 90.5 °F) Humidity: 20% to 80% RH ● Avoid installing the scanner near equipment that generates a magnetic field (e.g. speakers, televisions, or radios). ❏ Interfaces The interfaces are located on the right side of the scanner. a Power Connector: Connect the plug of the supplied AC adapter. b LAN Port: Connect a network cable designed for use with an RJ-45 modular jack. c PS/2 Connector (Green): Connect a PS/2 mouse. d PS/2 Connector (Purple): Connect a PS/2 keyboard. e USB Ports: Connect a USB memory device, USB keyboard, or USB mouse. 3-2
-
 1
1 -
2
-
3
-
4
-
5
-
6
-
7
-
8
-
9
-
10
-
11
-
12
-
13
-
14
-
15
-
16
-
17
-
18
-
19
-
20
-
21
-
22
-
23
-
24
-
25
-
26
-
27
-
 28
28 -
 29
29 -
 30
30 -
 31
31 -
 32
32 -
 33
33 -
 34
34 -
 35
35 -
 36
36 -
 37
37 -
 38
38 -
39
-
40
-
41
-
42
-
43
-
44
-
45
-
46
-
47
-
48
-
49
-
50
-
51
-
52
-
53
-
54
-
55
-
56
-
57
-
58
-
59
-
60
-
61
-
62
-
63
-
64
-
65
-
66
-
67
-
68
-
69
-
70
-
71
-
72
-
73
-
74
-
75
-
76
-
77
-
78
-
79
-
80
-
81
-
82
-
83
-
84
-
85
-
86
-
87
-
88
-
89
-
90
-
91
-
92
-
93
-
94
-
95
-
96
-
97
-
98
-
99
-
100
-
101
-
102
-
103
-
104
-
105
-
106
-
107
-
108
-
109
-
110
-
111
-
112
-
113
-
114
-
115
-
116
-
117
-
118
-
119
-
120
-
121
-
122
-
123
-
124
-
125
-
126
-
127
-
128
-
129
-
130
-
131
-
132
-
133
-
134
-
135
-
136
-
137
-
138
-
139
-
140
-
141
-
142
-
143
-
144
-
145
-
146
-
147
-
148
-
149
-
150
-
151
-
152
-
153
-
154
-
155
-
156
 |
 |
