Canon imagePROGRAF TM-300 MFP T36 Guide for Free Layout - Page 25
Setting, Details, Solid Line, Dotted Line, Dashed Line, Upper Left to Right, Upper Left to Bottom
 |
View all Canon imagePROGRAF TM-300 MFP T36 manuals
Add to My Manuals
Save this manual to your list of manuals |
Page 25 highlights
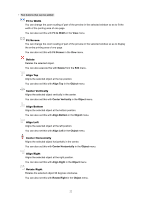
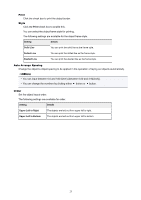
Print Click the check box to print the object border. Style Click the Print check box to enable this. You can select the object frame style for printing. The following settings are available for the object frame style. Setting Details Solid Line You can print the solid line as the frame style. Dotted Line You can print the dotted line as the frame style. Dashed Line You can print the dashed line as the frame style. Auto Arrange Spacing Change the object-to-object spacing to be applied in the operation of laying out objects automatically. Note • You can input between 0.0 and 100.0(mm) (between 0.00 and 3.94(inch)). • You can change the numbers by clicking either button or button. Order Set the object layout order. The following settings are available for order. Setting Details Upper Left to Right The objects are laid out from upper left to right. Upper Left to Bottom The objects are laid out from upper left to bottom. 25
-
 1
1 -
2
-
3
-
4
-
5
-
6
-
7
-
8
-
9
-
10
-
11
-
12
-
13
-
14
-
15
-
16
-
17
-
18
-
19
-
 20
20 -
 21
21 -
 22
22 -
 23
23 -
 24
24 -
 25
25 -
 26
26 -
 27
27 -
 28
28 -
 29
29 -
 30
30 -
31
-
32
-
33
-
34
-
35
-
36
-
37
-
38
-
39
-
40
-
41
-
42
-
43
 |
 |
