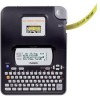
Casio KL-820 User Guide - Page 32
Part 14, Configuring the Printer Setup
 |
UPC - 079767181574
View all Casio KL-820 manuals
Add to My Manuals
Save this manual to your list of manuals |
Page 32 highlights
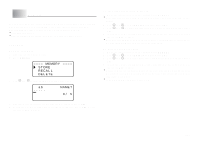
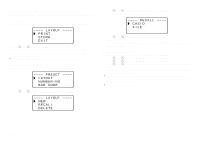
Part 14 Configuring the Printer Setup The printer has a SET UP screen that you can use to configure a variety of basic settings. To configure the printer setup 1. Press ON/OFF to turn on the printer. 2. Press FUNC and then FORM (SET UP). 3. Use z and x to select the SET UP item whose setting you want to change, and then press SET. 4. Use the cursor keys to change it. When this setting is selected: DEFAULT FONT CONTRAST DENSITY Change its setting like this: • Use x and z to select the font you want to use. • Use c and v to adjust the display contrast. • Use c and v to adjust the print density setting. LANGUAGE • Use x and z to select the display language you want to use. cm/inch • Use x and z to select centimeters (cm) or inches as the unit of measurement. 5. Press SET to apply the setting. Demo Printing Demo printing uses built-in data to demonstrate the type of tape label printing that can be performed by the printer. Important! • If there is label data from your last label layout session is still in memory, performing a demo print will delete it. If you think you will need the data later, save it in memory (page E-29) before performing a demo print. 1. Make sure a tape cartridge is loaded in the printer. 2. If the printer is on, press ON/OFF to turn it off. 3. Press ON/OFF to turn on the printer. • If the message "[SET] TO RECALL" appears, press any key other than SET. This will display a blank text input screen. 4. Press FUNC and then FORM (SET UP). 5. Use x and z to select DEMO PRINT, and then press SET. 6. Use x and z to select PRINT, and then press SET. 7. Confirm that 1 is specified for the number of copies. • You can change the number of copies if you want. 8. Press SET to start printing. • The demo print contents depend on the width of the tape cartridge currently loaded in the printer. 9. After printing is complete, use x and z to select EXIT, and then press SET. 10. In response to the confirmation message that appears, press SET. E-31
-
 1
1 -
2
-
3
-
4
-
5
-
6
-
7
-
8
-
9
-
10
-
11
-
12
-
13
-
14
-
15
-
16
-
17
-
18
-
19
-
20
-
21
-
22
-
23
-
24
-
25
-
26
-
 27
27 -
 28
28 -
 29
29 -
 30
30 -
 31
31 -
 32
32 -
 33
33 -
 34
34 -
 35
35 -
 36
36 -
 37
37 -
38
-
39
-
40
-
41
-
42
-
43
-
44
-
45
 |
 |
