Casio WK3300DX User Guide - Page 59
Cho r d
 |
View all Casio WK3300DX manuals
Add to My Manuals
Save this manual to your list of manuals |
Page 59 highlights
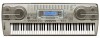
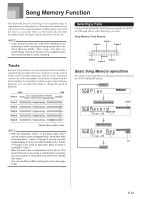
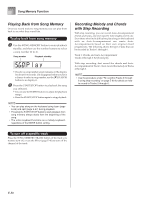
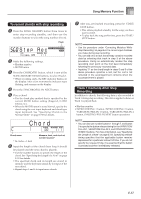
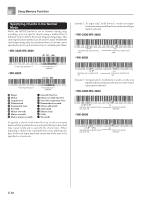
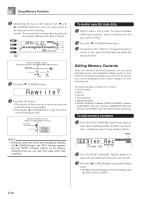
Song Memory Function To record chords with step recording 1 Press the SONG MEMORY button three times to enter step recording standby, and then use the number buttons to select the song number (0 to 4). Flash S t ep Rec 2 Make the following settings. • Rhythm number • MODE button 3 Press the CHORD/TR1 button, which is one of the SONG MEMORY TRACK buttons, to select Track1. • When recording starts, the REC indicator flashes on the display. After a few moments the indicator stops flashing, and remains on the display. 4 Press the SYNCHRO/FILL-IN NEXT button. 5 Play a chord. • Use the chord play method that is specified by the current MODE button setting (Fingered, CASIO Chord, etc.). • When the MODE button is set to Normal, specify the chord using the root input keyboard and chord type input keyboard. See "Specifying Chords in the Normal Mode" on page E-58 for details. Cho r d Chord name Measure, beat, and clock at current location* * 96 clocks = 1 beat 6 Input the length of the chord (how long it should be played until the next chord is played). • Use the number buttons to specify the length of the chord. See "Specifying the Length of a Note" on page E-59 for details. • The specified chord and its length are stored in memory and the keyboard stands by for input of the next chord. • Repeat steps 5 and 6 to input more chords. 7 After you are finished recording, press the START/ STOP button. • This enters playback standby for the song you have just recorded. • To play back the song at this time, press the START/ STOP button. NOTE • Use the procedure under "Correcting Mistakes While Step Recording" on page E-61 to correct input mistakes you make during step recording. • You can add on to a track that already contains recorded data by selecting that track in step 3 of the above procedure. Doing so automatically locates the step recording start point at the first beat immediately following the previously recorded data. • Inputting "0" as the chord length in steps 5 and 6 of the above procedure specifies a rest, but the rest is not reflected in the accompaniment contents when the accompaniment is played. Track 1 Contents After Step Recording In addition to chords, the following data is also recorded to Track 1 during step recording. This data is applied whenever Track 1 is played back. • Rhythm number • INTRO/ENDING 1 button, INTRO/ENDING 2 button, VARIATION/FILL-IN 1 button, VARIATION/FILL-IN 2 button, SYNCHRO/FILL-IN NEXT button operations NOTE • You can also use number buttons 1 through 7, and button 9 to specify the button release timing for the VARIATION/ FILL-IN 1, VARIATION/FILL-IN 2, and SYNCHRO/FILLIN NEXT buttons. For more information, see "Specifying the Length of a Note" on page E-59. Specifying release timing specifies that the applicable button remains depressed for a particular amount of time. If you do not specify the release timing, it is assumed that the button is pressed and then immediately released. E-57
-
 1
1 -
2
-
3
-
4
-
5
-
6
-
7
-
8
-
9
-
10
-
11
-
12
-
13
-
14
-
15
-
16
-
17
-
18
-
19
-
20
-
21
-
22
-
23
-
24
-
25
-
26
-
27
-
28
-
29
-
30
-
31
-
32
-
33
-
34
-
35
-
36
-
37
-
38
-
39
-
40
-
41
-
42
-
43
-
44
-
45
-
46
-
47
-
48
-
49
-
50
-
51
-
52
-
53
-
 54
54 -
 55
55 -
 56
56 -
 57
57 -
 58
58 -
 59
59 -
 60
60 -
 61
61 -
 62
62 -
 63
63 -
 64
64 -
65
-
66
-
67
-
68
-
69
-
70
-
71
-
72
-
73
-
74
-
75
-
76
-
77
-
78
-
79
-
80
-
81
-
82
-
83
-
84
-
85
-
86
-
87
-
88
-
89
-
90
-
91
-
92
-
93
-
94
-
95
-
96
-
97
-
98
-
99
-
100
-
101
-
102
-
103
-
104
-
105
-
106
-
107
-
108
 |
 |