Cisco 1252G Hardware Installation Guide - Page 39
Mounting Above a Suspended Ceiling
 |
UPC - 882658140631
View all Cisco 1252G manuals
Add to My Manuals
Save this manual to your list of manuals |
Page 39 highlights
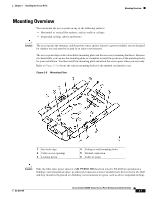
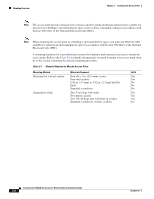
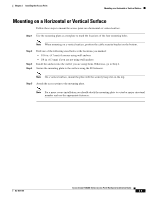
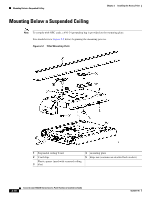
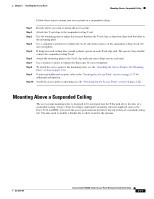
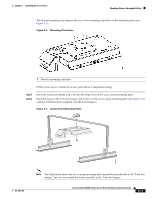
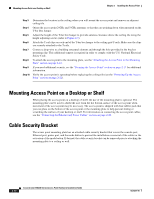
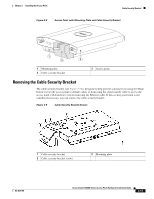
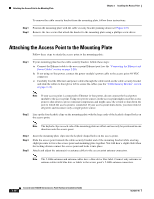
Chapter 2 Installing the Access Point Mounting Above a Suspended Ceiling Follow these steps to mount your access point on a suspended ceiling: Step 1 Step 2 Step 3 Step 4 Step 5 Step 6 Step 7 Step 8 Step 9 Step 10 Decide where you want to mount the access point. Attach two T-rail clips to the suspended ceiling T-rail. Use the mounting plate to adjust the distance between the T-rail clips so that they align with the holes in the mounting plate. Use a standard screwdriver to tighten the T-rail clip studs in place on the suspended ceiling T-rail. Do not overtighten. If using recessed ceiling tiles, install a plastic spacer on each T-rail clip stud. The spacer's legs should contact the suspended ceiling T-rail. Attach the mounting plate to the T-rail clip studs and start a Keps nut on each stud. Use a wrench or pliers to tighten the Keps nuts. Do not overtighten. To attach the access point to the mounting plate, see the "Attaching the Access Point to the Mounting Plate" section on page 2-16. If you need additional security, refer to the "Securing the Access Point" section on page 2-17 for additional information. Verify the access point is operating (see the "Powering Up the Access Point" section on page 2-22). Mounting Above a Suspended Ceiling The access point mounting plate is designed to be integrated into the T-bar grid above the tiles of a suspended ceiling. Using a T-bar box hanger and bracket mounting clip (not supplied) such as the Erico 512A and BHC, you orient the access point antenna just above the top surface of a standard ceiling tile. You may need to modify a thicker tile to allow room for the antenna. OL-8371-05 Cisco Aironet 1240AG Series Access Point Hardware Installation Guide 2-11
-
 1
1 -
2
-
3
-
4
-
5
-
6
-
7
-
8
-
9
-
10
-
11
-
12
-
13
-
14
-
15
-
16
-
17
-
18
-
19
-
20
-
21
-
22
-
23
-
24
-
25
-
26
-
27
-
28
-
29
-
30
-
31
-
32
-
33
-
 34
34 -
 35
35 -
 36
36 -
 37
37 -
 38
38 -
 39
39 -
 40
40 -
 41
41 -
 42
42 -
 43
43 -
 44
44 -
45
-
46
-
47
-
48
-
49
-
50
-
51
-
52
-
53
-
54
-
55
-
56
-
57
-
58
-
59
-
60
-
61
-
62
-
63
-
64
-
65
-
66
-
67
-
68
-
69
-
70
-
71
-
72
-
73
-
74
-
75
-
76
-
77
-
78
-
79
-
80
-
81
-
82
-
83
-
84
-
85
-
86
-
87
-
88
-
89
-
90
-
91
-
92
-
93
-
94
-
95
-
96
-
97
-
98
-
99
-
100
-
101
-
102
-
103
-
104
-
105
-
106
-
107
-
108
-
109
-
110
-
111
-
112
-
113
-
114
-
115
-
116
-
117
-
118
-
119
-
120
-
121
-
122
-
123
-
124
 |
 |