Cisco AIR-AP1252AG-A-K9 Hardware Installation Guide - Page 52
Installing the Access Point to the Mounting Plate, Mounting Plate Not Attached to a Surface
 |
View all Cisco AIR-AP1252AG-A-K9 manuals
Add to My Manuals
Save this manual to your list of manuals |
Page 52 highlights
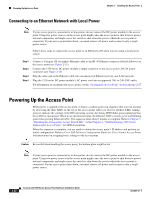
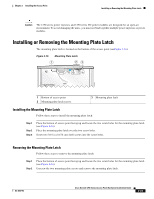
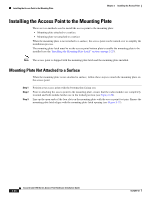
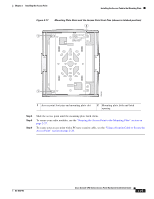
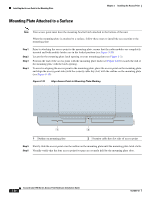
Installing the Access Point to the Mounting Plate Chapter 2 Installing the Access Point Installing the Access Point to the Mounting Plate There are two methods used to install the access point to the mounting plate: • Mounting plate attached to a surface • Mounting plate not attached to a surface When the mounting plate is not attached to a surface, the access point can be turned over to simplify the installation process. The mounting plate latch must be on the access point bottom plate to enable the mounting plate to be installed (see the "Installing the Mounting Plate Latch" section on page 2-23). Note The access point is shipped with the mounting plate latch and the mounting plate installed. Mounting Plate Not Attached to a Surface When the mounting plate is not attached to surface, follow these steps to attach the mounting plate on the access point: Step 1 Step 2 Step 3 Position your access point with the bottom plate facing you. Prior to attaching the access point to the mounting plate, ensure that the radio modules are completely inserted and both module latches are in the locked position (see Figure 2-24). Line up the open ends of the four slots on the mounting plate with the access point foot pins. Ensure the mounting plate latch aligns with the mounting plate latch opening (see Figure 2-17). 2-24 Cisco Aironet 1250 Series Access Point Hardware Installation Guide OL-8247-03
-
 1
1 -
2
-
3
-
4
-
5
-
6
-
7
-
8
-
9
-
10
-
11
-
12
-
13
-
14
-
15
-
16
-
17
-
18
-
19
-
20
-
21
-
22
-
23
-
24
-
25
-
26
-
27
-
28
-
29
-
30
-
31
-
32
-
33
-
34
-
35
-
36
-
37
-
38
-
39
-
40
-
41
-
42
-
43
-
44
-
45
-
46
-
 47
47 -
 48
48 -
 49
49 -
 50
50 -
 51
51 -
 52
52 -
 53
53 -
 54
54 -
 55
55 -
 56
56 -
 57
57 -
58
-
59
-
60
-
61
-
62
-
63
-
64
-
65
-
66
-
67
-
68
-
69
-
70
-
71
-
72
-
73
-
74
-
75
-
76
-
77
-
78
-
79
-
80
-
81
-
82
-
83
-
84
-
85
-
86
-
87
-
88
-
89
-
90
-
91
-
92
-
93
-
94
-
95
-
96
-
97
-
98
-
99
-
100
-
101
-
102
-
103
-
104
-
105
-
106
-
107
-
108
-
109
-
110
-
111
-
112
-
113
-
114
-
115
-
116
-
117
-
118
-
119
-
120
-
121
-
122
-
123
-
124
-
125
-
126
-
127
-
128
-
129
-
130
-
131
-
132
-
133
-
134
-
135
-
136
-
137
-
138
-
139
-
140
-
141
-
142
 |
 |