Cisco SA520-K9 Administration Guide - Page 42
Other options, Delete, Apply, Interface Name, IP Address
 |
UPC - 882658266744
View all Cisco SA520-K9 manuals
Add to My Manuals
Save this manual to your list of manuals |
Page 42 highlights
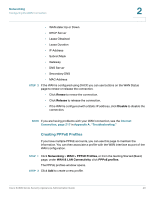
Networking Configuring the WAN Connection 2 Other options: Click the Edit button to edit an entry. To delete an entry, check the box and then click Delete. To select all entries in the table, check the box at the left side of the heading row. After you click Add or Edit, the IP Aliases window opens. STEP 3 Enter the following information: • Interface Name: Choose an interface name on which the alias is created. • IP Address: The IP address alias added to this WAN port of the router. • Mask: The IPv4 subnet mask. STEP 4 Click Apply to save your changes. The new alias appears in the List of IP Aliases table. Cisco SA500 Series Security Appliances Administration Guide 42
-
 1
1 -
2
-
3
-
4
-
5
-
6
-
7
-
8
-
9
-
10
-
11
-
12
-
13
-
14
-
15
-
16
-
17
-
18
-
19
-
20
-
21
-
22
-
23
-
24
-
25
-
26
-
27
-
28
-
29
-
30
-
31
-
32
-
33
-
34
-
35
-
36
-
 37
37 -
 38
38 -
 39
39 -
 40
40 -
 41
41 -
 42
42 -
 43
43 -
 44
44 -
 45
45 -
 46
46 -
 47
47 -
48
-
49
-
50
-
51
-
52
-
53
-
54
-
55
-
56
-
57
-
58
-
59
-
60
-
61
-
62
-
63
-
64
-
65
-
66
-
67
-
68
-
69
-
70
-
71
-
72
-
73
-
74
-
75
-
76
-
77
-
78
-
79
-
80
-
81
-
82
-
83
-
84
-
85
-
86
-
87
-
88
-
89
-
90
-
91
-
92
-
93
-
94
-
95
-
96
-
97
-
98
-
99
-
100
-
101
-
102
-
103
-
104
-
105
-
106
-
107
-
108
-
109
-
110
-
111
-
112
-
113
-
114
-
115
-
116
-
117
-
118
-
119
-
120
-
121
-
122
-
123
-
124
-
125
-
126
-
127
-
128
-
129
-
130
-
131
-
132
-
133
-
134
-
135
-
136
-
137
-
138
-
139
-
140
-
141
-
142
-
143
-
144
-
145
-
146
-
147
-
148
-
149
-
150
-
151
-
152
-
153
-
154
-
155
-
156
-
157
-
158
-
159
-
160
-
161
-
162
-
163
-
164
-
165
-
166
-
167
-
168
-
169
-
170
-
171
-
172
-
173
-
174
-
175
-
176
-
177
-
178
-
179
-
180
-
181
-
182
-
183
-
184
-
185
-
186
-
187
-
188
-
189
-
190
-
191
-
192
-
193
-
194
-
195
-
196
-
197
-
198
-
199
-
200
-
201
-
202
-
203
-
204
-
205
-
206
-
207
-
208
-
209
-
210
-
211
-
212
-
213
-
214
-
215
-
216
-
217
-
218
-
219
-
220
-
221
-
222
-
223
-
224
-
225
-
226
-
227
-
228
-
229
-
230
-
231
-
232
-
233
-
234
-
235
-
236
-
237
-
238
-
239
-
240
 |
 |

Networking
Configuring the WAN Connection
Cisco SA500 Series Security Appliances Administration Guide
42
2
Other options:
Click the
Edit
button to edit an entry. To delete an entry, check the
box and then click
Delete
. To select all entries in the table, check the box at the left
side of the heading row.
After you click Add or Edit, the IP Aliases window opens.
STEP
3
Enter the following information:
•
Interface Name
: Choose an interface name on which the alias is created.
•
IP Address
: The IP address alias added to this WAN port of the router.
•
Mask
: The
I
Pv4 subnet mask
.
STEP
4
Click
Apply
to save your changes.
The new alias appears in the List of IP Aliases table.