Cisco SF100D-05 Quick Start Guide - Page 4
Connecting Network Devices - configure
 |
View all Cisco SF100D-05 manuals
Add to My Manuals
Save this manual to your list of manuals |
Page 4 highlights
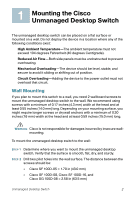
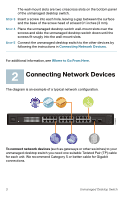
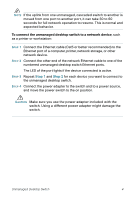
The wall-mount slots are two crisscross slots on the bottom panel of the unmanaged desktop switch. STEP 3 Insert a screw into each hole, leaving a gap between the surface and the base of the screw head of at least 0.1 inches (3 mm). STEP 4 Place the unmanaged desktop switch wall-mount slots over the screws and slide the unmanaged desktop switch down until the screws fit snugly into the wall-mount slots. STEP 5 Connect the unmanaged desktop switch to the other devices by following the instructions in Connecting Network Devices. For additional information, see Where to Go From Here. 2 Connecting Network Devices The diagram is an example of a typical network configuration. 193803 SYSTEM Link/Act 1 2 34 56 7 8 9 10 11 12 / miniGBIC1 Gigabit Link/Act 13 14 15 16 17 18 19 20 21 22 23 24 / miniGBIC2 Gigabit 1 2 3 4 13 14 15 16 5 6 7 8 17 18 19 20 9 10 11 12 21 22 23 24 (Shared with 12) (Shared with 24) miniGBIC1 miniGBIC2 Cisco Small Business SR2024 24-P or t 10/ 100/ 1000 Swit ch To connect network devices (such as gateways or other switches) to your unmanaged desktop switch you need one suitable Twisted Pair (TP) cable for each unit. We recommend Category 5 or better cable for Gigabit connections. 3 Unmanaged Desktop Switch
-
 1
1 -
 2
2 -
 3
3 -
 4
4 -
 5
5 -
 6
6 -
 7
7 -
 8
8
 |
 |
