Cisco SLM2008T-NA User Guide - Page 10
Installation
 |
View all Cisco SLM2008T-NA manuals
Add to My Manuals
Save this manual to your list of manuals |
Page 10 highlights
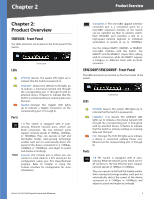
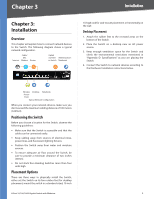
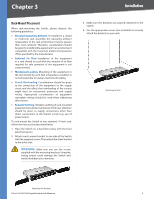
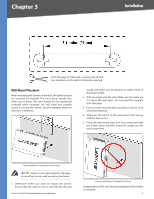
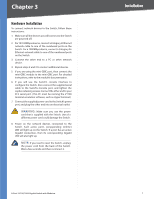
Chapter 3 Installation Chapter 3: Installation Overview This chapter will explain how to connect network devices to the Switch. The following diagram shows a typical network configuration. Cable/ DSL Internet Modem Router Uplink via Fiber Administrator's to Switch Notebook 1U high rack for rack-mount placement, or horizontally on the wall. Desktop Placement 1. Attach the rubber feet to the recessed areas on the bottom of the Switch. 2. Place the Switch on a desktop near an AC power source. 3. Keep enough ventilation space for the Switch and check the environmental restrictions mentioned in "Appendix D: Specifications" as you are placing the Switch. 4. Connect the Switch to network devices according to the Hardware Installation instructions below. Wireless Desktop Notebook Access Point Typical Network Configuration When you connect your network devices, make sure you don't exceed the maximum cabling distance of 100 meters (328 feet). Positioning the Switch Before you choose a location for the Switch, observe the following guidelines: •• Make sure that the Switch is accessible and that the cables can be connected easily. •• Keep cabling away from sources of electrical noise, power lines, and fluorescent lighting fixtures. •• Position the Switch away from water and moisture sources. •• To ensure adequate air flow around the Switch, be sure to provide a minimum clearance of two inches (50mm). •• Do not stack free-standing Switches more than four units high. Placement Options There are three ways to physically install the Switch, either set the Switch on its four rubber feet for desktop placement, mount the switch in a standard-sized, 19-inch 8-Port 10/100/1000 Gigabit Switch with Webview 4
-
 1
1 -
2
-
3
-
4
-
 5
5 -
 6
6 -
 7
7 -
 8
8 -
 9
9 -
 10
10 -
 11
11 -
 12
12 -
 13
13 -
 14
14 -
 15
15 -
16
-
17
-
18
-
19
-
20
-
21
-
22
-
23
-
24
-
25
-
26
-
27
-
28
-
29
-
30
-
31
-
32
-
33
-
34
-
35
-
36
-
37
-
38
-
39
-
40
-
41
-
42
-
43
-
44
-
45
-
46
-
47
-
48
-
49
-
50
-
51
-
52
-
53
-
54
-
55
-
56
-
57
-
58
-
59
-
60
-
61
-
62
-
63
-
64
-
65
-
66
-
67
-
68
-
69
-
70
-
71
-
72
-
73
-
74
-
75
-
76
-
77
-
78
-
79
-
80
-
81
 |
 |
