Cisco SPA112 Quick Start Guide - Page 4
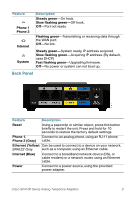
Connecting the Equipment, Internet, Phone 1, Phone 2 Gray, Power - faxing
 |
View all Cisco SPA112 manuals
Add to My Manuals
Save this manual to your list of manuals |
Page 4 highlights
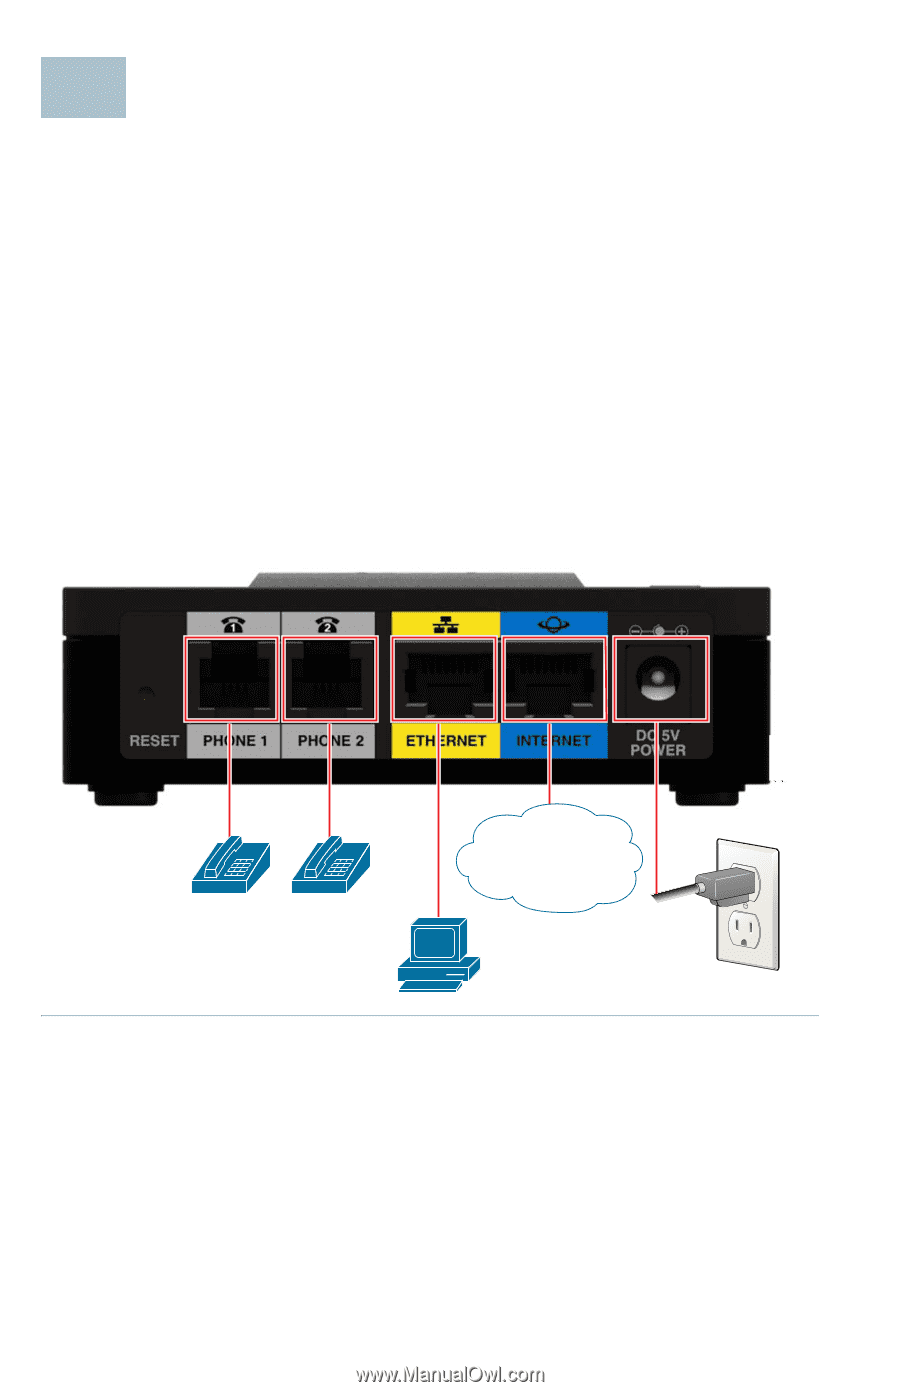
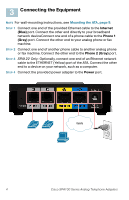
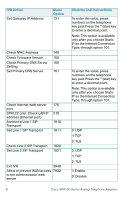
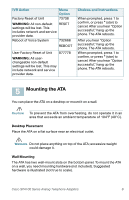
3 Connecting the Equipment NOTE For wall-mounting instructions, see Mounting the ATA, page 9. STEP 1 Connect one end of the provided Ethernet cable to the Internet (Blue) port. Connect the other end directly to your broadband network deviceConnect one end of a phone cable to the Phone 1 (Gray) port. Connect the other end to your analog phone or fax machine. STEP 2 Connect one end of another phone cable to another analog phone or fax machine. Connect the other end to the Phone 2 (Gray) port. STEP 3 SPA122 Only: Optionally, connect one end of an Ethernet network cable to the ETHERNET (Yellow) port of the ATA. Connect the other end to a device on your network, such as a computer. STEP 4 Connect the provided power adapter to the Power port. WAN 239795 4 Cisco SPA100 Series Analog Telephone Adapters
-
 1
1 -
 2
2 -
 3
3 -
 4
4 -
 5
5 -
 6
6 -
 7
7 -
 8
8 -
 9
9 -
 10
10 -
11
-
12
 |
 |