Cisco WBP54G User Guide - Page 21
Connect the Attached Bridge Power Cable to - wireless g bridge for phone adapters
 |
UPC - 745883566358
View all Cisco WBP54G manuals
Add to My Manuals
Save this manual to your list of manuals |
Page 21 highlights
Wireless-G Bridge for Phone Adapters 15. Connect the power cable of the Bridge to the Power port of the phone adapter or IP phone. Then connect the power adapter to an electrical outlet. Make sure the Bridge's Ethernet and Wireless LEDs are solidly lit or flashing. Click Next to proceed, or click Back to return to the previous screen. 16. Make sure your cable connections match the cable connections shown on-screen. Click Next to proceed, or click Back to return to the previous screen. Figure 4-18: Connect the Attached Bridge Power Cable to the Phone Adapter Screen Chapter 4: Setting Up and Connecting the Wireless-G Bridge for Phone Adapters Running the Setup Wizard Figure 4-19: Wireless is Now Active Screen 15
-
 1
1 -
2
-
3
-
4
-
5
-
6
-
7
-
8
-
9
-
10
-
11
-
12
-
13
-
14
-
15
-
 16
16 -
 17
17 -
 18
18 -
 19
19 -
 20
20 -
 21
21 -
 22
22 -
 23
23 -
 24
24 -
 25
25 -
 26
26 -
27
-
28
-
29
-
30
-
31
-
32
-
33
-
34
-
35
-
36
-
37
-
38
-
39
-
40
-
41
-
42
-
43
-
44
-
45
-
46
-
47
-
48
-
49
-
50
-
51
-
52
 |
 |

15
Chapter 4: Setting Up and Connecting the Wireless-G Bridge for Phone Adapters
Running the Setup Wizard
Wireless-G Bridge for Phone Adapters
15. Connect the power cable of the Bridge to the Power port of the phone adapter or IP phone. Then connect the
power adapter to an electrical outlet.
Make sure the Bridge’s Ethernet and Wireless LEDs are solidly lit or flashing.
Click Next to proceed, or click Back to return to the previous screen.
16. Make sure your cable connections match the cable connections shown on-screen.
Click Next to proceed, or click Back to return to the previous screen.
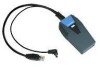
Figure 4-18: Connect the Attached Bridge Power Cable to the
Phone Adapter Screen
Figure 4-19: Wireless is Now Active Screen