Cobra 29 LTD NW 29 LTD Manual - Page 2
Installation
 |
View all Cobra 29 LTD NW manuals
Add to My Manuals
Save this manual to your list of manuals |
Page 2 highlights
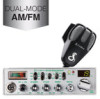
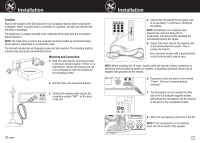
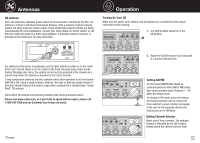
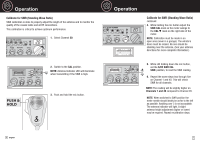
Installation Location Plan for the location of the CB transceiver and microphone bracket before starting the installation. Select a location that is convenient for operation, yet does not interfere with the driver or passenger. The transceiver is usually mounted to the underside of the dash with the microphone bracket beside it. NOTE: The transceiver is held in the universal mounting bracket by two thumbscrews which allow for adjustment to a convenient angle. The bracket includes two self-tapping screws and star washers. The mounting must be mechanically strong and conveniently located. Mounting and Connection 1. Hold the radio with the mounting bracket in the exact desired location. If there is no interference, remove the bracket and use it as a template to mark the location for the mounting screws. 2. Drill the holes and secure the bracket. 3. Connect the antenna cable plug to the receptacle marked "ANT" on the back of the unit. 2 English Installation 4. Connect the red lead of the DC power cord to an accessory 12 volt fuse or directly to the battery. NOTE: Connecting to an accessory fuse prevents the unit from being left on accidentally, and also permits operating the unit without running the engine. 5. Connect the black lead to the negative side of the vehicle electrical system. This is usually the chassis. Any convenient location with a good electrical contact (remove paint) may be used. NOTE: Before installing the CB radio, visually check the vehicle's battery connection to determine which terminal is positive or negative. A negatively grounded vehicle has its negative lead grounded to the chassis. 6. Plug power cable into back of unit marked "Power". Be sure to observe polarity markings. 7. The microphone can be mounted to either side of the CB using the supplied screws. Alternatively the microphone can be mounted to the dash or any convenient location. 29 LTD CLASSIC 8. Attach the microphone to the front of thFeM CB. NORMAL NOTE: If the microphone is not connected, audio will not be heard at the speaker. PUSH AM/FM 3
-
 1
1 -
 2
2 -
 3
3 -
 4
4 -
 5
5 -
 6
6 -
 7
7 -
 8
8 -
9
-
10
-
11
-
12
-
13
-
14
-
15
 |
 |
