Compaq Presario SR1000 Upgrading and Servicing Guide - Page 9
Replacing or Adding a Drive - hard drive removal
 |
View all Compaq Presario SR1000 manuals
Add to My Manuals
Save this manual to your list of manuals |
Page 9 highlights
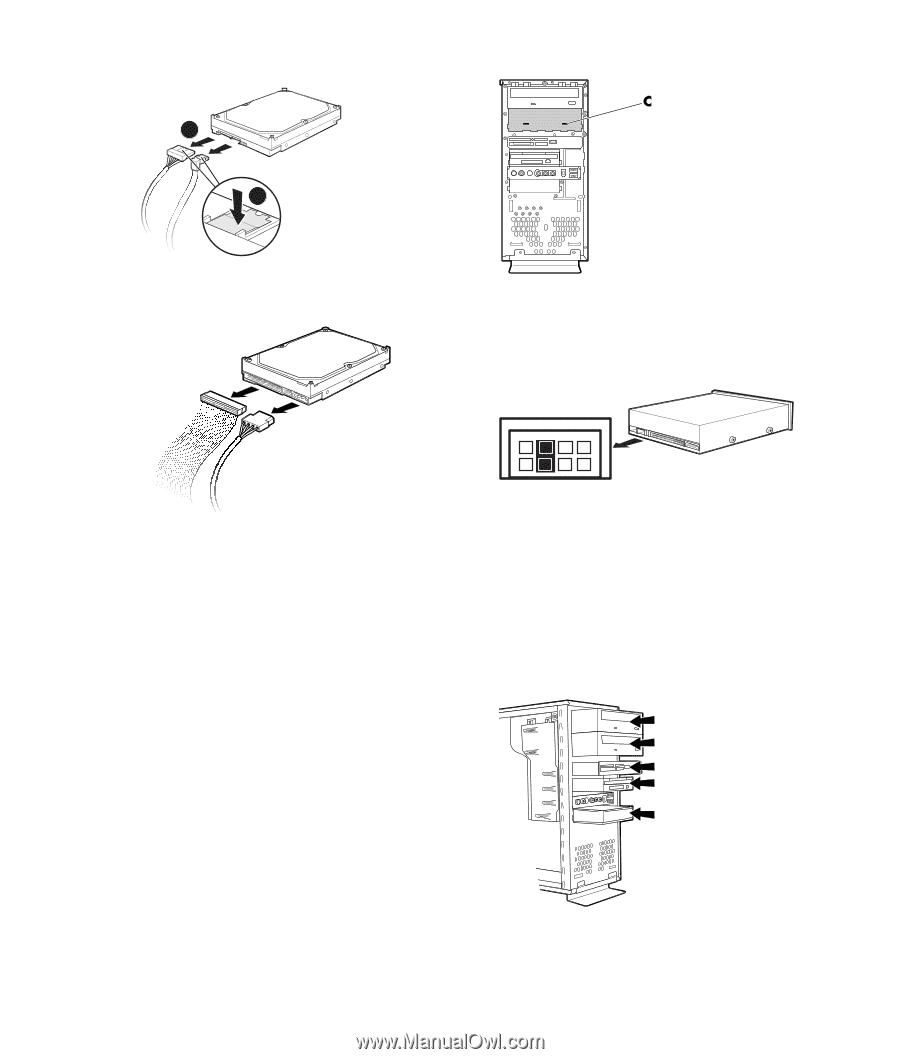
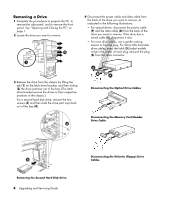
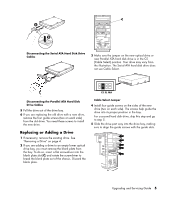
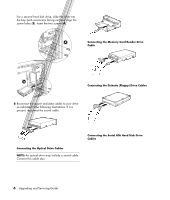
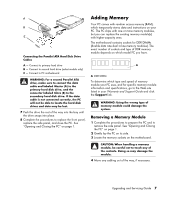
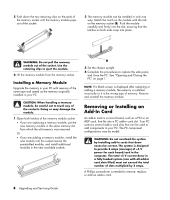
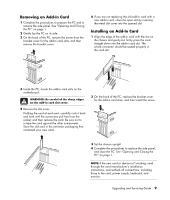
6 5 Disconnecting the Serial ATA Hard Disk Drive Cables 3 Make sure the jumper on the new optical drive or new Parallel ATA hard disk drive is in the CS (Cable Select) position. Your drive may vary from the illustration. The Serial ATA hard disk drive does not use Cable Select. CS SL MA Disconnecting the Parallel ATA Hard Disk Drive Cables 5 Pull the drive out of the drive bay. 6 If you are replacing the old drive with a new drive, remove the four guide screws (two on each side) from the old drive. You need these screws to install the new drive. Replacing or Adding a Drive 1 If necessary, remove the existing drive. See "Removing a Drive" on page 4. 2 If you are adding a drive to an empty lower optical drive bay, you must remove the blank plate from the bay. To do so, insert a flat screwdriver into the blank plate slot (C) and rotate the screwdriver to break the blank plate out of the chassis. Discard the blank plate. Cable Select Jumper 4 Install four guide screws on the sides of the new drive (two on each side). The screws help guide the drive into its proper position in the bay. For a second hard disk drive, skip this step and go to step 5. 5 Slide the drive part way into the drive bay, making sure to align the guide screws with the guide slots. Upgrading and Servicing Guide 5
-
 1
1 -
2
-
3
-
 4
4 -
 5
5 -
 6
6 -
 7
7 -
 8
8 -
 9
9 -
 10
10 -
 11
11 -
 12
12 -
 13
13 -
 14
14 -
15
-
16
 |
 |