Compaq ProLiant 1600 Microsoft Small Business Server 2000 Installation Instruc - Page 11
Task 3, Next., Finish, Task 4, I Agree, Install - configuration cd
 |
View all Compaq ProLiant 1600 manuals
Add to My Manuals
Save this manual to your list of manuals |
Page 11 highlights
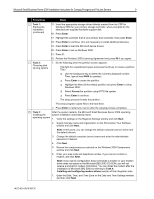
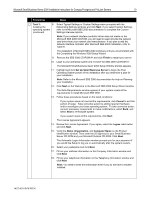
Microsoft Small Business Server 2000 Installation Instructions for Compaq Prosignia and ProLiant Servers 11 √ Procedures Steps … Task 3: 19. Verify/Enter your IP Address, Subnet Mask, and Default Gateway on the Installing the Server Network Card Configuration window and click Next. operating system (continued) 20. Enter your Full DNS name for new domain and Domain NetBIOS name on the New Domain Information window and click Next. 21. Select folders to store data for each component on the Data Folders windows and click Next. The Windows 2000 configuration folder choices include: • Networking configuration • Domain configuration • Terminal services • Network identification Setup starts to copy files, automatically configures your Active Directory, and restarts the server. 22. Select and modify components to fit your custom solution on the Component Selection window and click Next. 23. Choose whether you want to enable caching on the ISA Server Cache Drives window and click Next. 24. Select IP address ranges to load into the Local Address Table on the ISA Server Construct Local Address Table window and click Next. 25. Enter the IP address ranges on the ISA Server Local Address Table Configuration window and click Next. After a file copy, you are prompted for SBS 2000 CD-ROM #2. 26. Insert SBS 2000 CD-ROM #2 and click OK. File copy continues. You are prompted for SBS 2000 CD-ROM #3. 27. Insert SBS 2000 CD-ROM #3 and click OK. File copy continues. You are prompted for the Microsoft Outlook SR-1 Disc (CD-ROM #4). 28. Insert CD-ROM #4 and click OK. File copy continues. 29. Review the messages on the Component Messages window, which appears if you received any errors during the installation process, and click Next. The Completing the Microsoft Small Business Server 2000 Wizard window appears. 30. Click Finish and then you will be prompted to restart your operating system to complete the installation. The To do list appears. 31. Select the tasks you wish to complete at this time. … Task 4: Updating the system drivers 1. Insert the SmartStart and Support Software CD-ROM into the CD-ROM drive once Microsoft SBS 2000 installation completes. 2. Select the I Agree check box and click OK. 3. Select to install the CSP for Microsoft Windows 2000 and click OK when the System Utilities interactive window appears. This action launches the Compaq Remote Deployment Utility. 4. Select the Install button on the Compaq Remote Deployment Utility window to install all the components applicable to your server. 145Z-0301B-WWEN
-
 1
1 -
2
-
3
-
4
-
5
-
 6
6 -
 7
7 -
 8
8 -
 9
9 -
 10
10 -
 11
11 -
 12
12 -
 13
13 -
 14
14 -
 15
15
 |
 |
