Craftsman 10723 Owners Manual - Page 8
OPERATION cont.
 |
UPC - 822465131125
View all Craftsman 10723 manuals
Add to My Manuals
Save this manual to your list of manuals |
Page 8 highlights
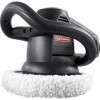
OPERATION cont. RUNNING YOUR BUFFER / POLISHER AND WAXING VEHICLE 1. After plugging tool into extension cord, loop extension cord over tool's stub length plug. Then wrap hook and loop strip around extension cord to secure it in place. Fig. 6 2. To avoid splashing wax, ALWAYS start and stop the buffer / polisher against the surface to be polished. 3. Place the extension cord over your shoulder to keep it safely out of your way (see Fig. 6). 4. Place buffer / polisher against vehicle and turn buffer / polisher ON by sliding switch to On position. 5. Apply wax in a straight line with either a side-to-side or back and forth motion. ALWAYS use broad, even strokes when applying wax (See Fig. 7). 6. Start applying wax to the flat surfaces (hood, trunk and roof) first. Wax one section at a time (see Fig. 8). Fig. 7 7. After flat surfaces are covered with wax, do the sides. The perimeter handle system allows easy polishing of horizontal and vertical surfaces. Hold tool with the cord hanging free (see Fig. 9). 8. Apply wax in a thin, even coat. Too much wax does not add any more protection and only makes the wax removal more difficult. 9. The random orbit motion of the buffer / polisher provides an application that cannot be duplicated, not even "by hand". Fig. 8 13 LEFT RIGHT 24 IMPORTANT: DO NOT apply excessive pressure against the work surface with this tool. The random orbital motion feature on this tool will perform better when less pressure is applied. Applying excessive pressure will slow the random orbital motion and reduce the effectiveness of the tool. Fig. 9 10. It is easiest to apply the wax to the entire surface before starting the removal phase; however, follow the specific recommendations of the wax or polish being used. 11. When you have finished applying wax with the applicator, bonnet, SHUT OFF the buffer / polisher before removing from the car's surface. 14 OPERATION cont. RUNNING YOUR BUFFER / POLISHER AND WAXING VEHICLE cont. 12. You can use the hand applicator pad included with the buffer / polisher to hand wax all the hard-to-reach surfaces (under bumpers, around door handles, etc.), or remove the wax applicator bonnet and use it to hand polish all the hard-to-reach surfaces (see Fig. 10). Fig. 10 13. Properly dispose of wax applicator bonnet. ATTACHING THE POLISHING BONNET TO THE FOAM PAD (Fig. 11) ! WARNING: When changing accessories, BE SURE that the switch is in the OFF position and the cord is unplugged. 1. Place the terry bonnet on foam pad as shown in Fig. 11. 2. ALWAYS make sure that the elastic strip on the bottom of the bonnet is securely tucked on the underside of the foam pad. Fig. 11 BUFFING AND POLISHING - REMOVING THE WAX FROM THE SURFACE (See Fig. 12) NOTE: Remove wax in the same order in which Fig. 12 it was applied. 1. Wait until wax has dried to an even haze on vehicle. 2. Place extension cord over your shoulder. 3. Turn buffer / polisher ON. IMPORTANT: DO NOT apply excessive pressure against the work surface with this tool. The random orbital motion feature on this tool will perform better when less pressure is applied. Appling excessive pressure will slow the random orbital motion and reduce the effectiveness of the tool. NOTE: For best results, use long, sweeping strokes in a criss-cross pattern when removing wax. 4. Buff and polish the entire surface until all dried wax is removed. Remove the bonnet from time to time and shake out the dried wax residue. A bonnet with excess residue will cause streaking. You may need to replace the bonnet with a new one if you can't get it clean enough to avoid streaking. 5. Use a clean terry cloth bonnet for final buffing and polishing, or use the polishing bonnet for the ultimate "showroom" shine. 15


