Craftsman 11543 Operation Manual - Page 16
Using, The Auxiliary
 |
View all Craftsman 11543 manuals
Add to My Manuals
Save this manual to your list of manuals |
Page 16 highlights
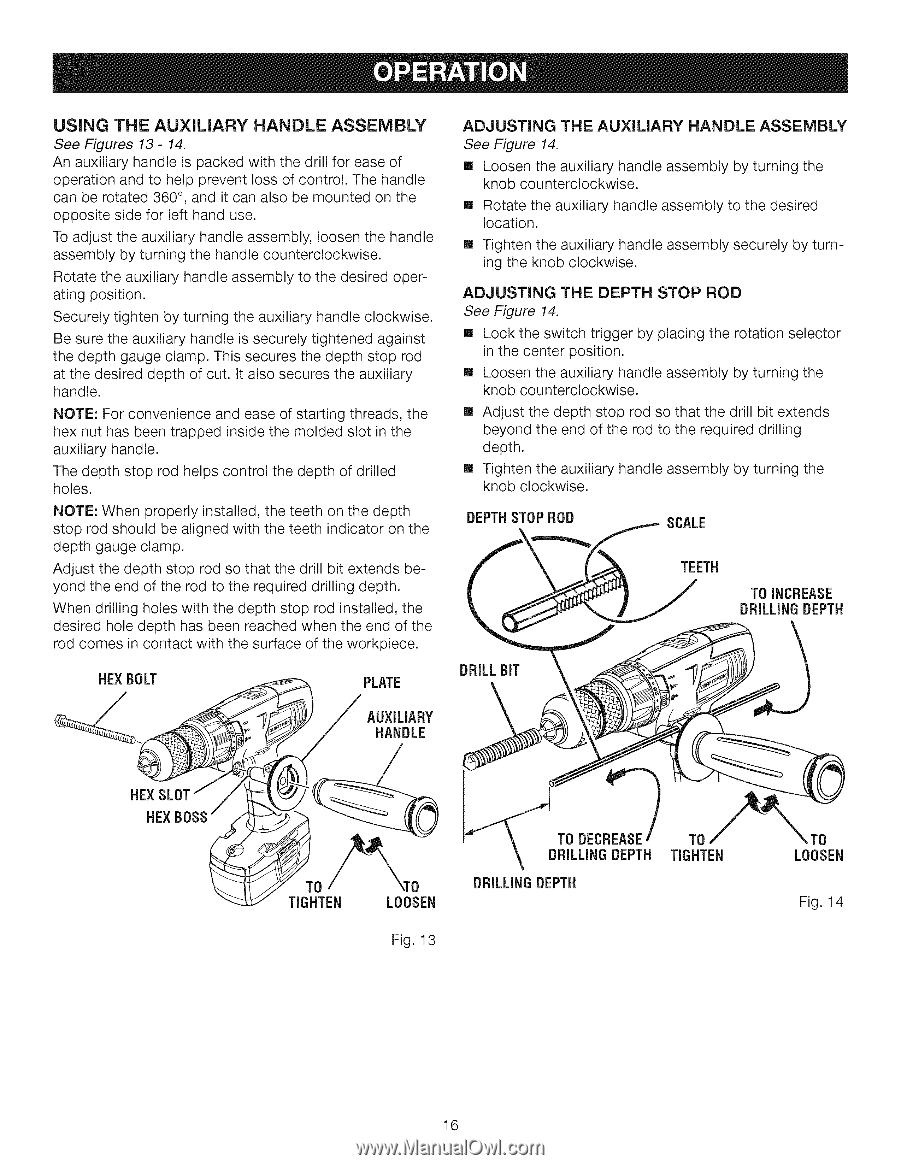
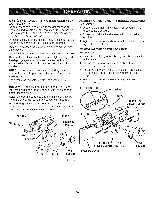
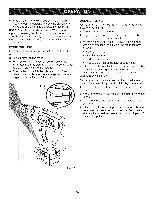
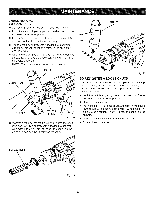
USING THE AUXiLiARY HANDLE ASSEMBLY See Figures 13- 14. An auxiliary handle is packed with the drill for ease of operation and to help prevent loss of control. The handle can be rotated 360 °, and it can also be mounted on the opposite side for left hand use. To adjust the auxiliary handle assembly, loosen the handle assembly by turning the handle counterclockwise. Rotate the auxiliary handle assembly to the desired operating position. Securely tighten by turning the auxiliary handle clockwise. Be sure the auxiliary handle is securely tightened against the depth gauge clamp. This secures the depth stop rod at the desired depth of cut. It also secures the auxiliary handle. NOTE: For convenience and ease of starting threads, the hex nut has been trapped inside the molded slot in the auxiliary handle. The depth stop rod helps control the depth of drilled holes. NOTE: When properly installed, the teeth on the depth stop rod should be aligned with the teeth indicator on the depth gauge clamp. Adjust the depth stop rod so that the drill bit extends beyond the end of the rod to the required drilling depth. When drilling holes with the depth stop rod installed, the desired hole depth has been reached when the end of the rod comes in contact with the surface of the workpiece. HEXBOLT PLATE ADJUSTING THE AUXILIARY HANDLE ASSEMBLY See Figure 14. [] Loosen the auxiliary handle assembly by turning the knob counterclockwise. [] Rotate the auxiliary handle assembly to the desired location. [] Tighten the auxiliary handle assembly securely by turning the knob clockwise. ADJUSTING THE DEPTH STOP ROD See Figure 14. [] Lock the switch trigger by placing the rotation selector in the center position. [] Loosen the auxiliary handle assembly by turning the knob counterclockwise. [] Adjust the depth stop rod so that the drill bit extends beyond the end of the rod to the required drilling depth. [] Tighten the auxiliary handle assembly by turning the knob clockwise. DEPTHSTOPR0D SCALE TEETH TO INCREASE DRILLINGDEPTH DRILL BIT HEX FO i_?TO TIGHTEN LOOSEN Fig. 13 DRiLLiNG DEPTH TO TIGHTEN ,TO LOOSEN Fig. 14 16
-
 1
1 -
2
-
3
-
4
-
5
-
6
-
7
-
8
-
9
-
10
-
 11
11 -
 12
12 -
 13
13 -
 14
14 -
 15
15 -
 16
16 -
 17
17 -
 18
18 -
 19
19 -
 20
20 -
 21
21 -
22
 |
 |