Craftsman 11543 Operation Manual - Page 18
thechuckstopsturning.When
 |
View all Craftsman 11543 manuals
Add to My Manuals
Save this manual to your list of manuals |
Page 18 highlights
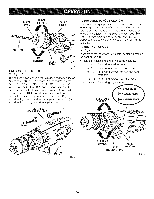
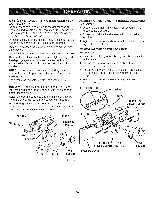
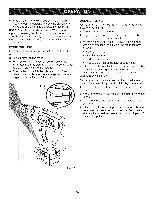
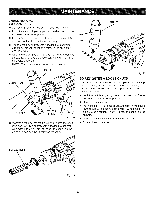
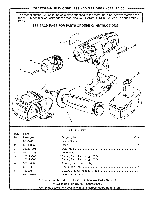
[] Ifthe bitjamsintheworkpieceor ifthe drillstalls, stopthetoolimmediatelyR.emovethe bitfromthe workpieceanddeterminethe reasonforjamming. NOTET: hisdrillhasanelectricbrakeW. hentheswitch triggeris releasedth, e chuckstopsturning.Whenthe brakeis functioningproperlys,parkswill bevisiblethrough theventslotsonthe housingT. hisis normaal ndisthe actionofthe brake. WOODDRILLING For maximum performance, use high speed steel bits for wood drilling. [] Select normal drilling mode. [] Begin drilling at a very low speed to prevent the bit from slipping off the starting point. Increase the speed as the drill bit bites into the material. [] When drilling through holes, place a block of wood behind the workpiece to prevent ragged or splintered edges on the back side of the hole. LEVEL METAL DRILLING For maximum performance, use high speed steel bits for metal or steel drilling. [] Select normal drilling mode. [] Begin drilling at a very low speed to prevent the bit from slipping off the starting point. [] Maintain a speed and pressure which allows cutting without overheating the bit. Applying too much pressure will: • Overheat the drill; Wear the bearings; Bend or burn bits; and Produce off-center or irregular-shaped holes. [] When drilling large holes in metal, start with a small bit, then finish with a larger bit. Also, lubricate the bit with oil to improve drilling action and increase bit life. MASONRY DRILLING For maximum performance, use carbide-tipped masonry impact bits when drilling holes in brick, tile, concrete, etc. [] Slide adjustment button on hammer drill left for hammer mode. [] Apply light pressure and medium speed for best results in brick. [] Apply additional pressure for hard materials such as concrete. [] When drilling holes in tile, practice on a scrap piece to determine the best speed and pressure. Begin drilling at a very low speed to prevent the bit from slipping off the starting point. Fig. 17 18
-
 1
1 -
2
-
3
-
4
-
5
-
6
-
7
-
8
-
9
-
10
-
11
-
12
-
 13
13 -
 14
14 -
 15
15 -
 16
16 -
 17
17 -
 18
18 -
 19
19 -
 20
20 -
 21
21 -
 22
22
 |
 |
