Craftsman 28195 Product Manual
Craftsman 28195 - Professional 7-1/4 Hypoid Saw Manual
 |
View all Craftsman 28195 manuals
Add to My Manuals
Save this manual to your list of manuals |
Craftsman 28195 manual content summary:
- Craftsman 28195 | Product Manual - Page 1
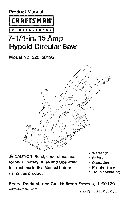
Circular Saw Model No. 320. 28195 CAUTION! Read, understand and follow all Safety Rules and Operating instructions in this Manual before using this product. • Warranty • Safety • Operation • Maintenance • Troubleshooting Sears, Roebuck and Co,, Hoffman Estates, IL 60179 www.craftsman.com PART - Craftsman 28195 | Product Manual - Page 2
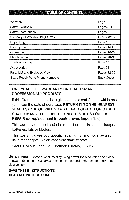
Description Operation Maintenance Troubleshooting Accessories PartsListandExplodeVdiew SearsRepaiPr artsPhoneNumbers Page2 Pages3-4 Pages5-12 Pages12-13 Page13 Pages14-15 Pages16-27 Pages28-30 Page30 Page31 Pages32-35 BackCover ONE YEAR FULL WARRANTY ON CRAFTSMAN PROFESSIONAL ® PRODUCT If this - Craftsman 28195 | Product Manual - Page 3
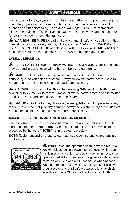
accident-prevention measures. ,_ WARNING: BE SURE to read and understand all safety instructions in this manual, including all safety alert symbols, such as "DANGER," "WARNING," and "CAUTION side shield, available at Sears Stores or other Craftsman Outlets. 283.95 Manual_Revised_07-0623 Page 3 - Craftsman 28195 | Product Manual - Page 4
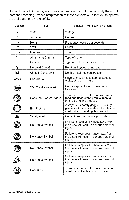
lDocoantiotnse.xpose to rain or use in damp Read the Product Manual Treoadreadnudceunthdeerrsistaknodf ipnrjuordyu,cut smeranmuuasl t before using this product. Eye Protection . Hot Surface Tavooirdedcuocnetatchte wristhk aonf yinhjuorty sourrfdaacem.age, 28195 Manual_Revised_07-0623 Page 4 - Craftsman 28195 | Product Manual - Page 5
_L, WARNING: BE SURE to read and understand all instructions in this manual before using this saw. Failure to follow all instructions may result electric shock, fire, and/or serious personal balance enables better control of the tool in unexpected situations. 28195 Manual_Revised_07-0623 Page 5 - Craftsman 28195 | Product Manual - Page 6
TOOL USE AND CARE Always use clamps or other practical ways to secure and support the workpiece to a stable platform. Holding the work by hand or against that may affect the tool's operation. If damaged, have the tool serviced before using. Many accidents are caused by poorly maintained tools. Use - Craftsman 28195 | Product Manual - Page 7
risk of electric shock. Inspect tool cords for damage. Have damaged tool cords repaired at a Sears Service Center. Be sure to stay constantly aware of the cord location, and keep it well away from immediately. Damaged cords increase the risk of electric shock. 28195 Manual_Revised_07-0623 Page 7 - Craftsman 28195 | Product Manual - Page 8
each use. If damaged, replace immediately. Never use the tool with a damaged cord; touching the damaged area could cause electrical shock, resulting in serious injury. 28195 Manual_Revised_07-0623 Page 8 - Craftsman 28195 | Product Manual - Page 9
personnel could result in a risk of injury. • When servicing a tool, use only identical replacement parts. Follow instructions in the maintenance section of this manual. Use of unauthorized parts or failure to follow maintenance instructions may create a risk of electric shock or injury. SAFETY - Craftsman 28195 | Product Manual - Page 10
operating properly, they must be serviced before use. The lower guard The lower guard should be retracted manually only for making special cuts, It is important to support the workpiece properly in rip fence or straight edge guide when performing rip cuts. This 28195 Manual_Revised_07-0623 Page 10 - Craftsman 28195 | Product Manual - Page 11
ADDITIONAL RULES FOR SAFE OPERATION • Know your power tool. Read this product manual carefully. Learn the applications and limitations, as well as the specific potential hazards them repaired at your nearest Sears Service Center. Be aware of the cord location. 28195 Manual_Revised_07-0623 Page 11 - Craftsman 28195 | Product Manual - Page 12
repaired or replaced at a Sears Service Center. Inspect lumber and remove all nails from lumber before sawing. Save these instructions. Refer to them frequently and use them to instruct others who may use this bent (or set) outward from the face of the blade. 28195 Manual_Revised_07-0623 Page 12 - Craftsman 28195 | Product Manual - Page 13
have carefully inspected and satisfactorily operated the tool. 4. If any parts are damaged or missing, return the product for replacement. PARTS LIST (Fig. 1) Fig. 1 2. Edge Guide 3. Blade Wrench 1.7-1/4-in Hypoid Circular Saw with Saw Blade 28195 Manual_Revised_07-0623 Page 13 - Craftsman 28195 | Product Manual - Page 14
KNOW YOUR HYPOID CIRCULAR SAW (Fig. 2) Fig. 2 Front Handle Rear Handle Upper Blade Guard Trigger Switch Bevel Adjustment Locking Lever Bevel Scale Base Edge Guide Locking Knob Blade Spindle Clamping Screw Adjustment Lever Lower Blade Guard Lever Lower Blade Guard Front Handle Motor Housing - Craftsman 28195 | Product Manual - Page 15
Depth at 45 ° Maximum Bevel Angle PRODUCT SPECIFICATIONS 15 Amps 120V, 60Hz AC 4400RPM 7-1/4 in. (184mm) 2-3/8 in. (59.5mm) 1-13/16 in. (42.5mm) 51° 28195 Manual_Revised_07-0623 Page i5 - Craftsman 28195 | Product Manual - Page 16
returns to the closed position. If, for any reason, your lower blade guard and bumper do not close freely, take the saw to your nearest Craftsman Repair Center for service before using it. 28195 Manual_Revised_07-0623 Page 16 - Craftsman 28195 | Product Manual - Page 17
knots or nails in the workpiece can cause kickback. [ Sawing into wet or warped lumber can cause kickback (Fig. 4a). Forcing a cut, or not supporting the workpiece correctly can cause kickback (Fig. 4a). Kickback can result from tool misuse and/or incorrect operating procedures or conditions - Craftsman 28195 | Product Manual - Page 18
knot or nail. 4. De not cut warped or wet lumber (Fig. 4a). 5. Always support large panels to minimize the risk of blade pinching and kickback. Large panels tend to sag under their own weight narrow kerfs, which cause excessive friction, blade binding, and Kickback. 28195 Manual_Revised_07-0623 Page 18 - Craftsman 28195 | Product Manual - Page 19
Kickback. STARTING/STOPPING THE SAW To start the saw: Depress the trigger switch (Fig. 7). Fig. 7 Always allow the blade to reach full speed, and then guide the saw into the workpiece. To stop the saw: Release the trigger switch. After you release the trigger switch, allow the blade to come to - Craftsman 28195 | Product Manual - Page 20
to clamp and support the workpiece and loss of control of the saw could result in serious injury. WARNING: Always maintain proper control of the saw to make sawing safer and easier. Loss of control of the saw could cause an accident resulting in possibly serious injury 28195 Manual_Revised_07-0623 - Craftsman 28195 | Product Manual - Page 21
Always support the workpiece so the cut will be on your right. Always clamp the workpiece so it will not move during the cut. Place the workpiece with the good side down. Figt 10 NOTE: The good side cuts and could shorten the life of the saw or cause Kickback. 28195 Manual_Revised_07-0623 Page 21 - Craftsman 28195 | Product Manual - Page 22
WARNING: Always securely clamp and support the workpiece. Always maintain proper control of the saw. Failure to clamp and support the workpiece and loss of front of the saw base. MAKING RIP CUTS Always use a guide when making long or wide rip cuts with your saw. You can use either a straight edge - Craftsman 28195 | Product Manual - Page 23
support the workpiece, combined with loss of control of the saw, could result in serious injury. You can make an efficient rip guide GUIDE The saw comes with an edge guide, it allows you to make accurate parallel cuts. The edge guide use the edge guide that was guide so that the ruler side of - Craftsman 28195 | Product Manual - Page 24
When using the edge guide, position the face of the edge guide firmly against the edge of the workpiece. This will help to make a true cut without binding is indicated on the bevel scale. 4. Tighten the bevel adjustment lever securely. Bevel Adjustment Lever 28195 Manual_Revised_07-0623 Page 24 - Craftsman 28195 | Product Manual - Page 25
of the saw. Failure to clamp and support the workpiece and loss of control of saw switch to start the saw. Always allow the blade to reach full speed, then guide the saw into the workpiece. 6. After completing your cut, release the trigger switch injury. 28195 Manual_Revised_07-0623 Page 25 - Craftsman 28195 | Product Manual - Page 26
the lower blade guard lever to swing the guard up. ,_ WARNING: Always use the lever to raise the lower blade guard to avoid serious injury. 28195 Manual_Revised_07-0623 Page 26 - Craftsman 28195 | Product Manual - Page 27
Hook the hook until it snaps into the open position. When not in use, always lower the hook until it snaps into the closed position. 28195 Manual_Revised_07-0623 Page 27 - Craftsman 28195 | Product Manual - Page 28
should be performed by a qualified service technician at a Craftsman Service Center. _L. WARNING: For maintenance allows for long life and trouble-free operation. A cleaning, lubrication cleaning. Replacement brush sets are available through Craftsman Parts and Repair Centers. 1. Unplug the saw - Craftsman 28195 | Product Manual - Page 29
brushes clean and sliding freely in their guide channels. Fig. 20 NOTE: To reinstall period. 4. Insert new brush assemblies into the guide channels with the carbon part going in first, Remember to replace both end caps after inspecting or servicing brushes. Tighten the caps snugly, but do not - Craftsman 28195 | Product Manual - Page 30
does not need to be removed. 10. Put a drop of oil onto the inner bushing washer and outer "D" washer where they will touch the blade. 28195 Manual_Revised_07-0623 Page 30 - Craftsman 28195 | Product Manual - Page 31
bent. ,, Blade is bent. Edge guide or straight edge is not being bent. * Workpiece is not properly supported. * Incorrect blade is being Craftsman outlets offer a large selection of 7-1/4-inch Craftsman Craftsman outlets also offer sawhorses, combination framing squares, straight edges, edge guides - Craftsman 28195 | Product Manual - Page 32
7-1/4-in. HYPOID CIRCULAR SAW - MODEL NUMBER 320. 28195 The Model Number will be found on the Nameplate. Always mention the Model Number in all correspondence regarding your tool. \ \ ,/ / / / / / / / ©/ ,/ © ,© / © _J 28195 Manual_Revised_07-0623 Page 32 - Craftsman 28195 | Product Manual - Page 33
3320504000 21 5620039000 22 3123566000 23 5630217000 24 5650017000 25 2740246000 26 3123762000 27 5610235000 28 2822409000 29 5690146000 28195 Manual_Revised_07-0623 Nylon String Power Cord & Plug Cord Guard Connect Cord Anchorage Right Handle ASSY Tapping Screw Thread Forming - Craftsman 28195 | Product Manual - Page 34
1 54 3402230000 Key 1 55 5620334000 Hexagon Socket Screw 1 56 3121051000 Stopper 1 57 3704087000 Circlips For Shaft 1 58 3700574000 Rip Fence 1 59 2822410000 Base Plate Set 1 28195 Manual_Revised_07-0623 Page 34 - Craftsman 28195 | Product Manual - Page 35
28195 Manual_Revised_07-0623 Page 35 - Craftsman 28195 | Product Manual - Page 36
the replacement parts, accessories and owner's manuals that you need to do-it-yourself. For Sears professional installation of home appliances and items like , call or go on-line for the nearest Sears Parts & Repair Service Center 1-800-488-1222 (U.S.A.) 1-800-469-4663 (Canada) Call anytime
-
 1
1 -
 2
2 -
 3
3 -
 4
4 -
 5
5 -
 6
6 -
 7
7 -
8
-
9
-
10
-
11
-
12
-
13
-
14
-
15
-
16
-
17
-
18
-
19
-
20
-
21
-
22
-
23
-
24
-
25
-
26
-
27
-
28
-
29
-
30
-
31
-
32
-
33
-
34
-
35
-
36
 |
 |
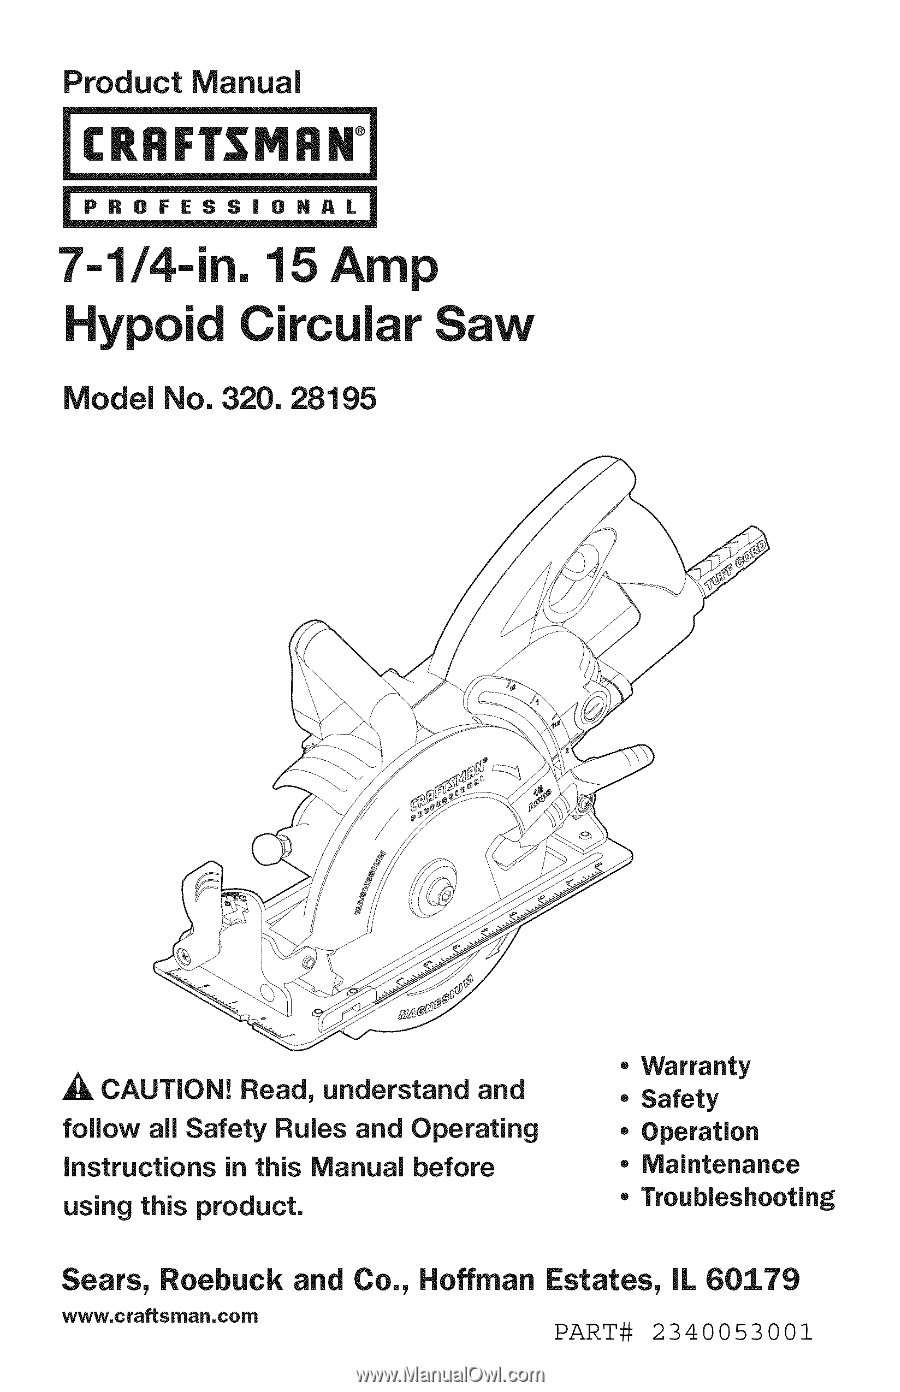
Product
Manual
7-1/4=in.
15
Amp
Hypoid Circular
Saw
Model
No. 320.
28195
CAUTION!
Read,
understand
and
follow
all
Safety
Rules
and
Operating
instructions
in this
Manual
before
using
this
product.
•
Warranty
•
Safety
•
Operation
•
Maintenance
•
Troubleshooting
Sears, Roebuck
and
Co,, Hoffman Estates,
IL 60179
www.craftsman.com
PART#
2 3 4 0 0 5 3 0 01