Craftsman 88957 Operation Manual
Craftsman 88957 - 179 CC 24" 2 Stage Snow Thrower Manual
 |
View all Craftsman 88957 manuals
Add to My Manuals
Save this manual to your list of manuals |
Craftsman 88957 manual content summary:
- Craftsman 88957 | Operation Manual - Page 1
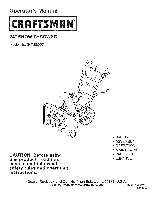
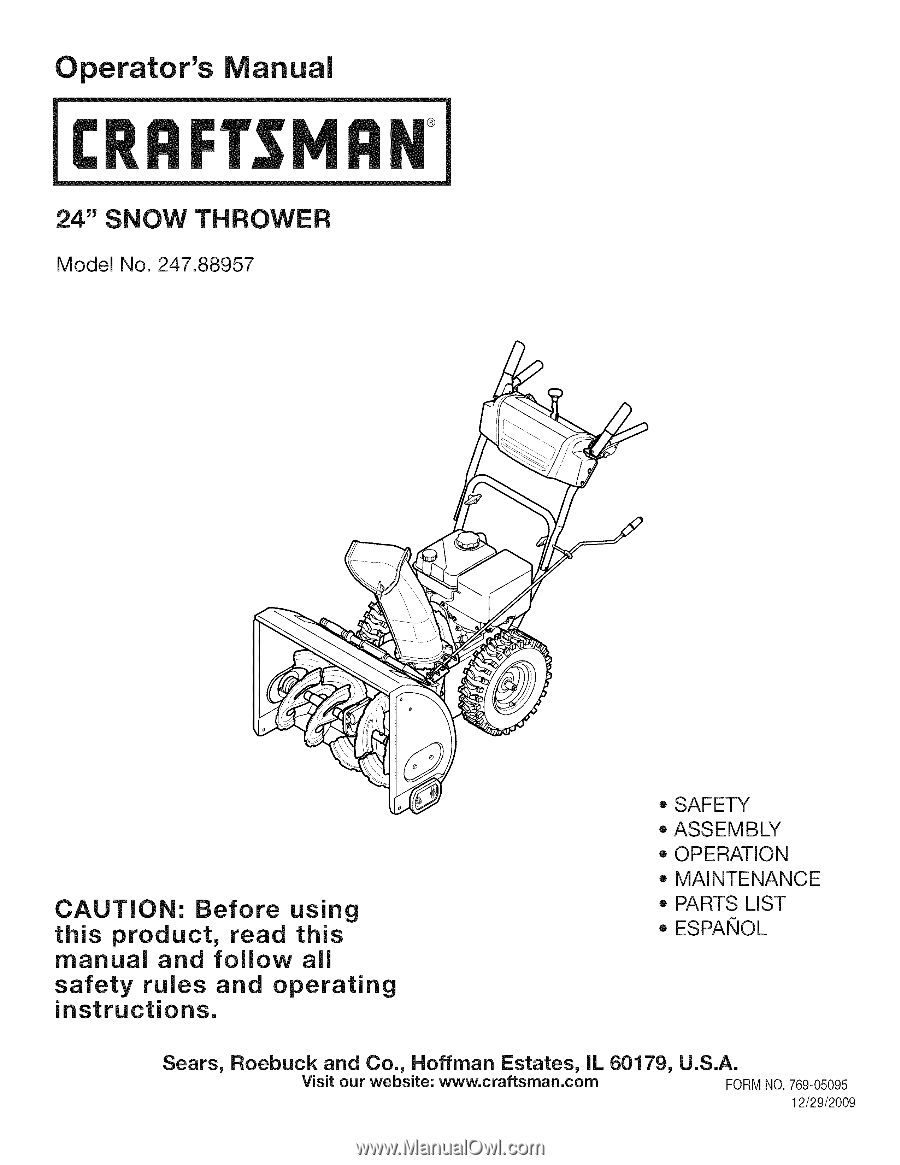
" SNOW THROWER Model No. 247.88957 CAUTION: Before using this product, read this manual and follow all safety rules and operating instructions. o SAFETY ASSEMBLY OPERATION MAINTENANCE PARTS LIST o ESPANOL Sears, Roebuck and Co., Hoffman Estates, IL 60179, U.S.A. Visit our website: www.craftsman - Craftsman 88957 | Operation Manual - Page 2
Service Sears will NOT pay for: • Expendableitemsthat becomewornduringnormaluse, includingbutnot limitedto auger blades,skid shoes,shaveplate, shearpins, spark plug,air cleaner,belts,and oil filter. • Standardmaintenanceservicing,oil Engine to .030" © Sears Brands,LLC Model Number Serial Number - Craftsman 88957 | Operation Manual - Page 3
machinewas builtto be operatedaccordingto the safeoperation practicesin this manual.As with anytype of powerequipment, carelessnessor error machinewithoutproper instruction. • Thrownobjectscan causeseriouspersonalinjury. Planyour snow-throwingpatternto controlleversbeforestartingthe engine. - Craftsman 88957 | Operation Manual - Page 4
a rate. • Neveroperatethis machinewithoutgoodvisibility or light. Always be sureof yourfootingand keepa firm the engine, disconnectthe spark plugwire and groundit againstthe engine. • If situationsoccur whichare notcoveredin this manual,use care and good judgment.ContactCustomerSupportfor - Craftsman 88957 | Operation Manual - Page 5
manual. • Beforecleaning,repairing,or inspectingmachinedisengageall controlleversand stop the engine instructions. Maintainor replacesafetyand instructionlabels,as necessary. • Observeproperdisposallawsand regulationsfor gas, oil necessary. Do notcrank enginewith spark plug removed. Accordingto the - Craftsman 88957 | Operation Manual - Page 6
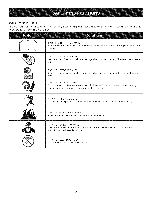
'S MANUAL(S) Read, understand, and follow all instructions in the manual(s) parts can amputate hands and feet. housing or chute assembly. WARNING--THROWN OBJECTS This machine may pick up and throw and objects which can cause serious personal injury. WARNING--GASOLINE IS FLAMMABLE Allow the engine - Craftsman 88957 | Operation Manual - Page 7
r 100/.LIIO-NV:IIO "lVflNV_ S,UOIVU3dOQV3H"G "S3OV_IJfl]S3AVUO NO9NIIV_J3dO N3HMNOIIflVOVSIX] qsfl"S9]ONVIS181]V98VHOSIO 10381083A3N'S]IUflrNI SI03PgoNMOUHIQIOAV01 "_ "3NIHOV_ONIOIA83SUOONIOOO]ONfl ]UO_38O3ddOIS]AVHSlHPd9NIAOW11VlllNfl S]IQNVH ONIH]8NIVW3UONV']NION]dOlS '88]A]1 HOlnlo]9VON]SIO"8 "] - Craftsman 88957 | Operation Manual - Page 8
snowthrowerare determinedfrom behindthe unit in the operatingposition(standing directlybehindthe snow thrower,facingthe handlepanel). REMOVING FROM CARTON 1. Cut the carton has beencompletelyemptiedbefore discardingit. LOOSE PARTS Tworeplacementaugershearpinsare includedin the handle panel - Craftsman 88957 | Operation Manual - Page 9
. b. Insertthe end of the chutedirectionalcontrolinto the lower bracketand securewith the flat washerand hairpinclipjust removed.See Figure5. If necessary,the lowerbracketcan be adjusted.Referto ChuteBracketAdjustmentin the Service& Maintenancesection. f F Figure4 Figure3 \ J Figure5 9 - Craftsman 88957 | Operation Manual - Page 10
. See Figure6. The tool is designedto cleara chuteassemblyof ice and snow.This item is fastenedwith a cabletie at the factory.Cut thecable tie Thetires are over-inflatedfor shippingpurposes.Checkthetire pressurebeforeoperatingthe snow thrower.Referto the tire sidewall for tiremanufacturer' - Craftsman 88957 | Operation Manual - Page 11
the Operationsection. 3. Whilestandingin the operator'sposition(behindthe snow thrower),engagethe auger. 4. Allowtheauger to remainengagedfor approximatelyten ( rotating,immediatelyreturnto the operator'spositionand shutoff the engine.Waitfor ALL movingparts to stop beforeadjustingthe augercontrol. - Craftsman 88957 | Operation Manual - Page 12
Control Augers Skid Shoe Choke Control :lectric Start Button Oil Drain Electric Starter Outlet ,.. j J Figure10 Nowthat . 1 2345 '6 NOTE: Donot turnthe ignitionkey in an attempt to startthe engine.Doingso may causeit to break. The shiftleveris locatedon the dash panel.Placethe shift - Craftsman 88957 | Operation Manual - Page 13
engine'selectric starterwhenpluggedintoa 120Vpowersource. ELECTRIC STARTER OUTLET Requiresthe useof a three-prongoutdoorextensioncord(included) and a 120Vpowersource/walloutlet. OIL FILL Engineoil levelcan be checkedand oil side of the snow thrower, To change the direction in which snow is thrown, - Craftsman 88957 | Operation Manual - Page 14
snow thrower'sengine. 6. Whilestandingin the operator'sposition(behindthesnow thrower Oil The unit was shippedwith oil in the engine.Checkoil levelbefore eachoperationto ensureadequateoil inthe engine.Forfurther instructions oil mayresult inenginesmoking, hard startingor spark engine's surface.Plug - Craftsman 88957 | Operation Manual - Page 15
covervent hole when pushing.If engine iswarm,push primeronlyonce. Alwayscover snow thrower. 2. Squeezethe drivecontrolagainstthe handleand the snow Part No. 738-04124Areplacementshearpins. Anydamageto the augergearboxor othercomponentsas a resultof [fa ng to do so w NOTbe coveredby yoursnow throwers - Craftsman 88957 | Operation Manual - Page 16
keeptrackof completedmaintenancetasks.To locate the nearest Sears Service Centeror to scheduleservice,simplycontactSearsat 1-800-4- light oil 3. Lubewith multipurposeautogrease 4. Lubewith light oil 1. Change 1. Change 1. Runengineuntilit stopsfrom lack offuel ENGINE MAINTENANCE Checking Engine Oil - Craftsman 88957 | Operation Manual - Page 17
. itcould shorten the engine'sservicelife. 7. Reinstallthe oil fillercap/dipsticksecurely. Figure13 after handling usedoil. Checking Spark Plug DO NOTcheckfor sparkwith spark plug removed.DO NOTcrank enginewith sparkplug removed. Spark Plug 0 If the engine hasbeen running,the mufflerwill - Craftsman 88957 | Operation Manual - Page 18
Figure16. NOTE:Whenlubricatingthe hexshaft, be carefulnotto get any oil on f thealuminumdriveplateor rubberfrictionwheel. Doingsowill hinder the snowthrower carriagebolts,washers,and hex flangenutsthat secureeachskid shoeto the snow thrower. 2. Reassemblenew skid shoeswith the fourcarriagebolts (two - Craftsman 88957 | Operation Manual - Page 19
thedrivecontrol released,pushthe snowthrowergently forward.The unitshouldroll freely. f 2. Engagethe drivecontroland gently attemptto pushthe snow throwerforward.Thewheelsshouldnotturn. The unitshouldnot roll freely. 3. With thedrivecontrol released,movethe shift leverbackand forth betweenthe - Craftsman 88957 | Operation Manual - Page 20
auger beltoff theengine pulley.See Figure23. f 4. Carefullypivotthe snowthrowerup and forwardso that itrestson theauger housing. 5. Removethe frame coverfrom the undersideof the snow thrower by removingfourself-tappingscrewswhich secureit. See Figure 24. J Figure22 Figure 23 f // J Figure24 2O - Craftsman 88957 | Operation Manual - Page 21
ofthismanual. NOTED:oNOTforgetot reinstathlleshouldsecrrewandreconnect thesprintgotheframeafteirnstallinagreplacemaeungt ebrelt. Drive Belt Toremoveand replaceyoursnow thrower'sdrivebelt, proceedas follows: 1. Topreventspillage,removeall fuel fromtank by runningengine untilit - Craftsman 88957 | Operation Manual - Page 22
and performingthe drivecontrolcableadjustmentfails to correct the problem,the frictionwheelmayneed to be replaced.Followthe theauger housing. 4. Removethe frame coverfrom the undersideof the snow thrower by removingthe self-tappingscrewswhich secureit. 5. Removethe right-handwheelby - Craftsman 88957 | Operation Manual - Page 23
NOTE:Be carefulnot to damagethe threadson the shaft, 7. Carefullypositionthe hexshaftdownwardand to the left before carefullyslidingthe frictionwheelassemblyoff the shaft. See Figure31. NOTE: If you'rereplacingthe frictionwheelassemblyas a whole, discardthe wornpartand slidethe newpart ontothe - Craftsman 88957 | Operation Manual - Page 24
reinstallthe spark plug. 4. Cleandebrisfrom aroundengine,and under,around,and behind muffler.Applya lightfilm of oil on anyareasthat are susceptible to rust. Whenstoringthe snowthrowerin an unventilatedor metal storage shed,careshouldbe taken to rustprooftheequipment.Using a light oil or silicone - Craftsman 88957 | Operation Manual - Page 25
. 1. Movechokecontrolto CHOKEposition. 2. Connectwireto spark plug. 3. Clean,adjustgap,or replace. tightenspark plugwire. 2. Removeice and snow from gascap. Be certain vent NEED MORE .HELP? o Find this and all your other product manuals online. , Get answers from our team of home experts. - Craftsman 88957 | Operation Manual - Page 26
Craftsman Snow Thrower IViodel 247.88957 I I )i / i 26 - Craftsman 88957 | Operation Manual - Page 27
Craftsman Snow Thrower IViodel 247.88957 731-2635 D= 00 SnowRemovalToolMount 2. 684-04057A-0637 0x .59 Screw,Self-tapping,1/4-20,0.750 Axle,Auger,24" Key,Hi-pro3/16x 5/8 Pin, Dowel,.25OD x 1.2 Shaft,Worm.75OD Gear,Worm20T Collar,Thrust Plug,1/4 x .437 Seal,Oil, .75x 1 x .131 Washer,Flat, .760ID - Craftsman 88957 | Operation Manual - Page 28
Craftsman Snow Thrower Model 247.88957 S_ ,_1_i _4_ / / 28 - Craftsman 88957 | Operation Manual - Page 29
Craftsman Snow Thrower IViodel 247.88957 631-04133A D= 0! HandleAssembly,ClutchLock,LH 2. 631-04134B ,5/16-18,Black CrankKnob,1.0Dia. x 3.2, Black 22. 749-04138A-0637 Handle,Lower 23. 935-0199A 24. 736-0262 Bumper,Rubber,.62 ODx .22 Washer,Fiat,.385x .870x .092 25. 738-04118 26 - Craftsman 88957 | Operation Manual - Page 30
Craftsman Snow Thrower Model 247.88957 ,_8h, _3L i // / / 30 - Craftsman 88957 | Operation Manual - Page 31
Craftsman Snow Thrower IViodel 247.88957 656-04025A I= 00 DiscAssembly,FrictionWheel 2. 684-04153 FrictionWheelAssembly,5.50D 3. 684-04154-0637 SupportBracket,FrictionWheel 4. 684-04156A Shift Assembly,Rod 5. J 710-0627 6. 710-0788 J HexScrew,5/16-24,.750,Gr5 Screw,1/4-20,1.000 7. 710- - Craftsman 88957 | Operation Manual - Page 32
Craftsman Engine IViodel ZS365=SUB For Snow Thrower IViodel 247.88957 26 \_ 2_ 26 24 56 27 26 !23 23 23 / 66 65 _/ 64 72 61\_\62 63_ 53_ 90 / 76 81 / 1/ 3 33 29 150 149 /148 \° o\ _ 146 140/_..._154 - Craftsman 88957 | Operation Manual - Page 33
Craftsman Engine IViodel ZS365=SUB For Snow Thrower IViodel 247.88957 1 951-11012 Bolt 70 951-11371 CrankcaseCoverGasket 2 951-11054 ValveCover 72 710-04932 CoverBolt 3 731-07059 BreatherHose 75 951-11368 Oil 710-05002 Bolt 89 712-04209 Nut 24 951-11111 ExhaustPipe Shield 90 951-10647 - Craftsman 88957 | Operation Manual - Page 34
Craftsman Engine IViodel ZS365-SUB For Snow Thrower IViodel 247.88957 |= 0 o e 126 715-04088 DowelPin 127 951 Idle SpeedAdjustingScrew 1 154 -- Fuel Bowl 1 56 951-11283 Oil Fill PlugAssembly 73 -- O-Ring 1 74 -- Oil Fill Plug 1 D= O -- 951-11061A GasketKit, Complete(Not Shown) - Craftsman 88957 | Operation Manual - Page 35
Craftsman Engine IViodel ZS365=SUB For Snow Thrower IViodel 247.88957 D= 00 m D= 0O m -- 951-11020 CarburetorKit, Major(Not Shown) -- 951- 710-04932 Cover Bolt 7 73 -- O-Ring 1 74 -- Oil Fill Plug 1 75 951-11368 Oil Seal 1 62 714-04078 CotterPin 1 63 CamshaftAssembly 1 64 951 - Craftsman 88957 | Operation Manual - Page 36
Craftsman Snow Thrower Model 247.88957 777S32636 777S32236 777X43688 ....D. OHOT........... USEE85 ORFUEL COHTAiHJHMGORE THAH 10% ETHAHOL J 777D12682 777D12648 777123031 777123030 777Dl1427 36 777122363 - Craftsman 88957 | Operation Manual - Page 37
the UnitedStates,newnon-road,spark-ignitionenginescertifiedfor model2005and later,mustmeet is defective,the part will be repairedor replacedby MTD. OWNER'S WARRANTY RESPONSIBILITIES: As FOR 1995 AND LATER SMALL OFF-ROAD ENGINES: This sectionappliesto 1995and later smalloff-roadengines.The - Craftsman 88957 | Operation Manual - Page 38
suchdiagnoswtiocrkisperformaetdawarransttyation. (7)Theenginme anufactuisrleiarblefordamagetosotheernginceomponepnrtosximatcealyusebdyafailuruendewr arranotyfanywarranted part. (8)Throughtohueet nginew'sarranptyerioddefineindSubsecti(oan)(2)M, TDwillmaintaainsuppolyfwarrantpeadrtsufficietnomt - Craftsman 88957 | Operation Manual - Page 39
engine is certified to be emissions compliant, assuming proper maintenance in accordance with the Operating & Maintenance Instructions. The following categories are used: Moderate: Engine Engine Emissions Compliance Label Period After July 1, 2000 certain Sears, Roebuck and Co., U.S.A. engines - Craftsman 88957 | Operation Manual - Page 40
, 10%off regularpriceof Sears Installation Service preventivemaintenancecheck ForSearsprofessionalinstallatioonf homeappliances,garagedoor * Fast help by phone- we call itRapidResolution- phone support froma SearsrepresentativeT. hinkof usas a "talkingowner's manual." openers,waterheaters,and - Craftsman 88957 | Operation Manual - Page 41
NOmero de servicio Cubierta posterior GARANTiA LIMITADA CRAFTSMAN Dos Ahos en Lanzador de Nieve Cuandohechofuncionary rnantenidosegQntodas onzas 2.3 cuartos Torch F6RTC (F6TC) .020" a .030" © Sears Brands,LLC N_mero de modelo N_mero de serie Fechade compra Registrearriba el nOrnerodel - Craftsman 88957 | Operation Manual - Page 42
.quinarueconstruidapara seroperadade acuerdocon las reglasde seguridadcontenidasen este manual.AI igualque concualquiertipo de equipo rnotorizadou, n utilicealhajas,bufandaslargasu otras prendassueltasque podrianenredarseen las partes rn6viles. Utiliceun calzadoespecialpara superficiesresbaladizas. • - Craftsman 88957 | Operation Manual - Page 43
montajedel canal mientrasel motorest,. en funcionamiento. Antes de destaparlo,apagueel motory permanezcadetr_.sde las manijashasta quetodas las partes m6vilesse hayandetenido. Uses61ounionesy accesoriosaprobadospor el fabricante(por ejemplo,pesaspara las ruedas,cadenaspara los neum_.ticos, cabinas - Craftsman 88957 | Operation Manual - Page 44
. El resultadopuedenserhuesos robs, fracturas,hernatornaso esguinces. • Si se presentansituacionesque no est&nprevistasen este manual,seacuidadosoy useel sentidocornQnP. 6ngaseen contactocon Asistenciaal Clientepara solicitarayuday el nornbredel distribuidorde serviciorn_.scercano. MANTENIMIENTO - Craftsman 88957 | Operation Manual - Page 45
reparaci6n. & LEA EL MANUAL DEL OPERADOR (S) Lea, entienda, y siga todas las instrucciones en el manual (es) antes de ROTATIVO No ponga manos o pies cerca del giro de partes, en el alojamiento de taladro/aspa tolva. Contacto con las partes rotativas puede amputar manos y pies. o asamblea de - Craftsman 88957 | Operation Manual - Page 46
piso Quitey descartetodos los insertosde empaque. 2. Saquela m_.quinaquitanievede la caja. 3. AsegQresede vaciarcompletamentela cajaantes de tirarla. PARTES SUELTAS Conel panelde carrerase incluyendos pasadoresde cuchillade barrenade repuesto.Consultela secci6n"Barrenas"en la secci6n de Servicioy - Craftsman 88957 | Operation Manual - Page 47
. SitOeel montajedel canalsobrela base.Vea la figura3. 5. Cierrelos fijadoresde la bridapara asegurarel montajedel canal a la basedel canal. Veala figura4. Losfijadoresde la brida emitenun chasquidocuandoest_.nbien asegurados. NOTA:si los fijadoresde la brida no seajustanen su lugarf_.cilmente, - Craftsman 88957 | Operation Manual - Page 48
de Limpieza del Canal Hay una herrarnientade lirnpiezadel canal iajustadaa la parte superiorde la caja de la barrenacon un pasadorde ensarnNado.Vea perrnanezcadetr_.sde las rnanijashasta que todas las partes rn6vilesse hayandetenidoantesde utilizarla herrarnienta de lirnpiezaparalirnpiarel - Craftsman 88957 | Operation Manual - Page 49
Paraajustarlas zapatasantideslizantes: 1. Aflojelascuatrostuercashexagonales(dos en cada lado)y los pernosdel carro.Muevalas zapatasantideslizantesa la posici6n deseada.Vea la figura 7. 2. Cornpruebeque toda la superficieinferiorde laszapatas antideslizantesest_ contrael sueloparaevitar un desgaste - Craftsman 88957 | Operation Manual - Page 50
lenta,y la posici6nseis(6) es la rn_.sr_.pida. Retroceso CONTROL DE OBTURACION El controlde obturaci6nse encuentraen la parte posteriordel motor,y seactiva haciendogirar el controlde obturaci6na posici6nCHOKE• AI activarel controlde obturaci6nse cierrala placade obturaci6ndel carburadory se ayudaa - Craftsman 88957 | Operation Manual - Page 51
CONTROL DEL REGULADOR El control del regulador estfi ubicado en la parte trasera del motor. Negula la velocidad del motor, y Io apaga cuando se Iocoloca en la posicidn STOP (detencidn). CEBADOR AI presionarel cebadorse envlacombustible directamenteal carburadordel - Craftsman 88957 | Operation Manual - Page 52
Paracarnbiarla direcci6nhaciala cual se arrojala nieve,gire el controldireccionaldel canal. HERRAMIENTA DE LIIVIPIEZA NOTA:No Io Ileneen exceso.El Ilenadoexcesivode aceite puede hacerque el motorgenerehurno,que cuestearrancarloo fallas en la bujia. 4. Vuelvaa colocarel tap6n/la varillade aceitey - Craftsman 88957 | Operation Manual - Page 53
Arrancador el_ctrico 2. Muevala palancadel cebadorhastala posici6nCHOKE I,'q¢l (encendidoconel motor en fifo). Si el motorya est,. caliente, El arrancadorel_ctricoopcionalest&equipadocon un cable de alirnentaci6ny un enchufede tres terrninalesconectadosa tierray est,. 3. dise_adoparaoperarcon - Craftsman 88957 | Operation Manual - Page 54
del rnantenirniento/servicios,uelte todos los rnandosy pare el motor.Esperehasta quetodas las partes de rnovirnientohayanvenidoa una paradacornpleta.Desconecteel alarnbrede bujia y b_.selocontrael motorpara prevenirel cornienzo involuntariSo.iernpreIlevepuestoscristalesinastillabledsurantela - Craftsman 88957 | Operation Manual - Page 55
. Elimineel aceiteusado adecuadamente.No Io arrojejunto con los residuosdomicilMos. Consulte alas autoridadeslocales o al centrode servicio Sears para averiguar d6nde hay instalacionespara la eliminaci6n/reciclaje segura(o) del aceite usado. . Vuelvaa colocarel tap6nde drenajedeaceitey - Craftsman 88957 | Operation Manual - Page 56
3. Midala separaci6nde bujia con un calibrador.Corrijade ser f necesariotorciendoel electrodolateral.Vea la Figura14.La separaci6ndebe establecerseentre0,02y 0,03 pulgadas (0,60-0,80ram). 4. Verifiqueque la arandelade la bujia est_en buenascondiciones y enr6squelamanualmenteparano estropearla - Craftsman 88957 | Operation Manual - Page 57
PLACA DE RASPADO Y ZAPATAS ANTiDESLIZANTES La placade raspadoy laszapatasantideslizantesubicadasen la base de la m_.quinaquitanieveest_.nsujetasa desgaste.Peri6dicamente deberiacontrolarlospernosy reemplazarloscuandosea necesario. NOTA:Laszapatasde esta m_.quinatienendos bordesde desgaste. Cuandoun - Craftsman 88957 | Operation Manual - Page 58
6. Ubiquela rn_nsulahaciaarribapara brindarrn_.sjuego (o hacia f abajo paraaurnentarla tensi6ndel cable). 7. Vueivaa apretarla tuercahexagonalsuperior. Soporte del canal Si la espiralsituadaen la parteinferiordel controldireccionaldel canal no seenganchacompletarnenteconel rnontajedel canal,es - Craftsman 88957 | Operation Manual - Page 59
correade la barrenasiga las instruccionesen orden inverso. 9. Realicela pruebade Controlde Taladroperfiladaen la secci6n de Asambleade este manual. NOTA:NOolvidevolvera instalarel tornillocon rebordey volvera conectarel resorteal marcotras instalaruna correade la barrenade repuesto. La correa de - Craftsman 88957 | Operation Manual - Page 60
4. Gireconcuidadlaorn_.quqinuaitaniehvaeciarribyahacia delandteernaneqrauequedaepoyadsaobrleacajadela barrena. 5. Saquleacubiertdaeml arcdoesddeebajdoelarn_.quqinuaita nievreetirandloostorniNaoustorroscanqtueelsa aseguraVne.alafigur2a3. 6. Detr_la.sparadsaeescappaaraaurnenltaarutorizacei6nntrel - Craftsman 88957 | Operation Manual - Page 61
NOTAT:engcauidaddoenodaSalarsroscadseel je. f 7. Concuidaduob,iqueelejehexagonhaalciabajyohacilaa izquierdaantedsedeslizacor nprecaucie6lrnnontadjelarueda defricci6fnueradelejeV. ealafigur3a0. NOTAC:uandsoedeseraeernplaezlacronjundtoelarueddae fricci6cnornpledtoe, - Craftsman 88957 | Operation Manual - Page 62
2. Elirninetodo el polvodel exteriordel motory del equipo. 3. Siga las recornendacionesde lubricaci6nen la secci6nde mantenirnientode este manual. 4. Alrnaceneel equipoen un _.readespejaday seca. 4. Lirnpielos residuosde alrededordel motor,y debajo,alrededor, y detr_.sdel silenciadorA. pNqueunacapa - Craftsman 88957 | Operation Manual - Page 63
el sistemadel combus- 3. Vacieel tanquedel combustible.Vuelvaa Ilenarlo tible concombustiblelimpio. 4. Es necesarioajustarel carburador 4. Contactecon sucentro de partes y reparaciones Sears. 1. El carburadorno est,. ajustadocorrectamente 1. Contactecon un centrode partesy servicioSears. 63 - Craftsman 88957 | Operation Manual - Page 64
Dernasiadavibraci6n 1. Hay piezasque est_.nflojas o la barrena estBd. afiada 1. Detengael motorde inrnediatoy desconecteel cablede la bujia.Ajustetodos los pernosy las tuercas.Si la vibraci6ncontinOaI.levela unidada reparara un centrode partesy reparaci6nSears. P@didade potencia 1. El cablede la - Craftsman 88957 | Operation Manual - Page 65
mantenimientode MTDCONSUMERGROUPI,NC. tan prontocomo aparecierael problem& Lasreparacionescubiertaspor la garantiasedeben Ilevara cabo en ,debe ponerseen contactocon su distribuidorlocalde MTD. Paracomunicarseconla Linea de Asistenciaal Clientede Distribuidoresde MTD,Ilameal nQmero(877)282-8684. - Craftsman 88957 | Operation Manual - Page 66
reernplazsaedgaQlangarantsiaegarantizapro_re, lrestdoelperioddoegarantia. (3) Cualqupieier zgaarantizaqduaeest_prograrnapdaarareernplaszeogQenlrnantenirnireenqtuoerideoconforrnidcaodnlasinstruccloneesscritadselaSubsecc(i6c) - Craftsman 88957 | Operation Manual - Page 67
de emisiones en la etiqueta de cumplimiento de las reglas de emisiones del motor Despu_s deJ 1 de julio de 2000 se certificar_, que determinados motores Sears, Roebuck and Co., de los Estados Unidos cumpien con los estAndares de emisiones de la fase 2 de la Agencia de Protecci6n Ambiental de los - Craftsman 88957 | Operation Manual - Page 68
el apoyotelef6nicode un Charnuscaal representanteP. ienseen nosotroscornoel manual"de un due_ohablador." Unavezadquiridoel Acuerdo,puedeprograrnarel serviciocon tan 1-800-361-6665. Servicio de instalaci6nde Sears Si deseasolicitarla instalaci6nprofesionadl e Searsde aparatos dorn_sticos, - Craftsman 88957 | Operation Manual - Page 69
69 - Craftsman 88957 | Operation Manual - Page 70
70 - Craftsman 88957 | Operation Manual - Page 71
71 - Craftsman 88957 | Operation Manual - Page 72
the replacement parts, accessories and owner's manuals that you need to do-it-yourself. For Sears professional Sears Parts & Repair Service Center 1-800-488-1222 (U.S.A.) 1-800-469-4663 (Canada) www.sears.com www.sears.ca To purchase a protection agreement on a product serviced by Sears
-
 1
1 -
 2
2 -
 3
3 -
 4
4 -
 5
5 -
 6
6 -
 7
7 -
8
-
9
-
10
-
11
-
12
-
13
-
14
-
15
-
16
-
17
-
18
-
19
-
20
-
21
-
22
-
23
-
24
-
25
-
26
-
27
-
28
-
29
-
30
-
31
-
32
-
33
-
34
-
35
-
36
-
37
-
38
-
39
-
40
-
41
-
42
-
43
-
44
-
45
-
46
-
47
-
48
-
49
-
50
-
51
-
52
-
53
-
54
-
55
-
56
-
57
-
58
-
59
-
60
-
61
-
62
-
63
-
64
-
65
-
66
-
67
-
68
-
69
-
70
-
71
-
72
 |
 |
Operator's
Manual
CRRFTSMRN
24"
SNOW THROWER
Model
No. 247.88957
CAUTION:
Before
using
this
product,
read
this
manual
and
follow
all
safety
rules
and
operating
instructions.
o SAFETY
ASSEMBLY
OPERATION
MAINTENANCE
PARTS LIST
o ESPANOL
Sears,
Roebuck
and Co.,
Hoffman
Estates,
IL
60179,
U.S.A.
Visit
our
website:
www.craftsman.com
FORMNO.769-05095
12/29/2009