Creative 0404 Owners Manual - Page 37
On Your Own, MIDI Omni, Proteus VX, Output, MIDI Channel 2, Restore Up, Track Record Enable, Record
 |
UPC - 054651129276
View all Creative 0404 manuals
Add to My Manuals
Save this manual to your list of manuals |
Page 37 highlights
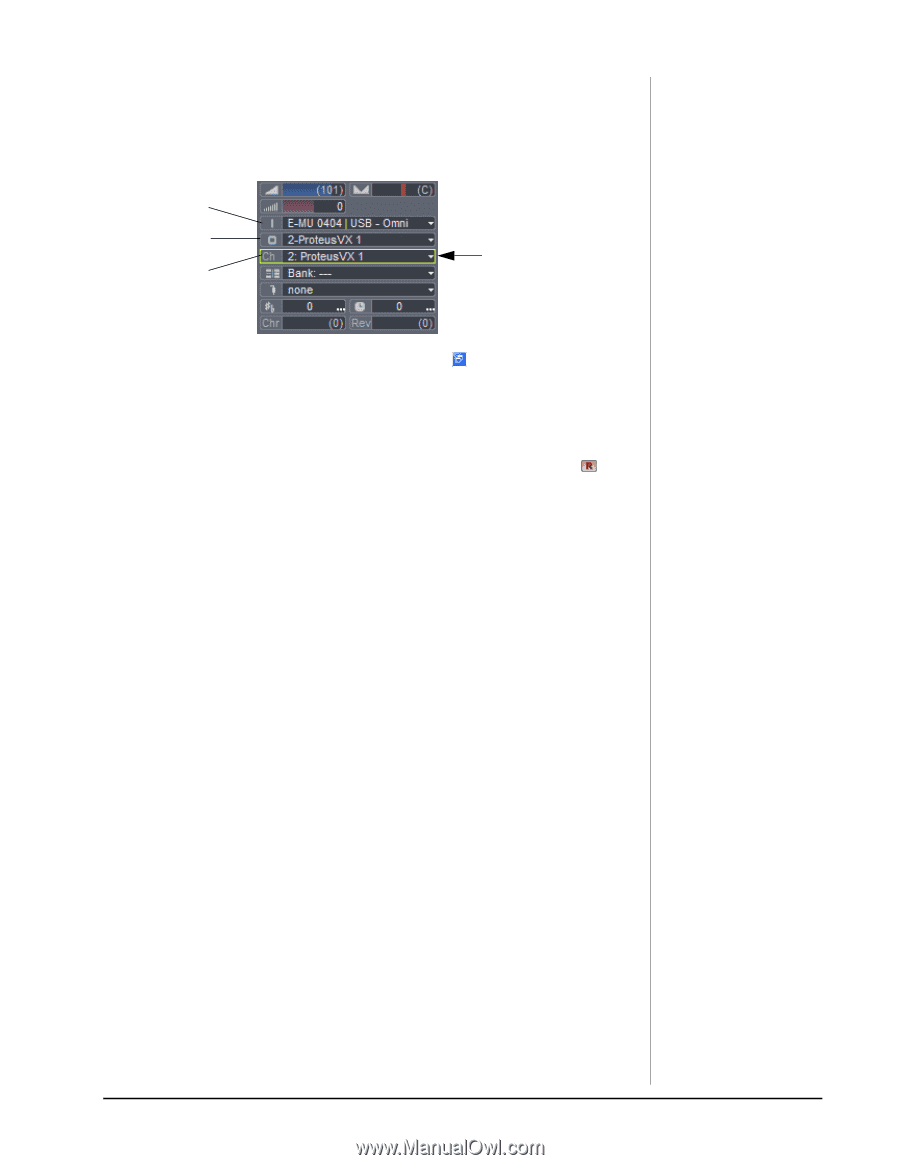
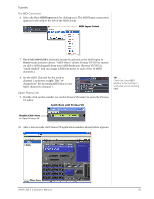
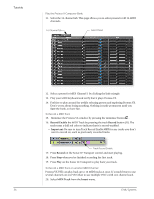
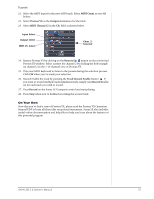
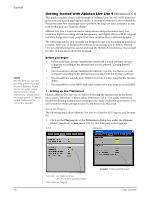
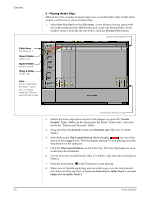
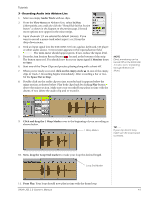
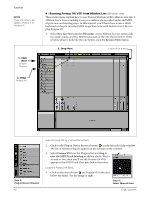
Tutorials 21. Select the MIDI input for the new MIDI track. Select MIDI Omni as you did before. 22. Select Proteus VX as the Output destination for the track. 23. Select MIDI Channel 2 in the Ch. field as shown below. Input Select Output Select MIDI Ch. Select Chan. 2 Selected 24. Restore Proteus VX by clicking on the Restore Up button on the minimized Proteus FX window. Select a preset for channel 2 by clicking the little triangle on channel 2 in the 1-16 channel view of Proteus VX. 25. Play your MIDI keyboard to listen to the presets during the selection process. Click OK when you've made your selection. 26. Record Enable the track by pressing the Track Record Enable button . If you want to record multiple tracks simultaneously, simply turn Record Enable on for each track you wish to record. 27. Press Record on the Sonar LE Transport control and start playing. 28. Press Stop when you're finished recording the second track. On Your Own Now that you've had a taste of Proteus VX, please read the Proteus VX Operation Manual PDF to learn all about this exceptional instrument. Sonar LE also includes useful online documentation and help files to help you learn about the features of this powerful program. 0404 USB 2.0 Owner's Manual 37
-
 1
1 -
2
-
3
-
4
-
5
-
6
-
7
-
8
-
9
-
10
-
11
-
12
-
13
-
14
-
15
-
16
-
17
-
18
-
19
-
20
-
21
-
22
-
23
-
24
-
25
-
26
-
27
-
28
-
29
-
30
-
31
-
 32
32 -
 33
33 -
 34
34 -
 35
35 -
 36
36 -
 37
37 -
 38
38 -
 39
39 -
 40
40 -
 41
41 -
 42
42 -
43
-
44
-
45
-
46
-
47
-
48
-
49
-
50
-
51
-
52
-
53
-
54
-
55
-
56
 |
 |