Cuisinart BFP-703R Instruction and Recipe Booklet - Page 8
Food Processor, Step By Step, Getting Started - blender
 |
View all Cuisinart BFP-703R manuals
Add to My Manuals
Save this manual to your list of manuals |
Page 8 highlights
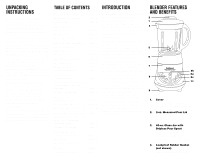
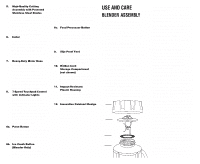
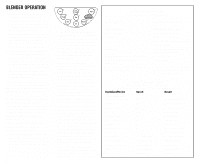
• Don't overprocess foods. Blender or food processor will achieve most desired results in seconds, not minutes. • Don't overload blender or food processor. If the motor stalls, turn OFF immediately, unplug the unit, and remove a portion of the food; then continue. • Don't use any utensil inside the blender jar or food processor bowl while the motor is ON. • Don't use any container or accessories not recommended by Cuisinart. Doing so may result in injury. • Don't place hands inside the blender jar or food processor bowl when blender is plugged in. • Don't add boiling liquids or frozen foods (except ice cubes or 1/2" pieces of frozen fruit) to glass blender jar. Boiling liquids should cool for 5 minutes before being placed in blender jar. • The food processor accessory is not intended to crush ice. This could damage the chopping blade and will damage work bowl. 6 FOOD PROCESSOR FEATURES AND BENEFITS 1. Food pusher with oil dispenser 2. Work bowl cover with feed tube 3. Stainless steel chopping blade 4. Stainless steel reversible slicing/shredding disc 5. Adapter stem 6. Clear work bowl 7. Gearbox collar 8. Motor base Used for both the blender jar and the food processor bowl FOOD PROCESSOR STEP BY STEP GETTING STARTED Please note that the bowl with collar will fit on the base in eight different positions. The handle can be in front or on either side and the feed tube in front, back, or on either side. Directions for use reference a certain position for instructional purposes only. FOOD PROCESSOR ASSEMBLY FOR CHOPPING, PURÉEING & MIXING 1. Hold gearbox collar in one hand and work bowl handle in the other. Twist bowl clockwise onto collar. 2. Place collar with bowl onto motor base with handle facing front. 3. Place chopping blade over shaft in work bowl. Chopping blade should slide easily to the bottom of the bowl. Lower blade will almost touch bottom of bowl. Food Pusher with Oil Dispenser (1) Work Bowl Cover with Feed Tube (2) Stainless Steel Chopping Blade (3) Reversible Slicing/ Shredding Disc (4) Adapter Stem (5) Work Bowl (6) Gearbox Collar (7) Blender Base (8) BE SURE TO HANDLE THE METAL BLADE WITH CARE AS IT IS RAZOR SHARP! 4. Place food to be processed in work bowl. Put cover on work bowl, with feed tube at about 11 o'clock. Turn the cover clockwise until it fits into position. Cover lock must click into locked position prior to use. If you have trouble fitting the cover on the work bowl, turn chopping blade hub slightly and replace cover.
-
 1
1 -
2
-
 3
3 -
 4
4 -
 5
5 -
 6
6 -
 7
7 -
 8
8 -
 9
9 -
 10
10 -
 11
11 -
 12
12 -
 13
13 -
14
-
15
-
16
-
17
-
18
-
19
-
20
-
21
-
22
-
23
-
24
-
25
 |
 |
