D-Link DAP-3690 Product Manual
D-Link DAP-3690 Manual
 |
View all D-Link DAP-3690 manuals
Add to My Manuals
Save this manual to your list of manuals |
D-Link DAP-3690 manual content summary:
- D-Link DAP-3690 | Product Manual - Page 1
- D-Link DAP-3690 | Product Manual - Page 2
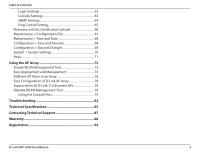
Configuration Menu 13 Wireless Settings 15 Access Point Mode 15 WDS with AP mode 17 WDS mode 19 Wireless Client mode (Static Pool Setting 44 DHCP Server (Current IP Mapping List 46 Filters (Wireless MAC ACL 47 Filters (WLAN Partition 48 Name Settings 61 D-Link DAP-3690 User Manual 2 - D-Link DAP-3690 | Product Manual - Page 3
Setting 65 Firmware and SSL Link AP Array 76 Supported in all D-Link 11n Business APs 78 Reliable WLAN Management Tool 78 Using the Console Port 79 Troubleshooting 82 Technical Specifications 85 Contacting Technical Support 87 Warranty 88 Registration 94 D-Link DAP-3690 User Manual - D-Link DAP-3690 | Product Manual - Page 4
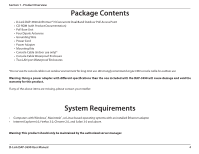
Overview PProacdkuacgteOCvoentrevnietsw • D-Link DAP-3690 AirPremier® N Concurrent Dual Band Outdoor PoE Access Point • CD-ROM ( cable for outdoor use. Warning: Using a power adapter with different specifications than the one included with the DAP-3690 will cause . D-Link DAP-3690 User Manual 4 - D-Link DAP-3690 | Product Manual - Page 5
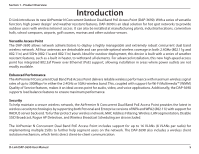
D-Link introduces its new AirPremier N Concurrent Outdoor Dual Band PoE Access Point (DAP-3690). With a series of versatile function, high power design1 and weather resistant features, DAP-3690 is an ideal solution for hot spot networks to provide outdoor users with wireless Internet access - D-Link DAP-3690 | Product Manual - Page 6
network traffic, building materials and construction, and network overhead, lower actual data throughput rate. Environmental conditions will adversely affect wireless signal range. 3 Operation frequency ranges vary depending on the regulations of individual countries D-Link DAP-3690 User Manual 6 - D-Link DAP-3690 | Product Manual - Page 7
modes. Scalability - Configurations can be easily changed and range from Peer-to-Peer networks, suitable for a small number of users to larger Infrastructure networks to accommodate hundreds or thousands of users, depending on the number of wireless devices deployed. D-Link DAP-3690 User Manual 7 - D-Link DAP-3690 | Product Manual - Page 8
DAP-3690 Wireless Access Point utilizes the 802.11a, 802.11b, 802.11g, and 802.11n standards. The IEEE 802.11n standard is an extension of the 802.11a, 802.11b, and 802.1g standards that came before it. It increases the maximum wireless affect wireless signal range. D-Link DAP-3690 User Manual 8 - D-Link DAP-3690 | Product Manual - Page 9
Installation Considerations The D-Link DAP-3690 lets you access your network, using a wireless connection, from virtually anywhere within its operating range. Keep in mind, however, that the number, thickness and location of walls, ceilings, or other objects that the wireless signals must pass - D-Link DAP-3690 | Product Manual - Page 10
Modes Access Point (AP) WDS with AP WDS Wireless Client Create a wireless LAN Wirelessly connect multiple networks while still functioning as a wireless AP Wirelessly connect multiple networks AP acts as a wireless network adapter for your Ethernet enabled device D-Link DAP-3690 User Manual 10 - D-Link DAP-3690 | Product Manual - Page 11
switch. Method 2 - Use if you do not have a PoE switch and do not have a power outlet near the location of the access point. Method 1 1. Connect one end of your Ethernet cable into the LAN (PoE) port on the DAP-3690 and then connect the other end to your PoE switch. D-Link DAP-3690 User Manual 11 - D-Link DAP-3690 | Product Manual - Page 12
end into the LAN (PoE) port on the DAP-3690 access point. 3. Use the supplied power adapter. Connect the power adapter to the Power In receptor on the PoE adapter. 4. Connect the power cable to the power adapter and then connect the other end into a power outlet. D-Link DAP-3690 User Manual 12 - D-Link DAP-3690 | Product Manual - Page 13
If you have changed the default IP address assigned to the DAP-3690, make sure to enter the correct IP address. • Type "admin" in the User Name field. • Leave the Password field blank. • Click the Login button. D-Link DAP-3690 User Manual Note: If you have changed the password, make sure to enter - D-Link DAP-3690 | Product Manual - Page 14
Section 3 - Configuration After successfully logging into the DAP-3690 the following window will appear: When making changes on most of " option on the Configuration drop-down menu at the top of each DAP-3690 window. This will cause the DAP-3690 to save and reboot. D-Link DAP-3690 User Manual 14 - D-Link DAP-3690 | Product Manual - Page 15
Mode: Select Access Point from the drop-down menu. The other three choices are WDS with AP, WDS, and Wireless Client. Network Name (SSID): Service Set Identifier (SSID) is the name designated for a specific wireless local area network (WLAN). The SSID's factory default setting is dlink. The SSID - D-Link DAP-3690 | Product Manual - Page 16
802.11n wireless devices password and Access Control. For more information about the different types of Authentication offered on the DAP-3690 and the respective settings of each, please go to the first page of the "Authentication" explanations, which begins on page 23. D-Link DAP-3690 User Manual - D-Link DAP-3690 | Product Manual - Page 17
is not supported in WDS with AP mode. Channel: All devices on the network must share the same channel. To change the channel, use the drop-down menu to make the desired selection. (Note: The wireless adapters will automatically scan and match the wireless settings.) D-Link DAP-3690 User Manual 17 - D-Link DAP-3690 | Product Manual - Page 18
bridges to wirelessly connect multiple networks. Address: Site Survey: Click the Scan button to search for available wireless networks, DAP-3690 and the respective settings of each, please go to the first page of the "Authentication" explanations, which begins on page 23. D-Link DAP-3690 User Manual - D-Link DAP-3690 | Product Manual - Page 19
/40 MHz allow both 802.11n and non-802.11n wireless devices on your network when the wireless mode is Mixed 802.11 b/g/n in 2.4G and Mixed 802.11 a/n in 5G. 802.11n wireless devices are allowed to transmit data using 40 MHz when the channel width is Auto 20/40 MHz. D-Link DAP-3690 User Manual 19 - D-Link DAP-3690 | Product Manual - Page 20
password and dynamic key changes. No RADIUS server is required. For more information about the different types of Authentication offered on the DAP-3690 and the respective settings of each, please go to the first page of the Authentication explanations which begins on page 23. D-Link DAP-3690 User - D-Link DAP-3690 | Product Manual - Page 21
used will be displayed, and follow the root AP. Channel Width: This option is unavailable in wireless client mode. Site Survey: Click the Scan button to search for available wireless networks, then click on the available network that you want to connect with. D-Link DAP-3690 User Manual 21 - D-Link DAP-3690 | Product Manual - Page 22
Authentication explanations which begins on page 23. Wireless MAC Clone Enable: Click the box to enable the Wireless MAC Clone feature. Enabling this option allows the user to manually assign the source MAC address to packets forwarded by the DAP-3690. If disabled, the packet's source MAC address - D-Link DAP-3690 | Product Manual - Page 23
Network Key entered above in the corresponding field. *ASCII (American Standard Code for Information Interchange) is a code that represents English letters using numbers ranging from 0-127. **Hexadecimal (HEX) digits consist of the numbers 0-9 and the letters A-F. D-Link DAP-3690 User Manual 23 - D-Link DAP-3690 | Product Manual - Page 24
the group key will be valid. Update Interval: The default value of 1800 is recommended. PassPhrase: When you select WPA-Personal, please enter a PassPhrase in the corresponding field. Confirm Retype the PassPhrase entered above in the corresponding PassPhrase: field. D-Link DAP-3690 User Manual 24 - D-Link DAP-3690 | Product Manual - Page 25
server. Server: Accounting Port: Enter the Accounting port (1813 is the default). Accounting Enter the Accounting secret. Secret: Note: You can input the secondary RADIUS server and accounting server settings if you have a backup RADIUS and accounting server. D-Link DAP-3690 User Manual 25 - D-Link DAP-3690 | Product Manual - Page 26
the Accounting server. Accounting Port: Enter the Accounting port (1813 is the default). Accounting Secret: Enter the Accounting secret. Note: You can input the secondary RADIUS server and accounting server settings if you have a backup RADIUS and accounting server. D-Link DAP-3690 User Manual 26 - D-Link DAP-3690 | Product Manual - Page 27
. Subnet Mask: Enter the subnet mask. All devices in the network must share the same subnet mask. Default Enter the IP address of the gateway in your network. If there is a gateway in your network, please enter an IP address within the range Gateway: of your network. D-Link DAP-3690 User Manual 27 - D-Link DAP-3690 | Product Manual - Page 28
wireless clients, while setting a lower one can help a wireless client connect to an access point faster. *Maximum wireless signal rate derived from IEEE Standard 802.11g, 802.11a and 802.11n specifications conditions will adversely affect wireless signal range. D-Link DAP-3690 User Manual 28 - D-Link DAP-3690 | Product Manual - Page 29
traffic and the client using multiple APs. If this function is enabled and when the number of users exceeds this value, or the network utilization of this AP exceeds the percentage that has been specified, the DAP-3690 will not allow clients to associate with the AP. D-Link DAP-3690 User Manual 29 - D-Link DAP-3690 | Product Manual - Page 30
most users, a limit of 10 is recommended. The default setting is 20. Network Utilization: Set the maximum utilization of this access point for service. The DAP-3690 will rate is supported in AP mode, (2.4 GHZ and 5 GHZ) and WDS with AP mode, including Multi-SSIDs. D-Link DAP-3690 User Manual 30 - D-Link DAP-3690 | Product Manual - Page 31
total of eight multi-SSIDs. SSID: Service Set Identifier (SSID) is the name designated for a specific wireless local area network (WLAN). The SSID's factory default setting is dlink. The SSID can be easily changed to of the 802.1X parameters please go to page 26. D-Link DAP-3690 User Manual 31 - D-Link DAP-3690 | Product Manual - Page 32
Section 3 - Configuration Priority: When the Enable Priority check box is checked at the top of this window, this drop-down menu is used to select a priority between 0 and 7. WMM (Wi-Fi Select Enable to provide basic Quality of Service features. Multimedia): D-Link DAP-3690 User Manual 32 - D-Link DAP-3690 | Product Manual - Page 33
DAP-3690 supports VLANs. VLANs can be created with a Name and VID. Mgmt (TCP stack), LAN, Primary/Multiple SSID, and WDS connection can be assigned to VLANs as they are physical ports. Any packet which enters the DAP-3690 VLAN Mode: The current VLAN mode is displayed. D-Link DAP-3690 User Manual 33 - D-Link DAP-3690 | Product Manual - Page 34
and internal networks on a Virtual LAN (VLAN), the switch and DHCP server you are using must also support VLANs. As a prerequisite step, configure a port on the switch for handling VLAN tagged packets as described The Port VLAN Identifier is displayed in this column. D-Link DAP-3690 User Manual 34 - D-Link DAP-3690 | Product Manual - Page 35
VLAN mode is displayed. VLAN ID (VID): Provide a number between 1 and 4094 for the Internal VLAN. VLAN Name: Enter the VLAN to add or modify. D-Link DAP-3690 User Manual 35 - D-Link DAP-3690 | Product Manual - Page 36
Enable. VLAN Mode: The current VLAN mode is displayed. PVID Auto Assign Use the radio button to toggle PVID auto Status: assign status to Enable. D-Link DAP-3690 User Manual 36 - D-Link DAP-3690 | Product Manual - Page 37
Section 3 - Configuration Intrusion The Wireless Intrusion Protection window is used to set APs as All, Valid, Neighborhood, Rogue, and New. Once you choices include All, Valid, Neighbor, Rogue, and New. Detect: Click this button to initiate a scan of the network. D-Link DAP-3690 User Manual 37 - D-Link DAP-3690 | Product Manual - Page 38
SSID, go to the Wireless Settings window (Basic Settings > Wireless). Day(s): Toggle the radio button between All Week and Select Day(s). If the second option is selected, check the specific days you want the Enter the ending hour and minute, using a 24-hour clock. D-Link DAP-3690 User Manual 38 - D-Link DAP-3690 | Product Manual - Page 39
. Once a user has made the password that will be used to access the AP array you Password: have created. Scan AP Array List: Click the button to initiate a scan of all the available APs on the network. Connection Status: This displays the status of the current AP array. D-Link DAP-3690 User Manual - D-Link DAP-3690 | Product Manual - Page 40
password to authenticate user access to the appointed page. Status: Toggle the drop-down menu between Enable and Disable. Web Direction A list of accounts will be displayed here. Highlight a username Account List: to edit it or click the Delete icon to remove it from this list. D-Link DAP-3690 User - D-Link DAP-3690 | Product Manual - Page 41
: Enter a name to authenticate user access to the internal RADIUS server. Password: Enter a password to authenticate user access to the internal RADIUS server. The length of your password should be 8~64. Status: Toggle the drop-down menu between Enable and Disable. D-Link DAP-3690 User Manual 41 - D-Link DAP-3690 | Product Manual - Page 42
the IP address of your gateway. Address: Gateway MAC Enter the MAC address of your gateway. Address: Gateway Address A list of gateway addresses will be displayed here. Highlight List: an IP address to edit it or click the Delete icon to remove it from this list. D-Link DAP-3690 User Manual 42 - D-Link DAP-3690 | Product Manual - Page 43
.dlink. com into IP addresses. Domain Name: Enter the domain name of the network, if applicable. (An example of a domain name is: www.dlink.com.) Lease Time The lease time is the period of time before the DHCP server will assign new IP addresses. (60-31536000 sec): D-Link DAP-3690 User Manual 43 - D-Link DAP-3690 | Product Manual - Page 44
the range of IP addresses that can be assigned to stations on the network. A static pool allows specific wireless stations to receive a fixed IP without time control. Once a user is : Define the subnet mask of the IP address specified in the "IP Assigned From" field. D-Link DAP-3690 User Manual 44 - D-Link DAP-3690 | Product Manual - Page 45
a dynamically assigned IP address, if applicable. DNS: Enter the Domain Name System (DNS) server address for the wireless network. The DNS server translates domain names such as www.dlink.com into IP addresses. Domain Name: Specify the domain name for the network. D-Link DAP-3690 User Manual 45 - D-Link DAP-3690 | Product Manual - Page 46
assigned Static Pools: through the static pool settings. Binding MAC The MAC address of a device on the network that is within Address: the DHCP static IP address pool. Assigned IP The current corresponding DHCP-assigned static IP Address: address of the device. D-Link DAP-3690 User Manual 46 - D-Link DAP-3690 | Product Manual - Page 47
Wireless MAC ACL) The DAP-3690 features a wireless MAC Access Control List filter. Once a user is finished with these settings, click the Save button to let the changes take effect. Wireless Band: Displays the current wireless band rate. Access : connected stations. D-Link DAP-3690 User Manual 47 - D-Link DAP-3690 | Product Manual - Page 48
The default value is Enable, which allows stations to Connection: intercommunicate by connecting to a target AP. When disabled, wireless stations cannot exchange data on the same Multi-SSID. In Guest mode, wireless stations cannot exchange data with any station on your network. D-Link DAP-3690 User - D-Link DAP-3690 | Product Manual - Page 49
Configuration Traffic Control (Uplink/Downlink Setting) The uplink/downlink setting allows users to customize the downlink and uplink interfaces including specifying downlink/uplink bandwidth . Bandwidth: Uplink The uplink bandwidth in Mbits per second. Bandwidth: D-Link DAP-3690 User Manual 49 - D-Link DAP-3690 | Product Manual - Page 50
Traffic Control (QoS) Quality of Service (QoS) enhances the experience of using a network by prioritizing the traffic of different applications. The DAP-3690 supports four priority levels. Once the value is Bandwidth: entered in the Uplink/Downlink Setting window. D-Link DAP-3690 User Manual 50 - D-Link DAP-3690 | Product Manual - Page 51
3 - Configuration Traffic Control (Traffic Manager) The traffic manager feature allows users to create traffic management rules that specify how to deal with listed client second. This value is Uplink Bandwidth: entered in the Uplink/Downlink Setting window. D-Link DAP-3690 User Manual 51 - D-Link DAP-3690 | Product Manual - Page 52
Section 3 - Configuration Home > Status Device Information Device This read-only window displays the configuration Information: settings of the DAP-3690, including the firmware version and the device's MAC address. D-Link DAP-3690 User Manual 52 - D-Link DAP-3690 | Product Manual - Page 53
address of the client. Band: Displays the wireless band that the client is connected to. Authentication: Displays the type of authentication being used. Signal: Displays the client's signal strength. Power Saving Displays the status of the power saving feature. Mode: D-Link DAP-3690 User Manual 53 - D-Link DAP-3690 | Product Manual - Page 54
the DAP-3690. Name: Displays the name of the client. MAC: Displays the MAC address of the client. Authentication: Displays the type of authentication being used. Signal: Displays the WDS link signal strength. Status: Displays the status of the power saving feature. D-Link DAP-3690 User Manual 54 - D-Link DAP-3690 | Product Manual - Page 55
Section 3 - Configuration Home > Status Stats > Ethernet Ethernet Traffic This window displays transmitted and received Statistics: count statistics for packets and bytes. D-Link DAP-3690 User Manual 55 - D-Link DAP-3690 | Product Manual - Page 56
Section 3 - Configuration Stats > WLAN WLAN Traffic This window displays wireless network statistics for data Statistics: throughput, transmitted and received frames, and frame errors. D-Link DAP-3690 User Manual 56 - D-Link DAP-3690 | Product Manual - Page 57
and network messages including a time stamp and message type. The log information includes but is not limited to the following items: cold start AP, upgrading firmware, client associate and disassociate with AP, and web login. The web page holds up to 500 logs. D-Link DAP-3690 User Manual 57 - D-Link DAP-3690 | Product Manual - Page 58
. The default value is 25. User Name: Enter a user name for the SMTP server. Password: Enter a password for the SMTP server. Confirm Confirm the password for the SMTP server by retyping it. Password: Schedule: Use the drop-down menu to set the e-mail log schedule. D-Link DAP-3690 User Manual 58 - D-Link DAP-3690 | Product Manual - Page 59
Section 3 - Configuration Maintenance > Administrator Settings Check one or more of the six main categories to display the various hidden administrator parameters and settings displayed on the next six windows. D-Link DAP-3690 User Manual 59 - D-Link DAP-3690 | Product Manual - Page 60
ID that the administrator will be allowed to log in from. VLAN ID: Limit Check to enable the Limit Administrator IP address. Administrator IP: IP Range: Enter the IP address range that the administrator will be allowed to log in from and then click the Add button. D-Link DAP-3690 User Manual 60 - D-Link DAP-3690 | Product Manual - Page 61
here. Password: Each of the six main categories display various hidden administrator parameters and settings. System Name Settings System Name: The name of the device. The default name is D-Link DAP-3690. Location: The physical location of the device, e.g. "office". D-Link DAP-3690 User Manual 61 - D-Link DAP-3690 | Product Manual - Page 62
Password: When changing your password, enter the new password here. The password is case-sensitive. "A" is a different character than "a." The length should be between 0 and 12 characters. Confirm Password: Enter the new password a second time for confirmation purposes. D-Link DAP-3690 User Manual - D-Link DAP-3690 | Product Manual - Page 63
and settings. Console Settings Status: Status is enabled by default. Uncheck the box to disable the console. Console Select the type of protocol you would like to use, Telnet Protocol: or SSH. Timeout: Set to 1 Min, 3 Mins, 5 Mins, 10 Mins, 15 Mins or Never. D-Link DAP-3690 User Manual 63 - D-Link DAP-3690 | Product Manual - Page 64
Private Enter the private SNMP community string. Community String: Trap Status: Check the box to enable the trap status. Trap Server IP: Enter the trap server IP address. This is the IP address of the SNMP manager to receive traps sent from the wireless access point. D-Link DAP-3690 User Manual 64 - D-Link DAP-3690 | Product Manual - Page 65
Configuration Ping Control Setting Confirm New Confirm by re-entering your new password here. Password: Each of the six main categories display various hidden administrator parameters and host and listening for ICMP echo response replies. The default is enabled. D-Link DAP-3690 User Manual 65 - D-Link DAP-3690 | Product Manual - Page 66
file location field. After downloading the most recent version of firmware for the DAP-3690 from http://dlink.com//support to your local computer, use the Browse button to locate the firmware file on your computer. Click Upload to update the firmware version. Please don't turn the power off while - D-Link DAP-3690 | Product Manual - Page 67
the current DAP-3690 Configuration File: configuration to your local computer. Note that if you save one configuration with the administrator's password now, after resetting your DAP-3690, and then updating to this saved configuration file, the password will be gone. D-Link DAP-3690 User Manual 67 - D-Link DAP-3690 | Product Manual - Page 68
Enter the NTP server IP address. Enable Daylight Manually: A user can either manually set the time for the AP here, or click the Copy Your Computer's Time Settings button to copy the time from the computer in use (Make sure that the computer's time is set correctly). D-Link DAP-3690 User Manual - D-Link DAP-3690 | Product Manual - Page 69
to display how many seconds remain before the save settings and reboot system action is completed. Configuration > Discard Changes The drop-down Configuration menu allows users to drop the latest changes by clicking "Discard Changes." D-Link DAP-3690 User Manual 69 - D-Link DAP-3690 | Product Manual - Page 70
System > System Settings Restart the Click Restart to restart the DAP-3690. Device: Restore to Click Restore to restore the DAP-3690 back to factory Factory Default default settings. Settings: Clear Language Click Clear to remove the DAP-3690 language pack. Pack: D-Link DAP-3690 User Manual 70 - D-Link DAP-3690 | Product Manual - Page 71
Section 3 - Configuration Help Help: Scroll down the Help page for topics and explanations. D-Link DAP-3690 User Manual 71 - D-Link DAP-3690 | Product Manual - Page 72
local area network (WLAN) in a small office with limited IT resources, D-Link's AP Array is the answer. It allows the efficient deployment of a secured WLAN and easier administration from a single point; thus, minimizing the effort to maintain the wireless network. D-Link DAP-3690 User Manual 72 - D-Link DAP-3690 | Product Manual - Page 73
AP: • Designate one AP as Master • Set up Array ID & password • Configure the AP Step 2 - Deployment of Slave APs: • Specify Array ID & password of Master in Slave APs. Step 3 - Settings Are Synchronized: • same model, and each AP is assigned with a unique IP address. D-Link DAP-3690 User Manual 73 - D-Link DAP-3690 | Product Manual - Page 74
a beacon to check the status of the Slave APs. If any changes are done to the slave APs manually, the Master AP will automatically synchronize its configuration to the slave AP and overwrite it. • Master AP , so that there is always a Backup Master AP available. D-Link DAP-3690 User Manual 74 - D-Link DAP-3690 | Product Manual - Page 75
user makes any changes in the Master AP and selects "Save & Activate", the Master AP in an array will automatically synchronize its configuration to all Slave APs. Settings that can be synchronized are: • Wireless will have to be configured individually for each AP. D-Link DAP-3690 User Manual 75 - D-Link DAP-3690 | Product Manual - Page 76
following section shows how simple it is to configure the D-Link AP Array for the different AP roles: Master AP Role Click Advanced Settings > AP Array to view and edit the information on the AP in an array. Step 1: Click Enable AP Array and select the Master role. D-Link DAP-3690 User Manual 76 - D-Link DAP-3690 | Product Manual - Page 77
Section 4 - Using the AP Array Step 2: Set up the AP Array name and password. Click the Save button located on the lower right hand side. Note: Remember to select "Save & information on the AP in an array. Step 1: Click Enable AP Array and select the Slave role. D-Link DAP-3690 User Manual 77 - D-Link DAP-3690 | Product Manual - Page 78
APs. As AP configuration and management are done within only one Master AP, you will be able to view the deployment of APs as a single wireless network rather than a series of separate wireless devices. D-Link DAP-3690 User Manual 78 - D-Link DAP-3690 | Product Manual - Page 79
the device. 2. Run HyperTerminal on the PC: • Go to the Start Menu • Select All Programs • Select Accessories • Select Communications • Select HyperTerminal 3. Enter a New Connection name: D-Link DAP-3690 User Manual 79 - D-Link DAP-3690 | Product Manual - Page 80
Section 3 - Configuration 4. Select the appropriate COM port: 5. Configure the Port Settings: Note: Your terminal emulation must be set to 115200 bits per second. D-Link DAP-3690 User Manual 80 - D-Link DAP-3690 | Product Manual - Page 81
Appendix A - Technical Specifications 6. Enter the Login Name and Password: Once logged in, you will be able to run configuration commands from the command line prompt. You can type in a letter and press tab to see the available commands. D-Link DAP-3690 User Manual 81 - D-Link DAP-3690 | Product Manual - Page 82
Section 5 - Troubleshooting Troubleshooting This chapter provides solutions to problems that can occur during the installation and operation of the DAP-3690 Wireless Access Point. We will cover various aspects of the network setup, especially the network adapters. Please read the following if you - D-Link DAP-3690 | Product Manual - Page 83
. • If it is necessary to assign a Static IP Address to the wireless adapter. If you are entering a DNS Server address, you must also enter the Default Gateway Address. Remember that if you have a DHCP-capable router, you will not need to assign a static IP address. D-Link DAP-3690 User Manual 83 - D-Link DAP-3690 | Product Manual - Page 84
D-Link products let you access your network from virtually anywhere you want, however, the positioning of the products within your environment will affect its wireless range. 4. Why does my wireless connection keep dropping? • Antenna Orientation - try different antenna orientations for the DAP-3690 - D-Link DAP-3690 | Product Manual - Page 85
adversely affect wireless signal range. **Please note that operating frequency ranges vary depending on the regulations of individual countries and jurisdictions. The DAP-3690 isn't supported in the 5.25~5.35 GHz and 5.47 ~ 5.725 GHz frequency ranges in some regions. D-Link DAP-3690 User Manual 85 - D-Link DAP-3690 | Product Manual - Page 86
Appendix A - Technical Specifications LEDs • Power • LAN • 2.4 GHz • 5 GHz ranges vary depending on the regulations of individual countries and jurisdictions. The DAP-3690 isn't supported in the 5.25~5.35 GHz and 5.47 ~ 5.725 GHz frequency ranges in some regions. D-Link DAP-3690 User Manual - D-Link DAP-3690 | Product Manual - Page 87
asked questions and answers to technical issues. For customers within the United States: Phone Support: (877) 354-6555 Internet Support: http://support.dlink.com For customers within Canada: Phone Support: (877) 354-6560 Internet Support: http://support.dlink.ca D-Link DAP-3690 User Manual 87 - D-Link DAP-3690 | Product Manual - Page 88
purchase price paid. Any repair or replacement will be rendered by D-Link at an Authorized D-Link Service Office. Link further warrants that, during the Software Warranty Period, the magnetic media on which D-Link delivers the Software will be free of physical defects. D-Link DAP-3690 User Manual - D-Link DAP-3690 | Product Manual - Page 89
responsible for all in-bound shipping charges to D-Link. No Cash on Delivery ("COD") is allowed. Products sent COD will either be rejected by D-Link or become the property of D-Link. Products shall be fully insured by the customer and shipped to D-Link Systems, Inc. D-Link DAP-3690 User Manual 89 - D-Link DAP-3690 | Product Manual - Page 90
firmware or other products or services provided by anyone other than D-Link; and Products that have been purchased from inventory clearance or liquidation sales or other sales in which D-Link OF MERCHANTABILITY, FITNESS FOR A PARTICULAR PURPOSE AND NONINFRINGEMENT. D-Link DAP-3690 User Manual 90 - D-Link DAP-3690 | Product Manual - Page 91
from D-Link Corporation/D-Link Systems, Inc., as stipulated by the United States Copyright Act of 1976 and any amendments thereto. Contents are subject to change without prior notice. Copyright ©2011 by D-Link Corporation/D-Link Systems, Inc. All rights reserved. D-Link DAP-3690 User Manual 91 - D-Link DAP-3690 | Product Manual - Page 92
with the instructions, may 5.25GHz frequency range, then it specific channels and/or operational frequency bands are country dependent and are firmware programmed at the factory to match the intended destination. The firmware setting is not accessible by the end user. D-Link DAP-3690 User Manual - D-Link DAP-3690 | Product Manual - Page 93
distance 20cm between the radiator & your body. This device has been designed to operate with an antenna having a maximum gain of 6 dB. Antenna having a higher gain is strictly prohibited per regulations of Industry Canada. The required antenna impedance is 50 ohms. D-Link DAP-3690 User Manual - D-Link DAP-3690 | Product Manual - Page 94
Appendix D - Registration Registration Register your product online at registration.dlink.com Product registration is entirely voluntary and failure to complete or return this form will not diminish your warranty rights. Version 1.0 June 21, 2011 D-Link DAP-3690 User Manual 94
-
 1
1 -
 2
2 -
 3
3 -
 4
4 -
 5
5 -
 6
6 -
 7
7 -
8
-
9
-
10
-
11
-
12
-
13
-
14
-
15
-
16
-
17
-
18
-
19
-
20
-
21
-
22
-
23
-
24
-
25
-
26
-
27
-
28
-
29
-
30
-
31
-
32
-
33
-
34
-
35
-
36
-
37
-
38
-
39
-
40
-
41
-
42
-
43
-
44
-
45
-
46
-
47
-
48
-
49
-
50
-
51
-
52
-
53
-
54
-
55
-
56
-
57
-
58
-
59
-
60
-
61
-
62
-
63
-
64
-
65
-
66
-
67
-
68
-
69
-
70
-
71
-
72
-
73
-
74
-
75
-
76
-
77
-
78
-
79
-
80
-
81
-
82
-
83
-
84
-
85
-
86
-
87
-
88
-
89
-
90
-
91
-
92
-
93
-
94
 |
 |